
If you've ever wanted to give your car that professional, showroom shine but felt lost in a sea of polishes, waxes, and mysterious chemicals, you're in the right place. An auto detailing starter kit is your perfect entry point—a hand-picked collection of the essential tools and products you need to get the job done right, without the guesswork.
Begin Your Car Detailing Journey Here
Walking into an auto parts store can be intimidating. The shelves are packed with hundreds of different products, all promising incredible results. A good starter kit cuts right through that noise. It’s not just a random box of supplies; it's a complete system where every product is designed to work together.
Think of it like getting a chef's first knife set. You get the fundamental, high-quality tools you need to learn the craft, without being bogged down by specialty items you don't need yet.
This guide will be your roadmap, turning that initial uncertainty into the confidence to make your car look incredible right in your own driveway. And remember, detailing isn't just about looks. It's a critical part of vehicle maintenance that protects your investment for years to come.
Why Start with a Kit?
Sure, you could buy everything separately, but starting with a kit has some major advantages. For a beginner, the biggest win is coherence. The products are meant to be a team. They work in harmony, so you don't have to worry about accidentally mixing chemicals that could damage your car's finish or just not give you the results you want.
Then there's the value. Bundling these items is almost always cheaper than buying them one by one. You get to build a solid foundation of quality supplies without a huge upfront cost. It’s the smartest way to get started.
A well-chosen auto detailing starter kit is the bridge between a simple car wash and a true preservation of your vehicle's aesthetic and financial value. It transforms a routine chore into a rewarding craft.
The Growing Appeal of DIY Detailing
It's not just you—more and more people are getting into DIY car care. The global market for car detailing kits was valued at around $2,307.4 million and is expected to nearly double to $4,500 million by 2035. That’s a steady growth of about 6.3% every year.
This boom is driven by a simple fact: people are realizing that taking care of their car is satisfying and a great way to protect its value. It's a hands-on skill that pays off. To dig deeper into this trend, you can learn more about the car detailing market trends.
This guide will walk you through everything, so you feel prepared and excited to get started. We'll break down what's in a great kit, how to pick the right one for you, and give you a simple step-by-step for your first detail. By the end, you won't just know how to do it—you'll understand why each step matters.
Key Components in a Typical Auto Detailing Starter Kit
So, what should you expect to find inside one of these kits? While brands vary, most quality starter packages contain a core set of items designed to cover the entire detailing process, from washing to protecting. Here's a quick look at the essentials.
| Component Category | Essential Items | Primary Purpose |
|---|---|---|
| Washing & Drying | Car Wash Soap, Wash Mitts, Drying Towels (Microfiber) | To safely lift and remove dirt and grime without scratching the paint. |
| Decontamination | Clay Bar or Mitt, Iron Remover, Lubricant | To remove embedded contaminants (like industrial fallout) that washing leaves behind. |
| Polishing & Correction | Polishing Compound, Applicator Pads | To remove minor scratches, swirl marks, and oxidation, restoring the paint's gloss. |
| Protection | Wax (Carnauba or Synthetic), Sealant, or Ceramic Coating | To apply a durable layer that protects the paint from UV rays, water, and dirt. |
| Wheels & Tires | Wheel Cleaner, Tire Shine, Brushes | To clean brake dust from wheels and give tires a clean, black finish. |
| Interior Cleaning | Interior Cleaner, Glass Cleaner, Detailing Brushes | To clean and protect all interior surfaces, from the dashboard to the upholstery. |
Having these core components on hand ensures you have a comprehensive system ready to go. It’s the perfect foundation for building your skills and tackling any detailing challenge with confidence.
What’s Inside a Great Detailing Kit?
Cracking open a new auto detailing starter kit is an exciting moment, but it can also feel a bit overwhelming. You've got a bunch of colorful bottles and unique tools, and it's not always clear where to begin. But a well-designed kit isn't just a random assortment of products; it's a complete system designed to guide you through the four core stages of detailing.
Think of it like cooking a gourmet meal. You don’t just toss all the ingredients in a pot and hope for the best. You follow a recipe, adding each component at the right time to build layers of flavor. Detailing is exactly the same. Each stage perfectly preps the surface for the next, all leading to that flawless, head-turning shine. Let's break down what that process looks like.
The Washing Stage: Safely Removing Surface Dirt
This is ground zero for any detail job. The goal here isn't just to get the dirt off—it's to do it without scratching your paint. This is where specialized car care products truly earn their keep over household cleaners.
- pH-Neutral Car Shampoo: Dish soap is a degreaser that will strip away any wax on your car and can dry out the paint. A proper car shampoo is engineered to be gentle on your car's finish, creating a slick, sudsy surface that lets dirt slide right off.
- Plush Wash Mitts: A high-quality microfiber or chenille wash mitt is miles better than an old sponge. Its deep fibers trap dirt particles, pulling them away from the paint instead of grinding them in—a major cause of swirl marks.
- Microfiber Drying Towels: Ditch the old bath towels and chamois. A big, plush microfiber drying towel is a game-changer. It's insanely absorbent and incredibly soft, soaking up water without leaving behind lint or scratches.
The Decontamination Stage: Removing What Washing Can’t
Even after a thorough wash, your car's paint isn't truly clean. It's covered in tiny, bonded contaminants that you can't see but can definitely feel. Try this: put your hand in a thin plastic sandwich bag and gently glide it over the paint. Feel that gritty texture? That's the stuff decontamination targets.
This stage is the difference between a car that looks clean and a car that is truly clean. Skipping it is like trying to paint a wall without sanding it first—the final result will never be as smooth or last as long.
Key Decontamination Tools:
- Clay Bar or Clay Mitt: This is your go-to for mechanical decontamination. As you glide it over a lubricated surface, the clay gently shears off stubborn contaminants like tree sap, road tar, and industrial fallout, leaving the paint feeling smooth as glass.
- Iron Remover: Your paint is covered in tiny bits of iron from brake dust and rail dust. An iron remover spray chemically reacts with these particles, turning them into a purple liquid that you can simply rinse away. It's a satisfying process to watch.
- Clay Lubricant: Never, ever use a clay bar on a dry surface. A good lubricant creates a slippery barrier, allowing the clay to glide effortlessly without marring or scratching the paint.
The Polishing Stage: Restoring Gloss and Clarity
This is where the real magic happens. Polishing is all about correcting the tiny imperfections in your car’s clear coat—the swirl marks, light scratches, and oxidation that make the paint look dull and tired. A good starter kit will include a light polish that’s perfect for hand application.
A polishing compound uses fine abrasives to gently level the clear coat, removing a microscopic layer to reveal a fresh, perfectly flat surface underneath. It's this flat surface that reflects light uniformly, creating that deep, wet-looking gloss we all crave. It's like exfoliating your skin to bring out a fresh, healthy glow. Even a gentle hand polish can make a massive difference.
For those just getting started, taking a look at the essential car detailing equipment for beginners can give you a better grasp of how each tool works together for a pro-level finish.
The Protection Stage: Locking In Your Hard Work
After all that effort cleaning, decontaminating, and polishing, you need to protect your masterpiece. This final layer acts as a sacrificial barrier, shielding your paint from the elements.
- Wax (Carnauba or Synthetic): Wax is known for providing a warm, deep glow and fantastic water beading. Carnauba wax is a natural classic loved for its rich shine, while synthetic waxes (often called sealants) are built for endurance, lasting months instead of just weeks.
- Paint Sealant: These are fully synthetic products engineered to chemically bond with your paint. They create a tough, slick shell that can provide protection for 4-6 months or more, typically with a sharp, mirror-like shine.
- Applicator Pads: A quality kit will always include soft foam or microfiber applicator pads. These are crucial for applying polishes, waxes, and sealants in a thin, even coat without accidentally scratching the surface.
Once you understand what each item in a detailing kit is for, it stops being a confusing box of chemicals and becomes a powerful system for making your car look its absolute best. Each stage builds on the last, guiding you toward a finish you can be truly proud of.
How to Choose the Right Starter Kit
Walking into the world of auto detailing can feel a bit overwhelming. You're met with a wall of products, all promising a mirror-like shine. So, with all the auto detailing starter kits out there, how do you find the one that's actually right for you?
The secret is to tune out the marketing hype and get back to basics. It really just comes down to three things: what you want to achieve, how much you want to spend, and the kind of detailing you plan on doing. It's like picking any tool for a job—you don't need a professional paint correction system if you just want to wash your car on a Sunday afternoon. A little self-assessment upfront saves a lot of headaches later.
First, What Are Your Detailing Goals?
Before you even think about adding a kit to your cart, take a second and ask yourself the most important question: What am I trying to do here? Your answer will instantly cut through the noise and point you in the right direction.
Are you a total newbie just looking for a better way to wash your car than the local gas station's scratch-o-matic? Or are you a budding enthusiast who's been watching videos and wants to finally get rid of those annoying swirl marks? The level of your ambition is everything.
- The Weekend Warrior: Your goal is straightforward maintenance. You want your car to look clean and be protected without dedicating an entire Saturday to the process. A solid wash-and-wax kit is going to be your new best friend.
- The Aspiring Enthusiast: You’ve seen what’s possible and you’re itching to get those same results yourself. You're ready to learn about things like clay bars and maybe even try a little polishing. A comprehensive, all-in-one kit is the perfect launchpad.
- The Interior Perfectionist: You care more about crumb-free carpets and a dust-free dash than a shiny exterior. An interior-focused kit has all the specialized cleaners and tools you need to make the inside feel brand new again.
Match the Kit to Your Needs and Budget
Once you know what you’re aiming for, you can start looking at the different types of kits on the market. Each one is built for a different level of involvement and comes with a specific set of tools. Think of it as the difference between a simple oil change and a full engine teardown—both are essential maintenance, but they serve completely different purposes.
This decision is practical, too. When you're looking at starter kits, it helps to think about the bigger picture, like weighing the benefits of DIY versus professional cleaning. A good kit often pays for itself after just one or two details, especially when you consider that a single professional service can easily cost $150-$300.
The best kit isn't the most expensive one with the most bottles. It’s the one that lines up with your goals and makes you want to get out there and use it. Overbuying is a classic rookie mistake that leads to "analysis paralysis"—where the kit is so complex it just sits in the garage, unopened.
There’s a reason these kits are so popular. People are realizing that taking care of their vehicle is a smart investment, and brands like Chemical Guys and Meguiar's have responded with kits for every possible need. The convenience and long-term savings are what really draw people in.
Comparing Detailing Kit Types for Different Needs
To make things even clearer, let's break down the main categories of starter kits. This table should help you pinpoint exactly where you fit in on your detailing journey.
| Kit Type | Ideal For | Typical Components | Average Price Range |
|---|---|---|---|
| Basic Wash-and-Wax Kit | Beginners focused on routine cleaning and basic protection. | pH-neutral soap, a wash mitt, microfiber towels, and a simple carnauba or synthetic wax. | $40 - $70 |
| All-in-One Comprehensive Kit | Enthusiasts who want a complete system for washing, decontaminating, polishing, and protecting. | Includes everything in a basic kit, plus a clay bar, iron remover, light polish, and applicators. | $100 - $200 |
| Interior-Focused Kit | Individuals who prioritize a clean cabin or have pets and children. | All-purpose interior cleaner, upholstery shampoo, glass cleaner, leather conditioner, and detailing brushes. | $50 - $90 |
| Paint Correction Kit | Advanced users ready to tackle swirl marks and scratches with a machine polisher. | Various polishing compounds, a range of foam pads, and sometimes a dual-action (DA) polisher. | $150 - $400+ |
By being honest about what you want to accomplish and matching that to one of these kits, you can make a smart choice. You'll end up with an auto detailing starter kit that actually helps you get incredible results, turning a confusing purchase into an exciting first step.
A Step-by-Step Guide to Your First Detail
So, you’ve unboxed your new auto detailing starter kit, and you're ready for the best part—bringing your vehicle back to life. It might look like a lot of steps, but it's really just a logical sequence. If you follow a plan, you'll sidestep the common pitfalls and end up with a finish you can't help but stare at.
Think of it like painting a room. You wouldn't just throw a coat of paint on a dusty, scuffed-up wall, right? You’d clean it, patch it, and prime it first. Detailing works the exact same way. Each step builds on the last, setting the stage for a smooth, glossy, and well-protected result.
We’ve broken the whole process down into four straightforward stages. Let's walk through them one by one, with some real-world tips to get you pro-level results from day one.
Stage 1: The Two-Bucket Wash Method
Every great detail starts with a proper wash—one that gets the grime off without adding new scratches. This is where the two-bucket method becomes your best friend. It’s non-negotiable. You'll have one bucket for your soapy car shampoo and a second one filled with plain rinse water.
Here’s the rhythm:
- Dip your wash mitt into the soap bucket and gently wash one panel of the car. Always start at the top and work your way down.
- Before you even think about getting more soap, dunk and swish that dirty mitt in the plain rinse water bucket. All the dirt and grit fall to the bottom.
- Now you can go back to the soap bucket for fresh, clean suds and move on to the next panel.
This simple habit is the single best way to prevent dragging grit all over your car's paint, which is what causes those dreaded swirl marks. And a pro tip: always wash in the shade. Direct sun bakes soap and water onto the surface, leaving you with stubborn spots that are a pain to remove.
Stage 2: Paint Decontamination
Your car might look clean after a wash, but run your hand over the paint (inside a plastic baggie for extra sensitivity). Feel that gritty texture? Those are bonded contaminants—tiny bits of brake dust, industrial fallout, and tree sap that a normal wash just can't lift.
This is a two-pronged attack:
- Chemical Decontamination: Grab an iron remover spray. This stuff is magic. It reacts with embedded iron particles, turning a dramatic purple as it dissolves them. Just spray it on, let it work for a few minutes (watch the "bleeding" effect!), and rinse it off thoroughly.
- Mechanical Decontamination: Next up is the clay bar. With a bit of clay lubricant to help it glide, the bar skims across the paint and literally pulls off any remaining contaminants. The paint will feel unbelievably smooth, like glass. That's when you know it's truly clean.
Stage 3: Polishing for That "Wow" Factor
Polishing is what brings out that deep, wet-looking shine. Even a brand-new car can have fine swirls and imperfections from the dealership that dull the finish. For your first detail, polishing by hand is a fantastic way to get a feel for the process without the intimidation of a machine.
Put a small dab of polish on a foam or microfiber applicator pad and work on a small section, maybe two-by-two feet. Use gentle, overlapping circles or straight-line motions. Once the polish starts to go clear, buff off the residue with a clean microfiber towel. The difference in clarity and reflection will be immediate and impressive.
Polishing doesn't add shine; it reveals the shine that's already there. You're smoothing out microscopic scratches on the surface, creating a perfectly flat plane that reflects light evenly. That's what creates that brilliant gloss.
This visual guide breaks down how to think about your needs before you even get the hose out.
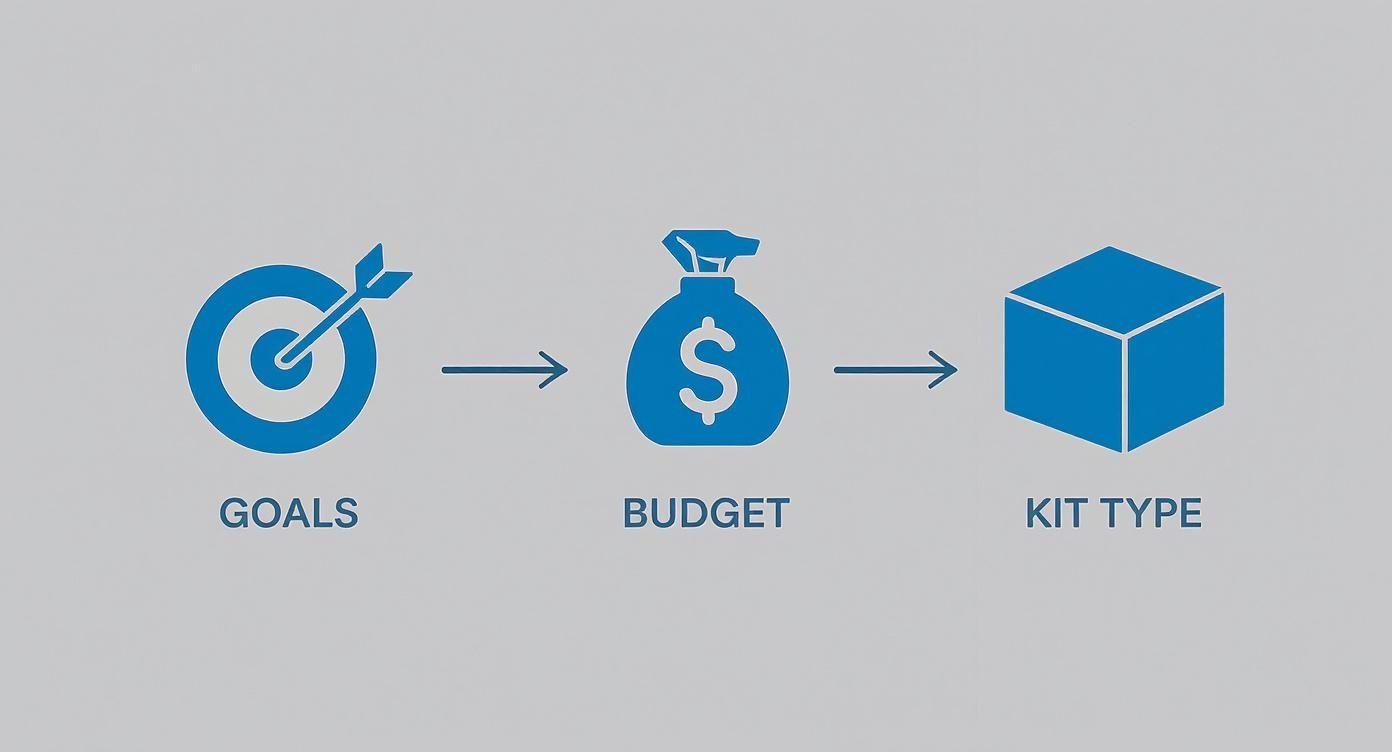
As the infographic shows, a great result doesn't start with the wash—it starts with matching your goals and budget to the right products.
Stage 4: Sealing in Your Hard Work
You’ve put in the effort, so now it’s time to protect it. A quality wax or sealant acts like a shield for your paint, taking the hit from UV rays, acid rain, and road grime. It’s the final touch that also adds incredible slickness and depth to the shine.
Using a fresh applicator pad, apply a thin, even coat of your chosen wax or sealant. Let it cure and haze up according to the directions—this usually takes 5-15 minutes. Then, with a clean, plush microfiber towel, gently buff it off to reveal a stunning, protected finish.
By following these four stages, you aren't just cleaning your car; you're actively preserving its value and appearance. For a more granular look at every tool and step, our complete auto detailing checklist is the perfect companion for this detail and every one after.
Upgrading Your Detailing Arsenal
So, you’ve gotten the hang of your auto detailing starter kits. You've tasted the satisfaction of bringing a brilliant shine back to your paint and making your interior look fresh again. Now you’re probably asking, "What's next?" This is where the real fun begins, moving past simple maintenance and into the world of true paint correction and long-term protection.
This doesn't mean you need to go out and buy a whole new garage full of gear. Think of it more like adding specialized tools to your collection. Each new piece of equipment opens up a new level of detailing, letting you fix bigger issues and achieve that jaw-dropping, professional-quality finish.
Graduating to a Machine Polisher
Washing and hand-polishing are great for maintaining a good finish, but when you want to erase swirl marks, light scratches, or that dull, faded look from oxidation, you need more power. The dual-action (DA) polisher is your ticket to that next level.
A DA polisher is the perfect tool for enthusiasts and budding professionals because it’s incredibly safe. Its head oscillates in a random pattern, which keeps heat buildup to a minimum and prevents you from accidentally burning through the clear coat—a common fear with the high-speed rotary polishers you see in body shops.
Getting a machine will not only save you hours of elbow grease but will also give you results that are simply impossible to achieve by hand. A quality DA polisher, combined with the right pads and compounds, can take years off a car's appearance. It's easily the most impactful upgrade you can make if you're serious about perfect paint.
Moving from hand polishing to a DA polisher is like switching from a handsaw to a power saw. Both get the job done, but the machine delivers faster, cleaner, and more precise results with a fraction of the physical effort.
Exploring Advanced Protection and Interior Tools
After you've spent all that time perfecting your paint, you’ll want to lock in that incredible shine with something more robust than traditional wax. This is where ceramic coatings change the game. These liquid polymers bond with your car's paint, creating a hard, slick layer of protection that lasts for years, not just a few months. Coatings provide insane gloss and make the car much easier to clean, all while protecting it from UV rays, chemicals, and minor scratches.
Don't forget the inside of the car, either. You can seriously step up your interior game with a few key pieces of equipment:
- Carpet Extractors: These are essential for deep-cleaning carpets and upholstery, pulling out dirt and stains that a vacuum could never touch.
- Steam Cleaners: A steamer is a fantastic, chemical-free tool for sanitizing surfaces, lifting grime from textured plastics, and cleaning out dusty air vents.
- Detailing Brushes: A quality set of brushes for every nook and cranny—from soft boar's hair for delicate trim to stiffer bristles for carpets—is a must-have. You can check out our rundown of essential car detailing supplies for more ideas.
Investing in this level of care isn't just a niche hobby anymore. The global car care products market was valued at $13.0 billion and is projected to reach $17.5 billion by 2033, largely because more and more people are demanding premium products like coatings to protect their vehicles. It’s clear that high-quality detailing is a trend with staying power.
Got Questions About Detailing Kits? We've Got Answers.
Getting into the world of car detailing can feel like learning a new language. You've got the gear, but a few questions always pop up when you're about to get your hands dirty. That's totally normal. Let's tackle some of the most common things people ask so you can get started with confidence.
Think of this as a quick chat with a seasoned pro. We’ve heard these questions a thousand times, and the answers are simpler than you might think. Our goal is to clear up any confusion and show you that getting those professional-looking results at home is well within your reach.
How Often Should I Detail My Car with a Starter Kit?
This is the big one, and the answer isn't just a number—it’s about getting into a rhythm that works for you and your car. How often you need to do something really depends on what that "something" is.
A full-blown, top-to-bottom detail—we're talking wash, clay bar, polish, and wax—is a pretty intense job. For a car you drive every day, you really only need to do this once or twice a year. I like to think of it as a big spring cleaning or getting it ready for winter.
But the small stuff? That's what really counts.
- Maintenance Wash: Try to give your car a proper wash every one to two weeks. This isn't just about looking good; it's about getting grime like bird droppings, dead bugs, and road salt off before they have a chance to eat into your paint.
- Protection Top-Up: The wax or sealant in your kit will wear off over time. A good rule of thumb is to reapply it every two to four months. The easiest way to tell? When water stops forming tight little beads on your paint and starts to lie flat, it's time for a fresh coat.
Of course, if you park outside, live somewhere with harsh weather, or drive a ton, you might need to adjust this schedule. The real key is staying consistent.
Can I Mix Products From Different Detailing Brands?
Absolutely. In fact, most serious detailers do. While your starter kit is put together to work well as a system, there's no rule that says you have to stick with one brand forever.
You might find that you just love the way one brand's shampoo smells and suds up, but another company makes a tire shine that you think is the best on the market. That's perfect. Experimenting is how you find what works best for you and develop your own go-to arsenal of products.
The golden rule is simple: just read the directions on each bottle. As long as you're using products in the right order (for example, you always polish before you wax), you'll be in great shape.
What Is the Biggest Mistake Beginners Make with Kits?
Hands down, the most common mistake is a bad wash technique. It's the very first thing you do, and it's where almost all of those ugly swirl marks and fine scratches come from. People grab an old sponge, use one bucket for everything, and scrub in circles, basically grinding dirt right into their car's finish.
A few other common slip-ups can cause a lot of frustration, too:
- Working in Direct Sunlight: This is a huge one. Hot sun bakes products onto your paint before you can wipe them off, leaving behind splotches and streaks that are a nightmare to fix. Always, always work in the shade or wait for an overcast day.
- Using Too Much Product: When it comes to detailing products, more is not better. A thick glob of wax doesn't add more protection; it just makes it incredibly difficult to buff off and wastes your money. A thin, even layer is all you need.
- Neglecting Your Microfiber Towels: Don't just toss your towels in the wash with your jeans and use fabric softener. That stuff clogs the fibers and ruins them. Wash them separately with a dedicated microfiber detergent to keep them soft, absorbent, and safe for your paint.
Just avoiding these few things will put you way ahead of the curve and save you from a lot of headaches.
Are Expensive Auto Detailing Starter Kits Worth It?
That's a great question, because a higher price tag doesn't automatically mean a better product. Whether a pricier kit is "worth it" really comes down to what you're getting and where you are on your detailing journey.
The more expensive kits usually justify their cost with more concentrated chemicals (so a bottle lasts longer) or higher-quality tools, like incredibly plush microfiber towels or better brushes. They also might include a long-lasting paint sealant instead of a traditional carnauba wax, giving you months of protection instead of just weeks.
But for someone just starting out? A solid, mid-range kit from a brand with a good reputation is the best bang for your buck. You get products that work well and are forgiving to use, without paying extra for advanced stuff you don't need yet. Focus on reviews and brand reputation, not just the price. For around $100 to $150, you can get a fantastic setup that pays for itself the very first time you use it instead of hiring a pro.
Ready to start your detailing journey with a tool that delivers professional-grade foam from a simple garden hose? The SwiftJet Car Wash Foam Gun is designed for enthusiasts like you. It makes washing faster, safer, and more effective, ensuring you get that perfect, sudsy foundation for a flawless detail every time.
Explore the SwiftJet Foam Gun and get your free microfiber mitt today!