
Basic car detailing is a world away from a quick run through the car wash. It's a hands-on process of deep cleaning, restoring, and protecting your vehicle from top to bottom, inside and out. The goal is to bring back that showroom shine and feel, which can do wonders for your car's resale value.
What Basic Car Detailing Actually Means
Let's clear something up right away. The word "detailing" often brings to mind a pro-level shop filled with expensive polishers and a wall of mysterious chemicals. But at its core, basic car detailing is something you can absolutely do at home. It's a methodical approach to keeping your car in fantastic shape.
This isn't just about making it look good for a weekend. Think of it as preventative maintenance for every surface of your vehicle. Beyond the visual appeal, proper detailing is a crucial part of protecting your investment and can genuinely help you make your car last longer.
It's a practice that's gaining serious traction. The global car detailing market is expected to grow from $1.52 billion in 2024 to $1.68 billion in 2025. If you're curious, you can dig into more of these car detailing industry trends and see just how big this is getting.
Car Wash vs Car Detail What's the Difference
So, where do we draw the line between a simple wash and a true detail? It all comes down to the depth of the cleaning and the final objective. A wash knocks off the surface-level grime, but a detail goes much, much deeper.
This table breaks down the fundamental tasks that separate a quick wash from a proper detail.
| Area | Basic Car Wash Task | Basic Car Detailing Task |
|---|---|---|
| Exterior | A quick spray down and a single bucket of soapy water. | A two-bucket wash to prevent scratches, followed by contaminant removal (like tar or bug guts). |
| Interior | A quick pass with the vacuum and wiping down the dash. | Deep vacuuming, getting into every crevice, and conditioning surfaces like leather or vinyl. |
| Protection | Usually none, or at best, a temporary spray wax. | Applying a durable paint sealant or wax for long-lasting protection against the elements. |
As you can see, detailing is a far more thorough and protective process. It’s about tackling the grime you can’t always see and safeguarding the finish for the future.
This infographic gives you a good idea of how your time might be split during a typical detailing session.
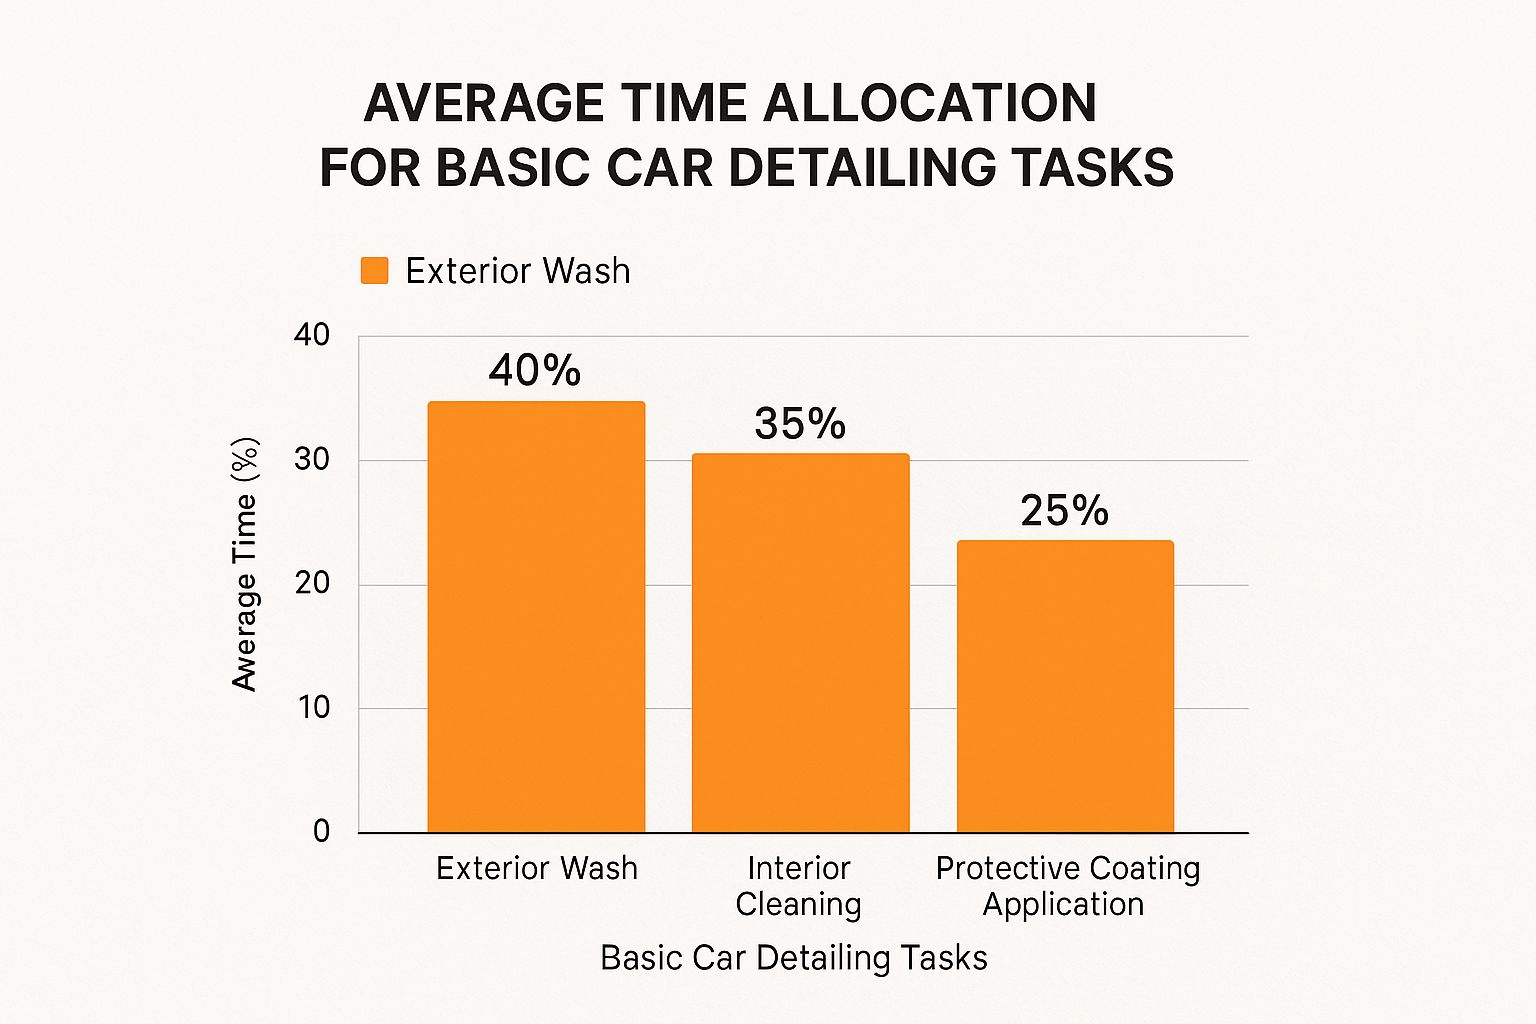
Notice how the effort is balanced between the exterior, the interior, and the crucial protection steps. It's a complete package.
The real goal of basic car detailing isn't about achieving absolute perfection. It's about protection. By removing corrosive contaminants and shielding your paint and interior, you are actively preventing long-term damage like fading, staining, and even rust. This guide is designed to show you how to get that professional-level result without the professional-level price tag.
Building Your Home Detailing Starter Kit
Jumping into car detailing doesn't have to break the bank. You can skip the overwhelming aisles at the auto parts store because getting a fantastic, professional-looking shine is possible with just a few core items. The real secret isn't a massive arsenal of tools; it's about choosing the right tools that make the job easier and, most importantly, prevent you from damaging your car's finish.
More and more car owners are catching on to this. The car detailing market is expected to hit around $48.6 billion in 2025 and is on track to nearly double within a decade. Why? Because people are realizing that proper care preserves a vehicle's appearance and value. You can dig deeper into this impressive market growth to see just how big this trend has become.
Essential Washing Tools
When you wash your car, your number one priority should be to avoid creating new scratches. Those frustrating swirl marks you see in the sunlight are almost always a result of poor washing habits. This is where your choice of equipment makes all the difference.
Here’s what you absolutely need to start:
- Two Buckets with Grit Guards: This is non-negotiable for a safe wash. One bucket is for your soapy water, the other for clean rinse water. The grit guards sit at the bottom, trapping dirt from your wash mitt so you aren't dragging it all over your paint.
- A Quality Microfiber Wash Mitt: Please, throw away that old sponge. A plush microfiber mitt is designed to pull dirt and grit deep into its fibers, lifting them away from your car's delicate clear coat.
- SwiftJet Foam Gun: This is a game-changer for anyone with a standard garden hose. The SwiftJet blankets your car in thick, clingy foam. This pre-soak lubricates the surface and loosens up dirt, letting gravity do a lot of the heavy lifting before you even lay a hand on the vehicle.
Pro Tip: Always wash your wheels and tires first. Use a separate, dedicated bucket and brushes for this job. You do not want the heavy brake dust and road grime from your wheels getting anywhere near your paint.
Core Cleaning Products
You don’t need an entire cabinet overflowing with bottles to get started. In fact, a few versatile products can handle 90% of your basic detailing tasks. Once you get the hang of it, you can always expand your collection by checking out a more comprehensive auto detailing equipment list.
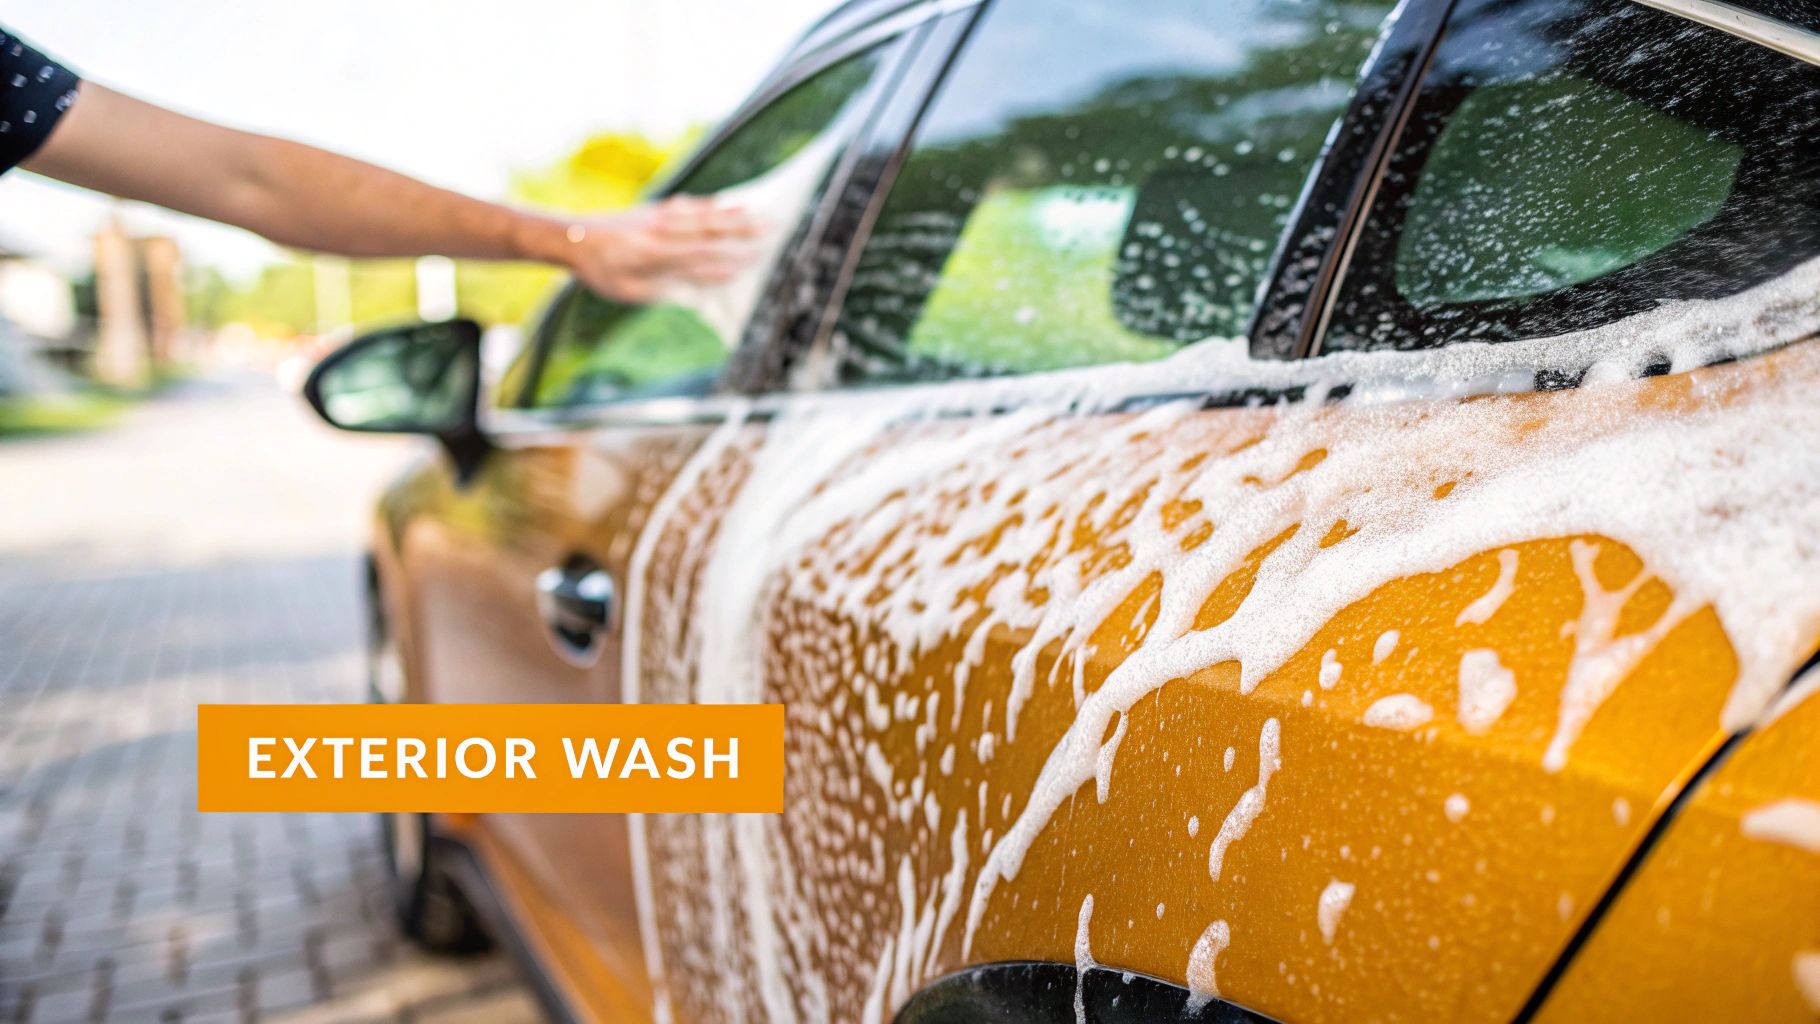
Getting That Flawless Exterior Wash
This is where all your prep work pays off and you see that dramatic, showroom-new transformation. Getting a brilliant, swirl-free shine isn't about scrubbing harder; it's about having a smart, systematic approach that safely lifts dirt away from your paint.
First, a quick but crucial bit of advice: try to wash your car on a cool surface, preferably out of direct sunlight. If the panels are hot, soap and water will evaporate way too fast, leaving you with frustrating water spots and streaks. I always start with the wheels and tires first, using a completely separate set of brushes and a dedicated bucket. This simple step keeps all that nasty brake dust and road grime from splashing onto the car panels you just cleaned.
The Magic of a Good Pre-Wash
Before a wash mitt even gets near your paint, it’s time to let your SwiftJet foam gun do the heavy lifting. This pre-wash stage is probably the single most important part of preventing those dreaded swirl marks.
Covering your car in a thick blanket of foam isn't just for show. Those suds are actively working to break down, surround, and lift the bigger, grittier pieces of dirt off the surface. Let that foam sit for a few minutes (just don't let it dry completely!), then give the entire car a thorough rinse. You’ll be genuinely surprised at how much dirt just slides right off. This means your wash mitt has far less grit to drag across the paint, which is the key to a safe and properly executed car wash.
Master the Two-Bucket Method
Now that the worst of the grime is gone, it’s time for the contact wash. For anyone serious about their car's finish, the two-bucket method isn't optional—it's essential. You'll have one bucket for your pH-neutral car shampoo and another with just plain water for rinsing. Make sure both have a grit guard at the bottom.
The process is straightforward but incredibly effective:
- Dip your clean microfiber mitt into the soapy water.
- Gently wash one small panel, always starting from the top of the car and working down.
- Here's the key: Before grabbing more soap, dunk the dirty mitt into your rinse bucket and scrub it against the grit guard.
- Once it's clean, go back to your soap bucket and move on to the next panel.
This rhythm ensures you're only ever touching your car with a clean, sudsy mitt. All the contaminants get trapped at the bottom of the rinse bucket, far away from your paint.
Pro Tip: I always keep a separate, designated wash mitt just for the lower third of the car—the rocker panels, bumpers, and bottom of the doors. These areas are always the filthiest, and using a separate mitt prevents you from dragging that heavy grit onto the more delicate upper panels.
Finally, you need to nail the drying process. Forget about old-school chamois, which can easily trap and drag tiny bits of grit. The modern, safer way is to use a large, high-quality microfiber drying towel. You can gently lay it over a panel and pat it dry, or do a slow, single-pass drag. This technique soaks up water quickly and safely, leaving behind nothing but that gleaming, streak-free shine you worked so hard for.
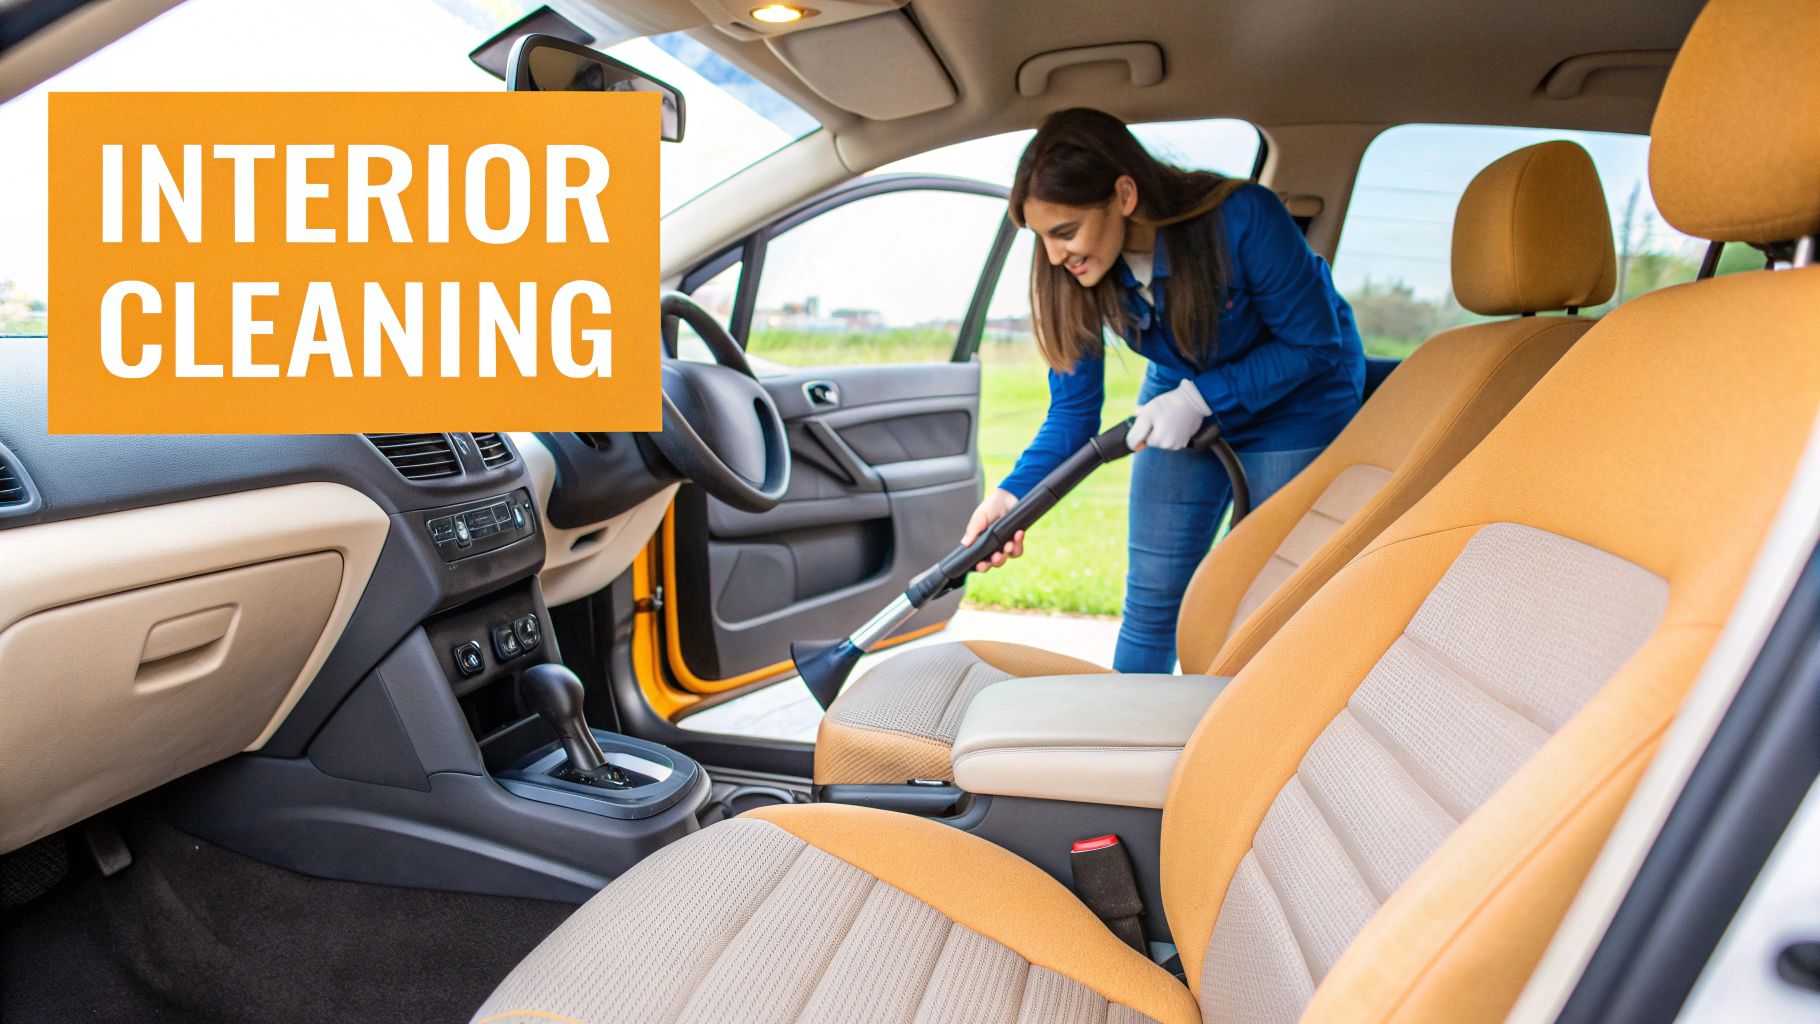
Reviving Your Car's Interior
Let’s be honest, a truly clean car is about more than just a shiny exterior. That fresh, new-car feeling really comes from the inside. Tackling the interior can feel like a big job, but with the right game plan, it’s surprisingly straightforward and incredibly satisfying.
The secret is to work smart, not hard. We'll start with all the dry cleaning first, then move on to the wet stuff. This simple sequence is a game-changer because it stops you from turning loose dust and crumbs into a muddy mess. Before you even touch a tool, pull out all the floor mats and clear out any clutter. Give yourself a clean slate to work with.
The Deep Vacuum Phase
A thorough vacuuming is the bedrock of a great interior detail. This isn't just a quick pass over the carpets. Grab your vacuum's attachments—they’re about to become your best friends. The crevice tool is essential for getting deep into those tight spots between the seats and the center console where dirt loves to hide. Use a soft brush attachment to gently agitate dust from vents and lift stubborn dirt from carpet fibers.
I always recommend starting high and working your way down. Begin with the dash and work your way to the floor. Gravity is on your side here, letting any dislodged dust fall onto areas you haven't hit yet. Don't forget to slide the seats all the way forward and back to vacuum underneath; you’ll be amazed at what you find.
Smart and Safe Surface Cleaning
Once all the loose debris is gone, it’s time to wipe things down. A good all-purpose cleaner (APC) will be your workhorse for the dashboard, door panels, and plastic trim. But here’s the most important rule: never spray the cleaner directly onto any surface. This is especially critical around your infotainment screen, gauge cluster, and buttons.
Expert Tip: Always spray your APC onto a clean microfiber towel first, then wipe the surface. This little habit prevents overspray from hitting your windows or, even worse, shorting out sensitive electronics. You get total control.
After you’ve wiped an area, immediately follow up with a second, dry microfiber towel. Buffing away the excess cleaner is what gets you that clean, factory-satin look instead of a cheap, greasy shine.
For a deeper dive into stain removal and getting rid of tough odors, check out these pro car interior cleaning tips.
Seats and Glass: The Finishing Touches
How you clean your seats really comes down to the material. For cloth seats, a light mist of your APC and a gentle scrub with a soft brush can work wonders on everyday grime. If you have leather, you absolutely need a dedicated leather cleaner and conditioner to clean it without causing it to dry out and crack over time. Always test any cleaner on a small, hidden area first, just to be safe.
Last but not least, the glass. The two-towel method is the only way to get a perfectly streak-free finish.
- Use your first towel with a quality automotive glass cleaner to do the initial wipe-down.
- Use a second, completely dry towel to immediately buff the glass until it’s crystal clear.
This technique is the key to eliminating that annoying interior haze. With the glass sparkling, your interior detail is done. Now you can enjoy a car that feels as good as it looks.
The Final Touch: Locking in That Shine with Protection
Your car is clean, but we're not quite done yet. This is the step that truly separates a quick wash from a proper detail. We're going to lock in all that hard work with a final layer of protection, which is like giving your paint its own personal bodyguard.
Think of a good spray wax or sealant as a shield. It guards your paint from the sun's damaging UV rays that cause fading over time. It also stands up to nasty stuff like bird droppings and acid rain. As a bonus, this protective layer makes your next wash way easier because dirt and grime just can't get a good grip on the slick surface.
The Secret to a Streak-Free Finish
The key here is to work one panel at a time. This is how the pros get that perfect, even shine. Lightly mist your spray sealant onto a single section—the hood, a door, or a fender. You don't need to drench it; a little bit really does go a long way.
Grab a clean, dry microfiber towel and gently spread the product over the panel. Immediately flip the towel to a dry side, or use a second one, and buff the area until it gleams. You'll actually feel the paint become incredibly smooth under the towel—that’s the sealant bonding with your car's clear coat.
Pro Tip: The biggest mistake people make is letting the sealant dry on the paint. You have to buff it off while it's still slightly damp. Going panel by panel guarantees you won't miss a spot and prevents any annoying hazy streaks from forming.
Don't Forget the Details
To really complete that professional look, you have to address the tires. A quality, non-sling tire dressing is the perfect finishing touch. It gives your rubber a deep, satin black finish that won't spray all over your clean paint once you start driving.
This small step frames your sparkling clean wheels and ties the whole look together. It’s what gives you that "just-detailed" appearance that makes all the effort feel completely worth it.
Diving into your first detail can feel a bit overwhelming, even with a good game plan. It's totally normal to have a few questions pop up. Let's walk through some of the things beginners ask us all the time, so you can get started with confidence.
A big one we always hear is, "How often should I actually be doing this?" It's a great question, and the answer depends on what you mean by "detailing."
Think of a full, basic detail as a seasonal reset for your car. You'll want to tackle that every 3-4 months. This routine keeps the protective layers strong and the interior genuinely clean. A simple maintenance wash, though? That's best done every week or two to keep fresh grime from settling in.
Another common hurdle is figuring out the right place and time to work on your car. Believe it or not, your location makes a huge difference.
Sunlight and Your Paint
So, can you detail your car out in the bright sun? Technically, yes, but I'd strongly advise against it. When your car's paint is hot, soap and other cleaning products evaporate in seconds. This leaves behind nasty water spots and streaks that are a real pain to polish off later.
You'll have a much easier time and get far better results if you work:
- Inside a garage or under a carport
- In a shaded part of your driveway
- On a cool, overcast day
Cool, indirect light gives you the time you need to apply products, let them do their job, and wipe them away cleanly without fighting the clock.
Wax vs. Sealant: What's Best for Beginners?
Finally, the great wax versus sealant debate. It's simpler than it sounds. A classic carnauba wax is known for giving paint a deep, warm glow, but its protection is short-lived—usually just a month or two.
A synthetic paint sealant, on the other hand, is all about durability. It creates a tough, long-lasting barrier that can hold up for 4-6 months, often leaving behind a sharper, more glass-like shine. For anyone just starting out, I always recommend a modern spray sealant. They're incredibly easy to apply, forgive mistakes, and deliver fantastic, durable protection.
Ready to make every wash easier and more effective? The SwiftJet foam gun turns any garden hose into a high-powered cleaning tool, lifting away dirt before you even touch the paint. Get your SwiftJet today and see the difference for yourself!