
Achieving a professional-grade detail isn't just about soap and water; it's a systematic process that transforms your vehicle from the inside out. Many car owners stop at a basic wash, missing the crucial steps that protect their investment and create that long-lasting, head-turning gloss. This comprehensive car detailing checklist breaks down the essential stages the pros use, moving beyond generic advice to give you actionable steps, required tools, and expert tips for a flawless finish. Forget a simple wash and wax; we're diving deep into the meticulous craft of automotive rejuvenation.
This guide is structured to be your definitive roadmap. Whether you're a seasoned DIY enthusiast looking to elevate your routine, a new car owner aiming to preserve that showroom shine, or simply someone searching for the most effective cleaning solutions, this listicle has you covered. We will walk you through every critical phase, from exterior decontamination and paint correction to interior deep cleaning and final protection application. By following these steps, you'll ensure no surface is overlooked. Get ready to unlock your vehicle's true potential and achieve results that rival any professional detail shop, right in your own driveway. This is more than a checklist; it's your blueprint for automotive perfection.
1. Step 1: Exterior Washing and Decontamination
The foundational stage of any proper car detailing checklist is a thorough exterior wash and decontamination. This process is far more involved than a simple drive-through wash; it's a systematic approach designed to strip away every trace of dirt, grime, and embedded contaminants from your vehicle's paintwork. Failing to execute this step correctly can lead to scratching the paint during polishing and will prevent waxes, sealants, or ceramic coatings from bonding properly.
The Multi-Step Cleaning Process
A truly clean surface is achieved in stages, each targeting a different type of soiling. The goal is to remove as much dirt as possible before ever making physical contact with a wash mitt. This is where tools like a foam cannon, such as the SwiftJet, become invaluable. By covering the vehicle in a thick layer of foam, it encapsulates and lifts heavy dirt, allowing it to be rinsed away safely.
Following the pre-wash, a careful contact wash using the two-bucket method is essential. One bucket holds your soapy water, and the other holds clean rinse water. Each time you wipe a section of the car, you rinse the mitt in the clean water bucket before reloading it with soap, preventing dirt from being dragged across the paint.
Chemical and Physical Decontamination
After the wash, your paint may feel gritty to the touch. These are embedded contaminants that a normal wash can't remove. This is where chemical and physical decontamination comes in.
- Iron Removers: These sprays react with ferrous (iron) particles from brake dust and industrial fallout, dissolving them into a purple solution that can be safely rinsed away.
- Clay Bar/Mitt: After the iron remover, a clay bar or clay mitt is used with a lubricant to physically pull out remaining embedded contaminants like tree sap, tar, and road grime, leaving the surface perfectly smooth.
This comprehensive cleaning process is the cornerstone of the entire car detailing checklist, ensuring every subsequent step can be performed safely and effectively.
The following infographic illustrates the three core phases of the decontamination process after the initial contact wash.
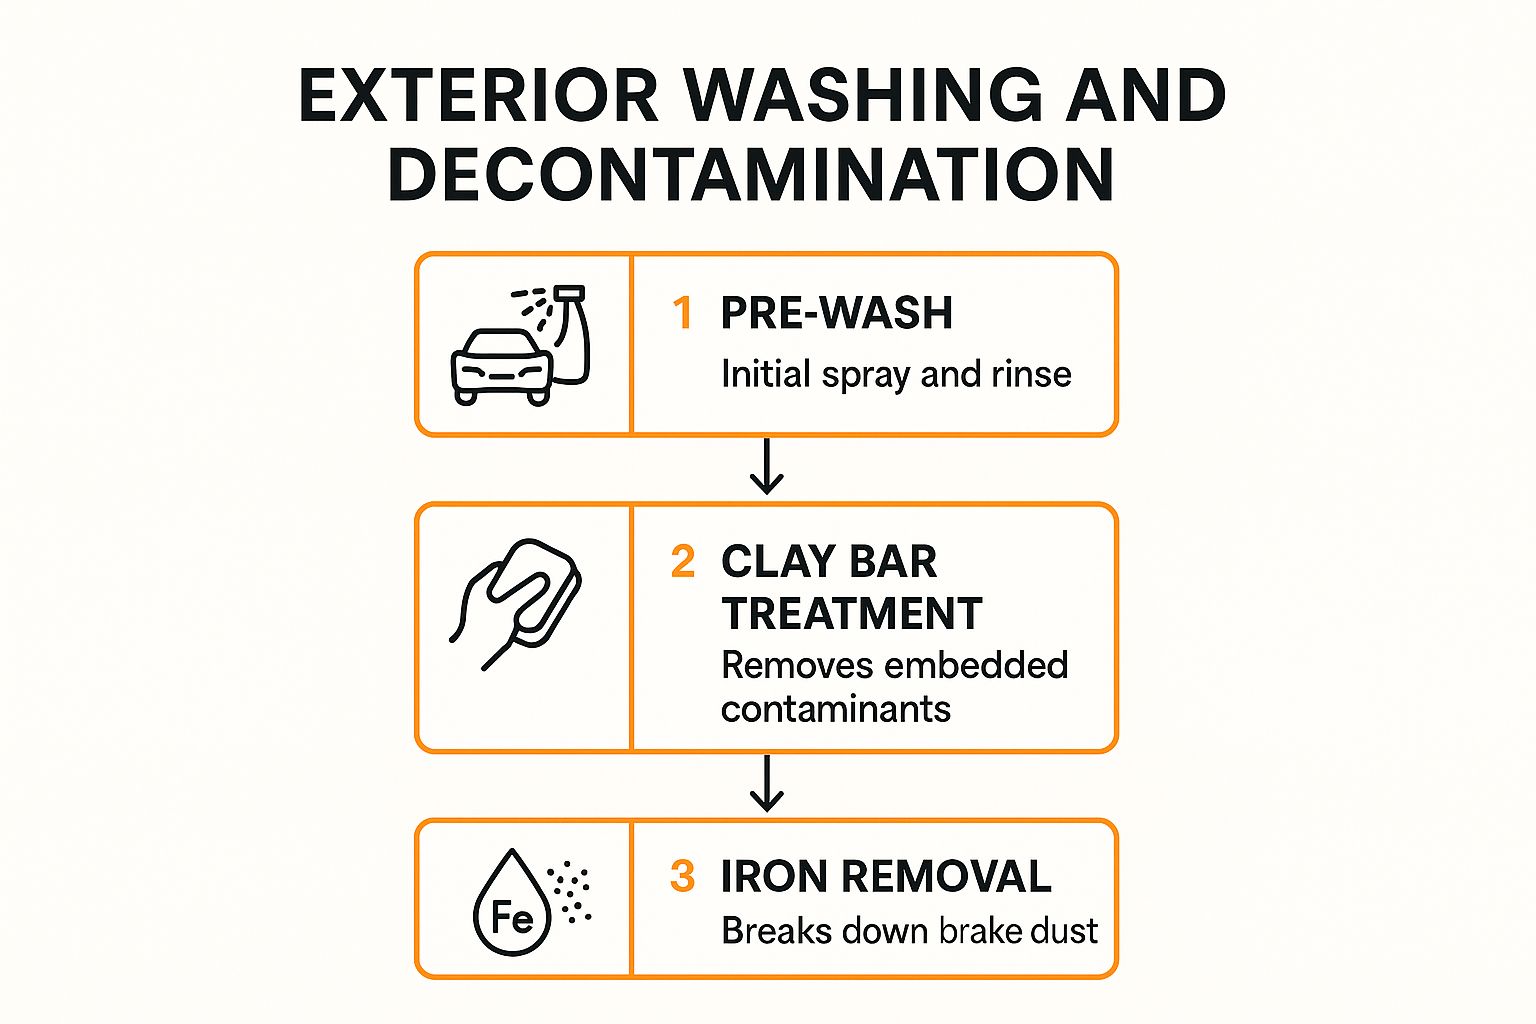
This sequence is crucial because each step prepares the surface for the next, systematically breaking down and removing different layers of contamination for a flawlessly clean finish.
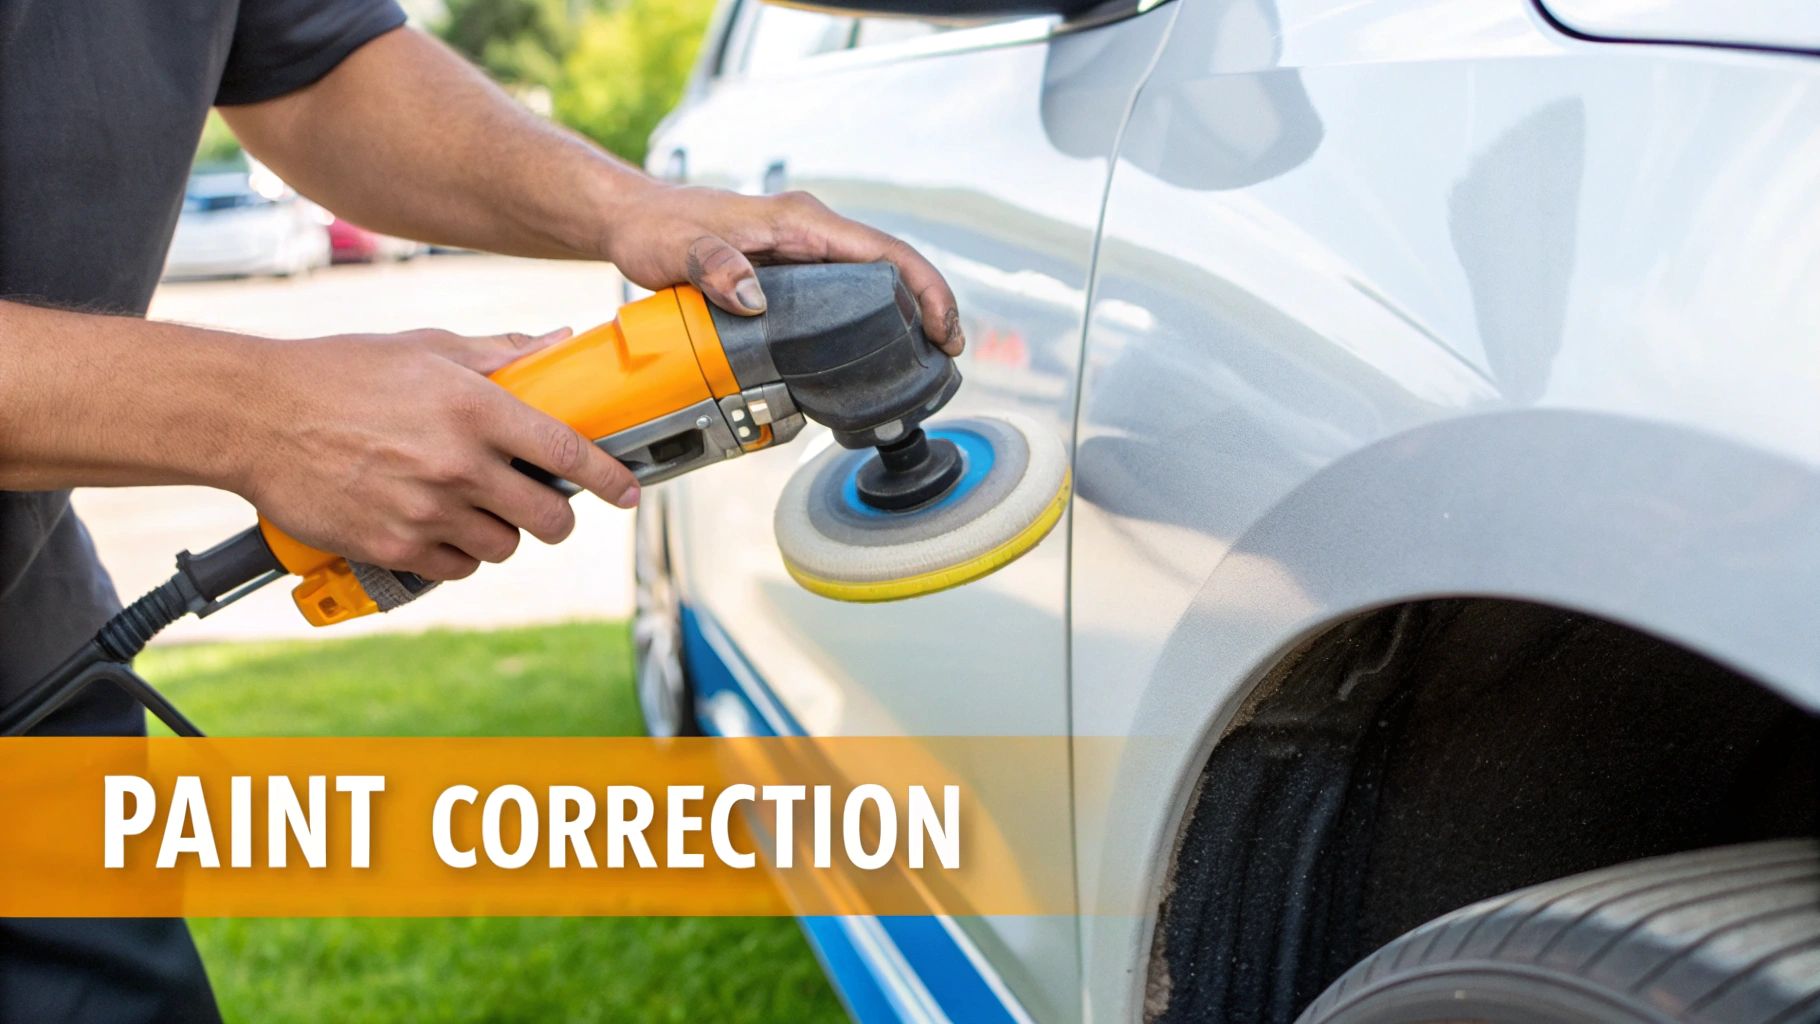
2. Paint Correction and Polishing
With the vehicle's surface completely decontaminated, the next critical stage in any comprehensive car detailing checklist is paint correction. This is the process of permanently removing imperfections from the clear coat, such as swirl marks, light scratches, water spots, and oxidation. It involves using specialized machines and abrasive compounds to carefully level the paint surface, restoring its clarity, depth, and gloss before any protective layers are applied.
Restoring the Factory Finish
Paint correction is what truly separates a basic car wash from a professional detail. By methodically abrading away a microscopic layer of the clear coat, detailers can eliminate the defects that dull the finish and catch the light. This is not simply filling in scratches; it's permanently removing them to reveal a flawless, mirror-like surface. The process can be a single-step polish for minor defects or a multi-step compounding and polishing process for more severe damage.
This technique is a standard practice for luxury car dealerships restoring high-end inventory and for classic car restoration shops aiming to bring back a vehicle's original luster. It's the key to achieving that "better than new" look that enthusiasts and professionals strive for.
Key Techniques for Flawless Results
Achieving professional results requires precision and the right approach. The process can be intricate, but following a few core principles ensures a safe and effective outcome. It's essential to understand that this step is irreversible, so proper technique is paramount.
- Test Spot: Always begin by polishing a small, inconspicuous test area to verify your pad and compound combination is achieving the desired result without being overly aggressive.
- Work in Sections: Divide larger panels like the hood or doors into smaller 2x2 foot sections. This allows you to focus your attention and ensure even coverage and consistent results.
- Proper Lighting: Use high-quality, specialized lighting to illuminate the surface from different angles. This helps you identify all defects and monitor your progress as you work.
The following video from detailing expert AMMO NYC demonstrates the visual difference that proper polishing makes and the techniques used to achieve it.
Executing this step correctly is crucial. It’s what creates the perfect canvas for waxes, sealants, or ceramic coatings, ensuring they bond to a flawless surface for maximum protection and shine.
3. Interior Deep Cleaning and Protection
Just as the exterior requires meticulous decontamination, the interior of a vehicle demands a comprehensive deep cleaning and protection strategy. This goes far beyond a quick vacuum and wipe-down; it involves a systematic process to clean, restore, and shield every surface inside the cabin. An immaculate interior is a critical component of a complete car detailing checklist, directly impacting the driver's experience, preserving the vehicle's value, and preventing premature aging of materials.
A Systematic Top-Down Approach
The most effective method for interior detailing is to work from the top down. This ensures that any dust, debris, or cleaning product overspray falls onto surfaces that have yet to be cleaned, preventing you from having to redo your work. Start with the headliner, pillars, and visors before moving down to the dashboard, door panels, and center console. The seats are addressed next, followed by the carpets and floor mats, which are typically the most soiled areas.
This methodical cleaning process is essential for everything from a family vehicle's seasonal deep clean to maintaining the pristine standards required by luxury hotel car services or high-volume rideshare vehicles.
Material-Specific Cleaning and Conditioning
Different interior materials require specialized products and techniques. Using a one-size-fits-all cleaner can damage sensitive surfaces like leather or advanced dashboard displays.
- Plastics and Vinyl: Use a dedicated interior cleaner to lift dirt from textured plastics and vinyl. Follow up with a high-quality protectant, like 303 Aerospace Protectant, to provide UV resistance and a non-greasy, satin finish.
- Fabric and Carpets: For fabric seats and carpets, an upholstery cleaner and a stiff brush are needed to agitate and lift embedded dirt and stains. For deep-set grime, a hot water extractor may be necessary.
- Leather: Leather requires a pH-neutral cleaner to gently remove dirt from the pores without drying it out. Afterward, a quality conditioner, such as those from Lexol, should be applied to replenish natural oils, keeping the leather soft and preventing cracks.
Executing this phase properly is crucial for a complete detail. For more specific techniques, you can explore professional car interior cleaning tips. A well-maintained interior not only looks and smells fresh but is also protected from the harsh effects of UV rays and daily use.
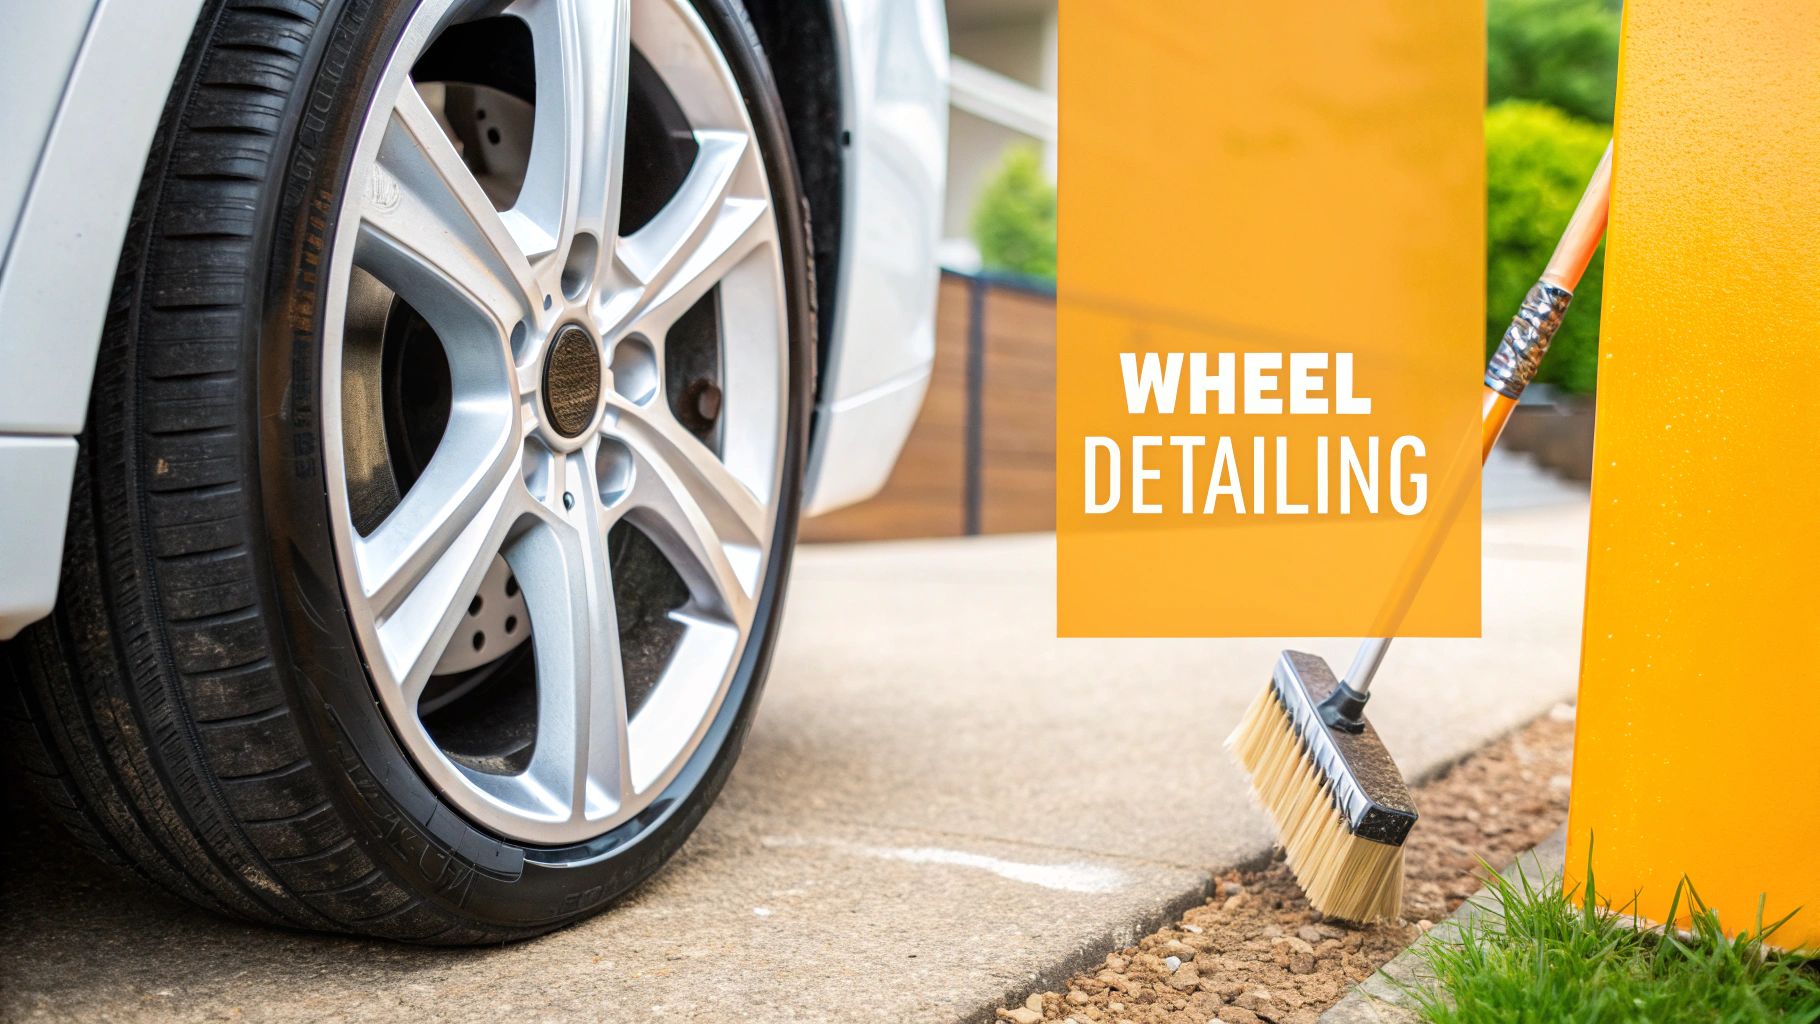
4. Wheel and Tire Detailing
A critical, yet often rushed, part of any comprehensive car detailing checklist is the dedicated cleaning and protection of the wheels and tires. These components are subjected to the harshest conditions, accumulating corrosive brake dust, stubborn road grime, and embedded contaminants. Neglecting them not only detracts from the vehicle's overall appearance but can also lead to permanent damage to wheel finishes and premature tire aging.
The process involves more than just a quick spray and rinse; it requires specialized products and tools to safely and effectively break down the unique types of grime found here. Performance car owners with expensive forged or multi-piece wheels, for example, rely on this step to preserve their investment and maintain peak aesthetics.
A Specialized Cleaning Approach
Given the heavy contamination, wheels and tires should always be cleaned first, before washing the body of the car. This prevents dirty water and brake dust remover from splashing onto a freshly cleaned panel. It's crucial to use separate wash buckets, mitts, and brushes for the wheels to avoid cross-contaminating the paintwork with abrasive brake dust particles.
A dedicated wheel cleaner, often a pH-balanced or acid-free iron remover, is sprayed onto the cool wheel surface. These chemicals react specifically with ferrous particles from brake pads, turning a deep purple color as they dissolve the contaminants, making them easy to rinse away. For the tires, a strong degreaser or dedicated tire cleaner is used to strip away old dressings and "tire blooming," the brown residue that leaches out of the rubber.
Protection and Finishing Touches
After a thorough cleaning and drying, the final step is to apply protection. This not only enhances the appearance but makes future cleaning significantly easier.
- Wheel Sealant/Coating: A high-temperature resistant sealant or ceramic coating is applied to the wheel faces and barrels. This creates a slick, hydrophobic barrier that repels brake dust and grime.
- Tire Dressing: A quality, non-sling, water-based or solvent-based dressing is applied to the tires. This restores a rich black look and provides UV protection to prevent cracking and fading.
This focused approach ensures every corner of your vehicle looks its best, from the paint down to the rubber. You can discover the best way to clean car rims on swiftjetusa.com for more in-depth techniques.
5. Glass Cleaning and Treatment
Often overlooked in a basic car wash, dedicated glass cleaning and treatment is a critical part of any professional car detailing checklist. This step focuses on achieving streak-free clarity on all glass surfaces, including windows, mirrors, and sunroofs, before applying protective treatments. Crystal-clear glass is not just about aesthetics; it is a fundamental aspect of driver safety, ensuring maximum visibility in all weather conditions, especially at night or during rain.
The Two-Sided Cleaning Method
Achieving a perfectly transparent, non-greasy finish requires a specific technique. The most effective approach involves using two high-quality, waffle-weave microfiber towels. This method prevents cross-contamination of cleaning agents and residues, which is a primary cause of streaks. The goal is to clean thoroughly first and then follow up with a dry buff to remove any remaining haze.
Start by lightly misting a dedicated automotive glass cleaner, like Stoner Invisible Glass, onto one towel rather than directly on the glass. This prevents overspray onto newly cleaned interior panels. Wipe the glass surface in one consistent direction (e.g., horizontally on the inside, vertically on the outside) to easily identify which side any remaining streaks are on. Immediately follow with the second, clean and dry towel to buff the surface to a brilliant shine.
Enhancing Visibility with Glass Treatments
Once the glass is immaculately clean, applying a hydrophobic treatment elevates the finish from clean to high-performance. These treatments create a super-slick surface that water cannot cling to.
- Water Repellency: Products like Rain-X or Aquapel form a chemical bond with the glass, causing water to bead up and roll off the windshield at driving speeds. This drastically improves visibility during storms, often reducing the need for wipers.
- Easier Cleaning: The slick surface also repels dirt, ice, and bug splatters, making future cleaning significantly easier and less frequent.
This step is essential for completing the car detailing checklist, as it directly impacts both the vehicle's appearance and the driver's ability to operate it safely. Applying a treatment ensures the glass stays cleaner and clearer for longer.
6. Engine Bay Cleaning and Detailing
Often overlooked in a standard car wash, engine bay detailing is a critical step in a comprehensive car detailing checklist that elevates a vehicle from clean to concours-ready. This process involves the careful cleaning and dressing of all visible engine components, hoses, plastic covers, and under-hood surfaces. A clean engine bay not only dramatically improves the vehicle's overall aesthetics but also makes it easier to spot potential fluid leaks or mechanical issues, contributing to easier maintenance and enhanced resale value.
The Systematic Cleaning Approach
Safely cleaning an engine bay requires a methodical approach to protect sensitive electronics. The first, non-negotiable rule is to work on a cool engine to prevent cleaning products from evaporating too quickly and to avoid personal injury. Begin by covering critical electrical components like the alternator, battery terminals, fuse box, and any exposed air intakes with plastic bags and tape. This simple precaution prevents water damage that could lead to costly repairs.
Next, a quality degreaser, such as Gunk Engine Degreaser or Simple Green Pro HD, is liberally applied to all soiled surfaces. The product is allowed to dwell for several minutes to break down grease and grime. A variety of soft-bristled brushes are then used to agitate stubborn buildup on plastics, hoses, and metal parts. Finally, the bay is rinsed carefully using a low-pressure water stream, never a high-pressure jet, to wash away the loosened contaminants.
Final Dressing and Protection
Once the engine bay is clean and thoroughly dried with compressed air or microfiber towels, the final step is to apply a protectant or dressing. This is a crucial part of the process that restores a rich, factory-new look to plastics and rubber.
- Water-Based Dressings: Products like those from Adam's Polishes or Chemical Guys are applied sparingly to restore a satin or semi-gloss finish to plastic covers and hoses.
- Avoid Over-Application: Applying too much dressing can create a sticky surface that attracts dust and dirt, quickly undoing your hard work. A light mist followed by a wipe-down with a clean towel is all that is needed.
This meticulous process is a hallmark of professional detailing, whether for a classic car entering a judged show or for a pre-sale preparation aimed at maximizing the vehicle's market value.
7. Paint Protection Application
After investing significant time and effort into washing, decontaminating, and polishing your vehicle's paint, the final crucial step in a comprehensive car detailing checklist is applying a protective layer. This stage is about preservation and enhancement, creating a sacrificial barrier that shields the pristine finish from environmental hazards. Neglecting this step leaves your perfected paint vulnerable to UV rays, acid rain, bird droppings, and road grime, quickly undoing all your hard work.
Choosing Your Shield
The market offers a spectrum of protection options, each with distinct characteristics in terms of durability, appearance, and application. The choice often depends on your desired longevity and aesthetic goals. For instance, show cars are often layered with high-grade carnauba waxes from brands like Zymol or Swissvax for their deep, warm glow, while fleet vehicles benefit from durable paint sealants like those from Collinite that offer months of protection and easy maintenance.
The modern pinnacle of paint protection is a ceramic coating. Brands like Gtechniq and CarPro have popularized these SiO2 (silicon dioxide) based liquids that chemically bond to the paint. This creates a hard, semi-permanent shell that offers unparalleled resistance to chemicals, UV rays, and minor scratches, lasting for years rather than months. Luxury dealerships frequently offer ceramic coating packages as a premium service to protect a new vehicle's finish right from the start.
Best Practices for Application and Maintenance
Proper application is non-negotiable for achieving the advertised durability and appearance of any protectant. A flawless result hinges on the groundwork laid in previous steps; the paint must be completely clean, decontaminated, and preferably polished before application.
- Apply Thin and Evenly: Whether it's wax, a sealant, or a ceramic coating, a thin, uniform layer is always more effective than a thick one. Over-application can lead to difficult removal, hazy patches, and wasted product.
- Respect Curing Times: All protective products have a specified curing time, which is the period they need to fully harden and bond to the surface. Follow the manufacturer's instructions precisely, which often means keeping the vehicle away from moisture for 24-48 hours.
- Maintain with Care: Preserve your chosen protection by using pH-neutral car shampoos and gentle wash techniques. Avoid harsh automatic car washes with abrasive brushes, as they can quickly strip waxes and sealants and even damage coatings.
This final protective measure is the true culmination of the detailing process, locking in the shine and ensuring your vehicle looks its best for as long as possible.
8. Final Inspection and Quality Control
The final inspection is the last, crucial step in any professional car detailing checklist, acting as the ultimate quality assurance gate. This is not a quick glance-over; it's a meticulous, systematic examination of every surface to ensure the highest standard of finish has been achieved. Overlooking this stage can mean missed spots, sealant high spots, or residual polish, undermining all the hard work that came before it. It’s what separates a good detail from a great one and is fundamental to the standards set by organizations like the International Detailing Association (IDA).
The Systematic Examination Process
A proper final inspection requires more than just good eyesight; it requires the right tools and techniques. The goal is to view the vehicle from multiple perspectives and under various lighting conditions to reveal any imperfections that might otherwise go unnoticed. This is the same level of scrutiny applied in Concours d'Elegance judging, where every detail matters.
The process involves slowly walking around the vehicle, using different light sources to scan each panel from various angles. This helps identify any remaining polish residue, holograms from the polishing stage, or uneven application of waxes and sealants. Every surface, from the paint and glass to the trim and tires, must be checked to confirm it meets the expected standard.
Techniques for Flawless Quality Control
To execute a professional-level inspection, specific techniques are essential. The right lighting is your most important tool, as the sun or a single overhead garage light can hide many flaws.
- Vary Your Lighting: Use a combination of ambient light (like pulling the car outdoors), diffused light (common in detailing shops), and direct, focused light from an inspection penlight or swirl finder light. Different sources will reveal different types of defects.
- Change Your Angle: Don't just stand and look. Crouch down, look along the body lines, and view panels from acute angles. This is especially effective for spotting "high spots" where a sealant or coating hasn't been leveled correctly.
- Document Everything: Taking high-quality "after" photos serves two purposes. It provides a record of the completed work for your portfolio or the client and forces you to look closely at every area through a lens, often revealing things you might have missed.
This final quality control check is the signature on your work, confirming that every task on the car detailing checklist has been completed to perfection and the vehicle is truly finished.
8-Step Car Detailing Checklist Comparison
| Item | Implementation Complexity 🔄 | Resource Requirements ⚡ | Expected Outcomes 📊 | Ideal Use Cases 💡 | Key Advantages ⭐ |
|---|---|---|---|---|---|
| Exterior Washing and Decontamination | Moderate: multi-step, requires specific tools and products | Moderate: specialty soaps, clay bars, mitts | Clean, contaminant-free surface, paint prep | Weekly maintenance, dealership prep, professional detailing | Removes contaminants, extends paint protection life |
| Paint Correction and Polishing | High: requires expertise, multi-stage polishing | High: polishing machines, pads, compounds | Restored paint clarity and gloss | High-end restorations, luxury dealerships, classic cars | Dramatic paint improvement, increases resale value |
| Interior Deep Cleaning and Protection | Moderate: detailed cleaning, conditioning steps | Moderate: steam cleaners, conditioners, extractors | Cleaner, odor-free, protected interiors | Rideshare vehicles, luxury hotel fleets, family cars | Removes allergens, extends interior lifespan |
| Wheel and Tire Detailing | Moderate: requires detailed work on small parts | Moderate: specialized cleaners, brushes, dressings | Clean, protected wheels and tires | Performance cars, off-road trucks, show car prep | Prevents corrosion, improves vehicle appearance |
| Glass Cleaning and Treatment | Low to Moderate: cleaning and applying treatments | Low: glass cleaners, microfiber towels, repellents | Improved visibility and safety | Fleet vehicles, motorcycles, RVs | Enhances safety, repels water |
| Engine Bay Cleaning and Detailing | Moderate to High: careful work around sensitive parts | Moderate: degreasers, steam cleaners, dressings | Clean, protected engine bay, easier leak detection | Classic car shows, pre-sale detailing, maintenance shops | Spot leaks easier, improves resale value |
| Paint Protection Application | Moderate: requires proper prep and careful application | Moderate to High: waxes, sealants, ceramic coats | Long-lasting paint protection and enhanced gloss | Luxury dealerships, fleet vehicles, show cars | Extends paint life, easier future cleaning |
| Final Inspection and Quality Control | Low to Moderate: systematic visual and documented checks | Low: inspection lights, checklists, cameras | Consistent quality, verified work completion | Professional detail shops, concours prep, dealership delivery | Ensures customer satisfaction, quality assurance |
From Checklist to Reality: Maintaining Your Perfect Finish
You’ve journeyed through the complete car detailing checklist, moving from the foundational exterior wash to the final, critical inspection. This guide is more than a simple list of tasks; it’s a systematic blueprint for achieving a professional-grade finish that protects and enhances your vehicle. By methodically addressing each stage, from decontamination and paint correction to interior deep cleaning and engine bay revitalization, you are building layers of care and protection. Each step is a crucial component that contributes to the final, stunning result.
The true value of this comprehensive process isn't just in the immediate visual transformation. It's about long-term preservation. A detailed vehicle holds its value better, resists environmental damage more effectively, and provides a greater sense of pride for its owner. The meticulous attention you pay to the wheels, glass, and final protective coating ensures every part of your car is not just clean, but actively shielded from wear and tear.
From Hobbyist to Professional: The Next Level of Detailing
Mastering this car detailing checklist is the first step. For enthusiasts, it elevates a hobby into a craft. For those who detail vehicles professionally, turning this craft into a successful business requires another level of organization. Efficiency becomes paramount. Managing multiple client vehicles, scheduling jobs, and tracking material costs are as critical as the detailing techniques themselves. For professional detailers looking to streamline their operations, exploring tools to efficiently track jobs and costs can transform a passion into a profitable and smoothly run enterprise. This allows you to focus more on delivering the flawless results your clients expect.
Maintaining the Momentum: Your Action Plan
Now, the key is to maintain that showroom shine. The effort you've invested deserves to be preserved, and this doesn't require repeating the entire intensive process every weekend. Your focus should shift from restoration to maintenance.
- Implement a Regular Wash Schedule: Aim for a maintenance wash every one to two weeks, depending on weather and driving conditions.
- Use Safe Washing Techniques: Always use the two-bucket method or a foam cannon to minimize the risk of inflicting new scratches on your corrected and protected paint.
- Invest in Quality Maintenance Products: A high-quality car soap, plush microfiber towels, and a detail spray are your best friends for upkeep.
- Perform Quarterly Top-Ups: Reapply a spray wax or sealant every few months to boost your primary paint protection and maintain its hydrophobic properties.
By turning this checklist into a regular habit, you transition from a one-time project to a continuous cycle of care. This commitment is the secret to keeping your vehicle in pristine condition, ensuring the time and effort you’ve put in pays dividends for years to come. Your car is no longer just a mode of transport; it’s a testament to your dedication and skill.
Ready to make your maintenance washes faster, safer, and more effective? The SwiftJet Car Wash Foam Gun connects to any standard garden hose to blanket your car in thick, dirt-lifting foam, drastically reducing the risk of scratches. Perfect your process and protect your finish with the ultimate tool for every item on your car detailing checklist. Explore SwiftJet today!