
Ready for a Showroom Shine?
This car wash checklist provides a comprehensive 8-step guide to achieving a professional-quality clean. From pre-rinse to final inspection, you'll learn the proper techniques for washing your car, preserving its paint, and maximizing its shine. This detailed car wash checklist covers wheel cleaning, the two-bucket wash method, decontamination, interior detailing, drying, protection, and quality control. Following these steps helps maintain your vehicle's value and ensures a sparkling finish every time.
1. Pre-Rinse and Initial Inspection
The first step in any successful car wash checklist is the pre-rinse and initial inspection. This crucial stage sets the foundation for a thorough and damage-free cleaning process. It involves thoroughly rinsing your vehicle with water to remove loose dirt, debris, and surface contaminants. Simultaneously, you conduct a visual inspection to identify problem areas, paint defects, and heavily soiled sections that may require special attention later. This two-pronged approach maximizes efficiency and minimizes the risk of scratching your car’s paint during the wash process. Think of it as reconnaissance before the main battle against grime.
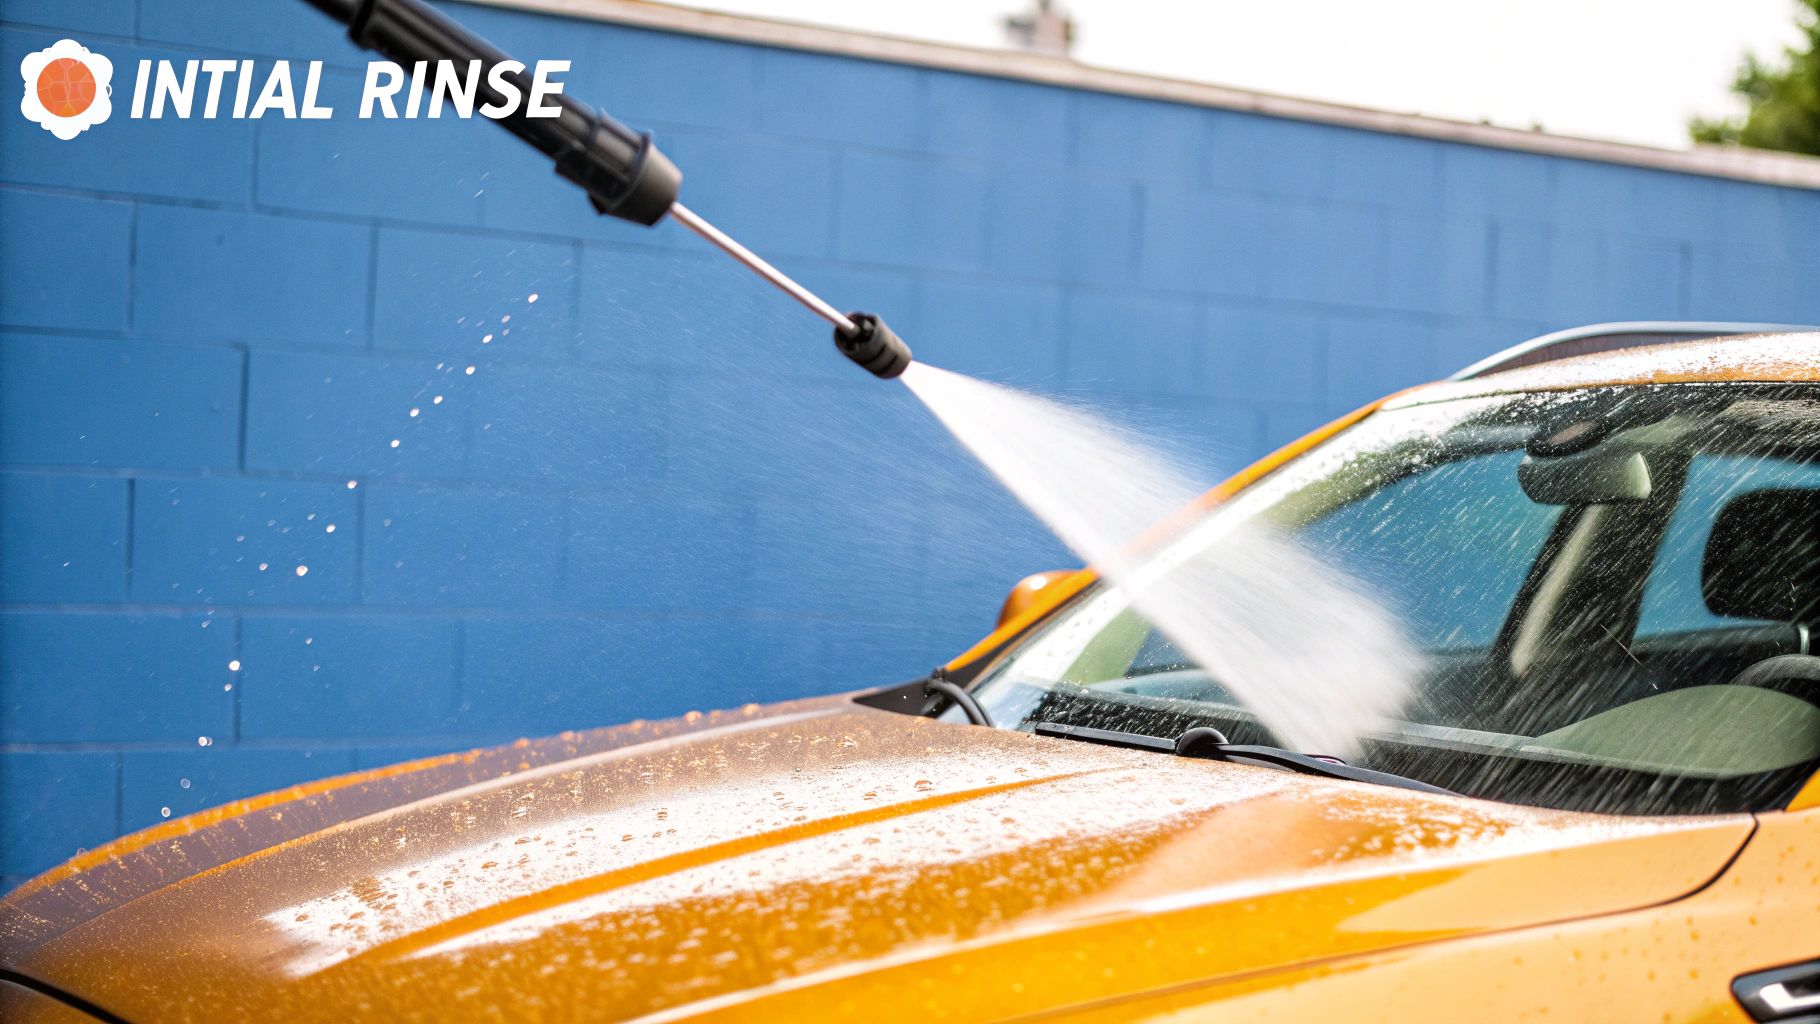
The pre-rinse utilizes the power of water to loosen and lift away dirt particles. This initial rinse significantly reduces the amount of abrasive material that could potentially scratch your car’s paint during the contact wash stage. The visual inspection performed during this stage allows you to assess the condition of your vehicle's paint, identify any pre-existing scratches or dents, locate stubborn stains like tar or bug splatters, and evaluate the state of your wheels and tires. This information is invaluable for tailoring your car wash approach and ensuring the best possible results.
This step is paramount in a car wash checklist for several reasons. Firstly, by removing loose dirt and debris, the pre-rinse drastically reduces the risk of scratching during the washing process. Imagine rubbing a handful of sand across your car’s paint – that’s essentially what happens when you wash a car without pre-rinsing. Secondly, the inspection allows you to identify problem areas beforehand, enabling you to adjust your washing technique and choose the appropriate cleaning products. For instance, if you spot tar, you’ll know to grab a dedicated tar remover. Thirdly, this initial step can actually save you time in the long run by loosening dirt and making the subsequent washing process more efficient.
Features of a thorough pre-rinse and inspection:
- High-pressure water rinse from top to bottom
- Visual inspection for scratches, dents, and paint issues
- Identification of stubborn stains and tar spots
- Assessment of wheel and tire condition
Pros:
- Prevents scratching during washing by removing abrasive particles
- Allows for proper planning of washing approach
- Helps identify areas needing special treatment
- Reduces overall washing time by loosening dirt
Cons:
- May not remove all embedded dirt
- Can waste water if not done efficiently
- May miss hidden contamination in crevices
Examples of Successful Implementation:
- Professional detailers dedicate a significant amount of time, typically 5-10 minutes, to the pre-rinse, meticulously covering every inch of the vehicle.
- Automated car wash systems in commercial car wash chains incorporate powerful pre-rinse arches with multiple nozzles for comprehensive coverage.
- Mobile detailing services utilize portable pressure washers to deliver an effective pre-rinse at any location.
Tips for an Effective Pre-Rinse and Inspection:
- Use a pressure washer or a high-pressure nozzle attached to a garden hose for the best results. The increased pressure helps dislodge stubborn dirt and provides better coverage.
- Start from the top of the vehicle and work your way down. This allows gravity to assist in carrying away the loosened dirt and prevents re-soiling already cleaned areas.
- Pay special attention to wheel wells and the undercarriage, as these areas tend to accumulate a significant amount of dirt and grime.
- Take photos of any existing damage before you start washing. This provides documentation in case any further damage occurs during the wash.
The importance of the pre-rinse and initial inspection has been popularized by professional detailing associations and auto detailing experts like Larry Kosilla of AMMO NYC, who emphasize its role in achieving a flawless finish. Whether you're a DIY enthusiast, a professional detailer, or simply someone who cares about their car, incorporating this crucial step into your car wash checklist will undoubtedly elevate your results. From camping trips to everyday commutes, a clean car is a happy car, and it all starts with a thorough pre-rinse and inspection. This method caters to a wide audience, from DIY car enthusiasts and professional detailers to RV travelers and homeowners looking for efficient cleaning solutions. It's also a great tip for anyone looking for the perfect Father's Day or Christmas gift for the car lover in their life - the gift of a perfectly clean car!
2. Wheel and Tire Cleaning
Wheel and tire cleaning is a critical step in any car wash checklist that often gets overlooked. It's more than just a cosmetic enhancement; it’s about preserving the integrity and longevity of your wheels and tires, contributing to both the appearance and safety of your vehicle. This process involves thoroughly cleaning the wheels, tires, and often-forgotten wheel wells using specialized products and techniques to remove brake dust, road grime, and rubber residue. Leaving these contaminants untreated can lead to corrosion, premature wear, and even compromise tire performance. This is why meticulous wheel and tire cleaning deserves its place in any comprehensive car wash checklist.
Brake dust, a common byproduct of braking, is highly corrosive and can permanently damage wheel finishes if left to accumulate. Road grime, a mixture of dirt, oil, and other debris, can also degrade tire rubber over time. By incorporating regular wheel and tire cleaning into your car wash routine, you prevent this damage and extend the lifespan of these crucial components. Learn more about Wheel and Tire Cleaning for expert advice on achieving a perfect shine.
This process utilizes a range of specialized products and tools. Different wheel types require specific cleaners; for example, BMW dealerships often use pH-balanced wheel cleaners to protect their expensive alloy wheels from harsh chemical reactions. Tire cleaning and conditioning products help remove grime and maintain the tire's flexibility, preventing cracking and dry rot. Wheel well degreasers and cleaners are essential for tackling the build-up of dirt and grime in these often-neglected areas. Various brushes, including wheel woolies, tire brushes, and detail brushes, are designed to effectively clean different surfaces without causing scratches.
While highly beneficial, wheel and tire cleaning can be time-consuming and requires multiple products. Using the wrong products can also damage the finish of your wheels, so it’s crucial to choose carefully and test any new product on an inconspicuous area first. The process can also be physically demanding, requiring scrubbing and reaching into tight spaces. Despite these drawbacks, the benefits of preventing corrosion, enhancing appearance, extending wheel and tire lifespan, and improving safety significantly outweigh the effort involved. Even professional racing teams meticulously clean their wheels between sessions, understanding the impact of clean wheels and tires on performance. Luxury car services often offer ceramic coatings for wheels after a deep clean, providing long-lasting protection and shine – a testament to the importance of this step.
To illustrate the process of effective wheel and tire cleaning, the infographic below outlines the key steps involved.
The following infographic visualizes the three-step process for cleaning your wheels and tires: applying a pH-balanced cleaner, agitating with brushes, and rinsing and applying tire dressing.
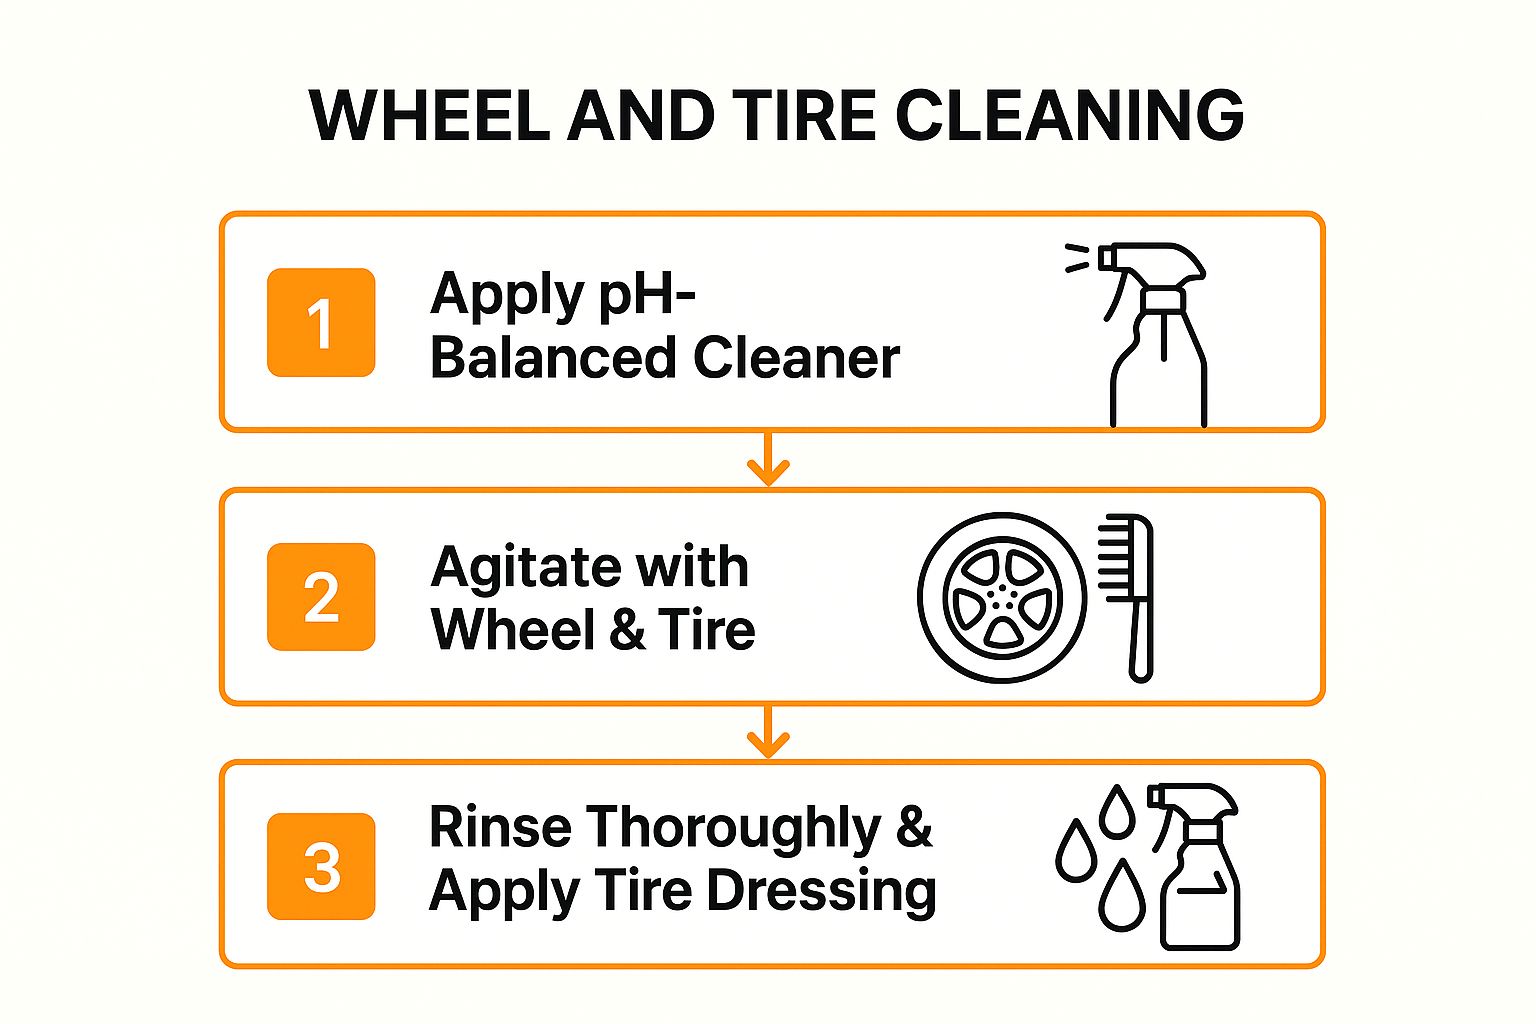
The infographic emphasizes the importance of a methodical approach, starting with the application of the correct cleaning solution, followed by agitation to loosen dirt and grime, and finally a thorough rinse and the application of tire dressing.
Here are some actionable tips to ensure effective and safe wheel and tire cleaning:
- Clean wheels when cool: Applying cleaning products to hot wheels can cause them to dry too quickly and potentially damage the finish.
- Use different brushes: Employ wheel woolies for delicate surfaces, tire brushes for scrubbing tire sidewalls, and detail brushes for reaching tight spots.
- Test wheel cleaner: Always test a new wheel cleaner on an inconspicuous area to ensure compatibility with your wheel finish.
- Apply tire dressing sparingly: Over-applying tire dressing can attract dirt and dust.
Whether you are a DIY car care enthusiast, a professional detailer, or simply someone who takes pride in a clean vehicle, incorporating thorough wheel and tire cleaning into your car wash checklist will significantly enhance the appearance, performance, and longevity of your wheels and tires. Remember, it’s not just about looking good; it’s about maintaining the health and safety of your vehicle.
3. Two-Bucket Wash Method
The two-bucket wash method is a cornerstone of any thorough and safe car wash checklist. This technique is essential for minimizing swirl marks and scratches, preserving your car’s finish, and achieving a truly professional-level clean. Unlike the traditional single-bucket method, which can quickly contaminate your wash water with dirt and debris picked up from the car's surface, the two-bucket method provides a simple yet highly effective solution to this problem.
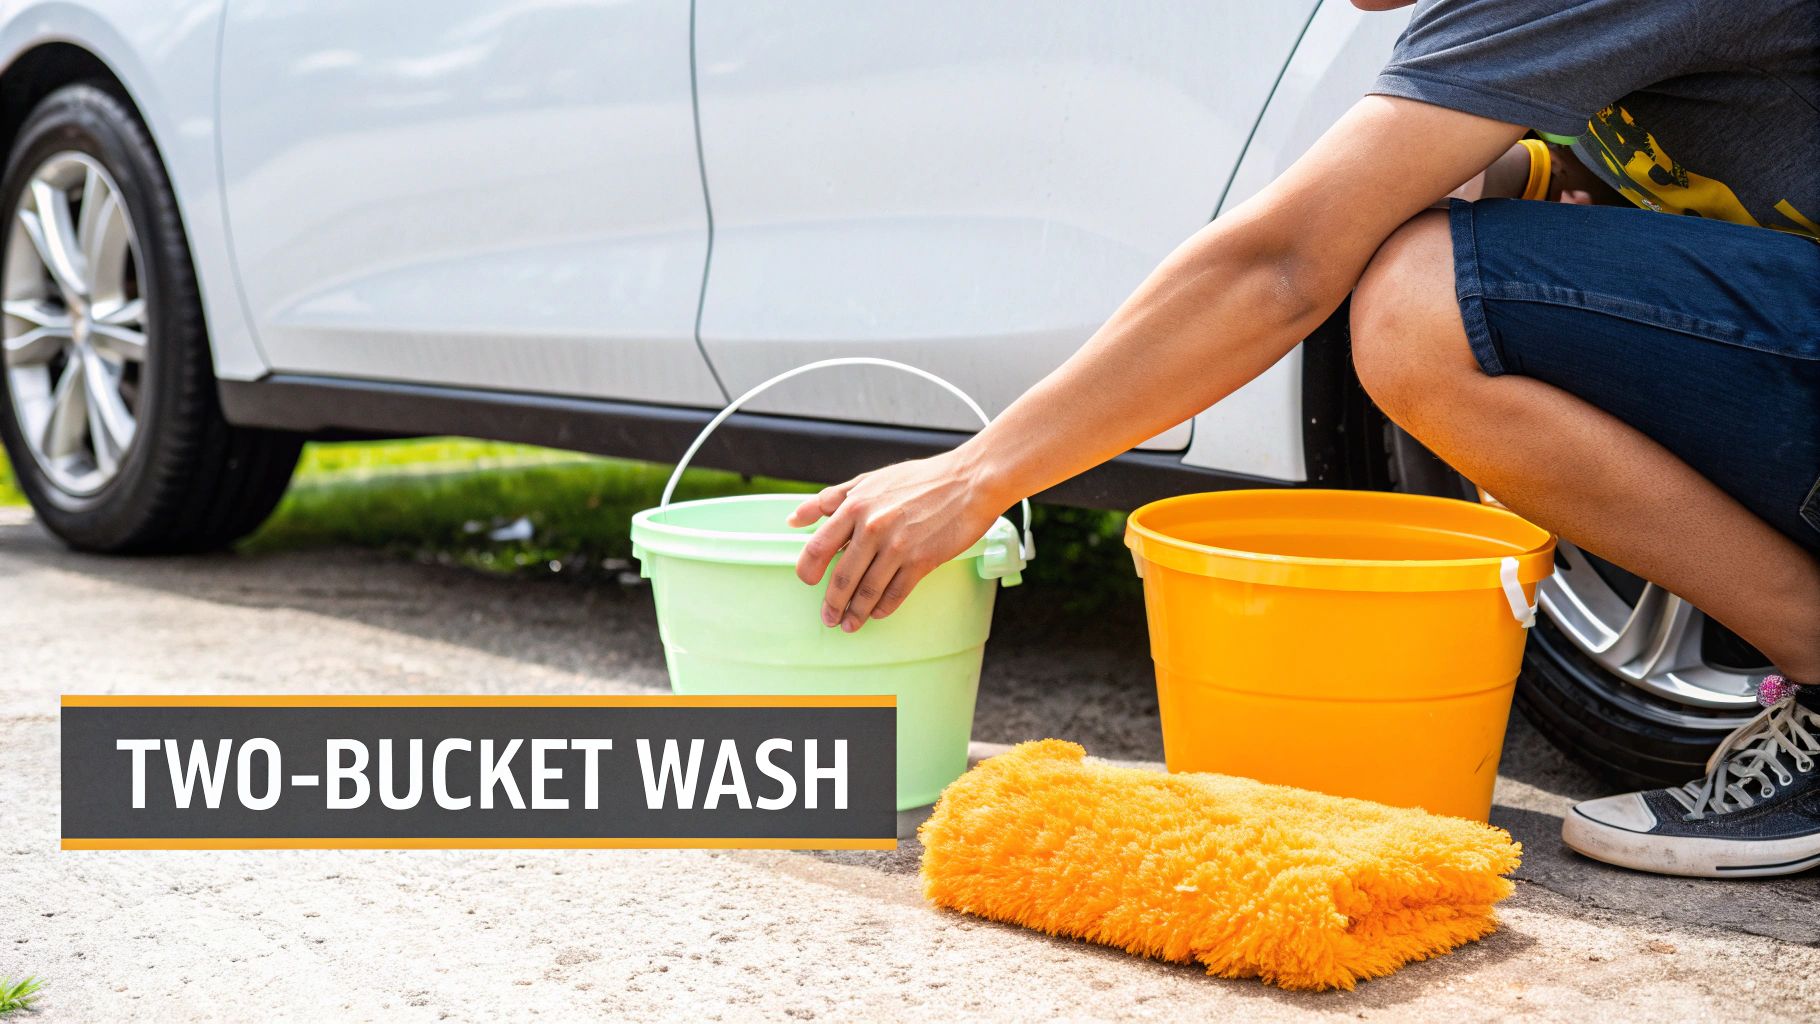
This method involves, as the name suggests, using two buckets. One bucket is filled with your chosen car wash soap solution and the other with clean rinse water. The key to this method's effectiveness lies in the constant rinsing of the wash mitt. After washing a section of the car, the mitt is thoroughly rinsed in the clean water bucket, removing the dirt and grime it has just picked up. This prevents those abrasive particles from being reintroduced to the soap solution and subsequently back onto the car’s paint, where they can cause scratches. This simple process drastically reduces the risk of inflicting swirl marks, those fine scratches that become especially visible in direct sunlight.
The two-bucket method is implemented by professional detailers worldwide as a standard practice, demonstrating its effectiveness in protecting vehicle finishes. Car enthusiast forums, like AutoGeek, consistently recommend this method as a superior alternative to traditional washing techniques. You’ll even find that many automotive manufacturers include this method in their official care instructions. These endorsements underscore the method's value in preserving the long-term beauty and integrity of your car's paint.
To maximize the effectiveness of the two-bucket method, incorporate these key features: two buckets equipped with grit guards, high-quality microfiber wash mitts, a pH-neutral car wash soap specifically designed for automotive use, and a systematic washing pattern, always starting from the top of the vehicle and working your way down. Grit guards are essential components, sitting at the bottom of each bucket to trap dirt and debris, preventing them from being stirred back up into the water and re-contaminating your wash mitt.
This method delivers numerous benefits, including a significantly reduced risk of paint scratches, maintaining clean wash water throughout the entire washing process, and achieving professional-grade results. It's also a remarkably cost-effective method for regular car maintenance, requiring only a few readily available tools. While the initial setup might require slightly more equipment than a single-bucket wash, and it might consume a bit more water, the superior protection offered to your car's finish far outweighs these minor drawbacks. The slightly longer wash time is a small price to pay for the peace of mind knowing you're minimizing potential damage.
While there are some cons, such as requiring more setup and equipment compared to a single bucket method and using slightly more water, the protection offered makes it well worth the effort. The additional time spent is minimal when considering the long-term benefits for your car's paintwork.
Here are some actionable tips for implementing the two-bucket wash method into your car wash checklist:
- Use grit guards in both buckets: These trap dirt at the bottom, preventing it from being picked up by your wash mitt.
- Rinse mitt thoroughly in rinse bucket before reloading with soap: This ensures you're always applying clean soap to the car's surface.
- Work in small sections: This prevents the soap from drying on the paint, which can leave streaks.
- Replace water if it becomes too dirty: Don't be hesitant to refresh your rinse water if it becomes excessively dirty. This ensures optimal cleaning and scratch prevention throughout the wash.
Whether you're a DIY auto care enthusiast, a professional detailer, or simply someone who takes pride in keeping their car clean, the two-bucket wash method deserves a place in your car wash checklist. It’s a smart, effective, and accessible technique for maintaining the pristine condition of your vehicle's paint, ensuring it looks its best for years to come. From RV owners needing to clean large surface areas to those looking for the perfect Father’s Day or Christmas gift for the car enthusiast in their life, understanding and implementing this method elevates car washing from a chore to a practice of care and preservation. This method is also valuable for those frequently cleaning vehicles exposed to harsher environments, such as camping trips or off-roading adventures.
4. Paint Decontamination
Paint decontamination is a crucial step in a comprehensive car wash checklist, especially for those seeking a truly pristine finish. This advanced cleaning process goes beyond a typical wash and wax, targeting embedded contaminants that cling stubbornly to your vehicle's paint. While regular washing removes surface dirt and grime, decontamination tackles the microscopic pollutants that dull your car’s shine and can even cause long-term damage. Think of it as deep cleaning for your car’s exterior.
So, what exactly does paint decontamination involve? It's a multi-stage process that uses specialized products and techniques to lift and remove ingrained contaminants like industrial fallout (those tiny metallic particles that feel rough to the touch), tree sap, tar, bug splatters, and other bonded pollutants that regular washing simply can't handle. These contaminants not only detract from your car’s appearance but can also compromise the integrity of the paint over time, leading to oxidation and other forms of damage.
There are several methods for achieving paint decontamination, each targeting specific types of contaminants. One popular method is the use of a clay bar. This pliable resin gently lifts embedded particles from the paint surface. Another method involves using iron removers, specifically designed to dissolve ferrous metallic particles. Tar and adhesive removers tackle sticky residues, while dedicated paint-safe decontamination chemicals offer a comprehensive approach to removing a wide range of bonded pollutants. Learn more about Paint Decontamination to understand the process better.
The benefits of including paint decontamination in your car wash checklist are significant. First and foremost, it dramatically improves the smoothness and clarity of your car’s paint. By removing the microscopic imperfections, light can reflect more evenly, resulting in a deeper, richer shine. Decontamination also creates the ideal surface for applying wax or sealant, allowing these protective products to bond more effectively and last longer. Perhaps most importantly, it removes contaminants that can etch and damage the paint, preserving its condition and preventing costly repairs down the line.
Think of luxury car dealerships. Before a new car is delivered, it often undergoes a thorough decontamination process to ensure the paint is absolutely flawless. Professional detailers also offer paint decontamination as a premium service, recognizing its value in achieving a show-car finish. In fact, car show preparation almost always includes this critical step. These examples highlight the importance of decontamination for anyone seeking the best possible results for their vehicle's appearance.
While the advantages of paint decontamination are clear, there are some considerations to keep in mind. It's a more time-intensive process than a basic car wash and requires specialized products and knowledge. There’s also a risk of paint damage if done incorrectly, particularly if excessive pressure is used during the clay bar process. Furthermore, the specialized products can be more expensive than standard car wash supplies.
However, the investment in time and resources is well worth it for the dramatic improvement in your car's appearance and the long-term protection it provides. For the DIY enthusiast, mobile detailer, or even the RV traveler looking to maintain their vehicle’s finish, understanding and implementing paint decontamination as part of a regular car wash checklist offers a significant advantage. Whether you’re preparing for a car show, looking for the perfect Father's Day or Christmas gift for the car enthusiast in your life, or simply seeking efficient and effective car washing tips, paint decontamination elevates your car care routine.
Here are some tips for effective and safe paint decontamination:
- Lubrication is Key: Always use a dedicated lubricant when claying your car. This prevents the clay bar from marring the paint and allows it to glide smoothly across the surface.
- Work in the Shade: Avoid direct sunlight, which can cause the products to dry too quickly and potentially damage the paint. A cool surface is essential for successful decontamination.
- Gentle Pressure: Let the chemicals and the clay bar do the work. Use light pressure and avoid excessive rubbing, especially with the clay bar.
- Follow Up with Protection: After decontamination, your paint is primed for protection. Apply a high-quality wax or sealant to lock in the shine and protect the paint from future contaminants.
By following these tips and taking the time to properly decontaminate your car's paint, you'll be rewarded with a stunning finish that truly stands out. This crucial step in the car wash checklist takes your detailing efforts to the next level, ensuring your vehicle looks its absolute best.
5. Interior Deep Cleaning
Interior deep cleaning is a crucial component of any comprehensive car wash checklist, going beyond a simple vacuum and wipe-down. It involves a thorough and meticulous cleaning of every surface within your vehicle's cabin, from the dashboard and steering wheel to the carpets and upholstery. This process not only maintains the aesthetic appeal of your car but also contributes to a healthier, more comfortable driving experience and preserves its resale value. Whether you're a DIY enthusiast, a professional detailer, or simply someone who takes pride in their vehicle, understanding the nuances of interior deep cleaning is essential.
This method differs significantly from a standard interior cleaning included in a basic car wash. While a regular car wash might involve a quick vacuum and surface wipe, a deep clean delves much further. It addresses embedded dirt, stains, and odors, restoring the interior to a like-new condition. This involves using specialized tools and products designed for specific materials like leather, fabric, vinyl, and plastic. Think of it as spring cleaning for your car, a chance to reset and refresh the entire cabin.
A successful interior deep cleaning requires more than just elbow grease. It necessitates the right tools and techniques. This includes a multi-surface vacuum with various attachments to reach crevices and tight spaces, as well as dedicated cleaners for fabric and leather upholstery. Interior protectants and conditioners help maintain the suppleness and appearance of these materials, preventing cracking and fading. For a truly deep clean, steam cleaning capabilities are invaluable, offering powerful sanitization that eliminates bacteria and allergens lurking within the fibers of your upholstery and carpets.
The benefits of a regular interior deep cleaning are numerous. First and foremost, it maintains a healthy cabin environment by removing dust, allergens, and bacteria that can accumulate over time. This is especially crucial for allergy sufferers and those concerned about air quality. Furthermore, regular deep cleaning preserves interior materials from the damaging effects of UV rays, spills, and everyday wear and tear, ultimately enhancing the vehicle's resale value. Finally, a clean and well-maintained interior significantly improves the driving experience, making it more comfortable and enjoyable.
Of course, interior deep cleaning isn't without its challenges. It can be a time-consuming process requiring multiple specialized products. There's also a risk of damage to sensitive electronics if proper precautions aren't taken, and reaching every nook and cranny can be difficult. However, the rewards far outweigh the challenges.
Consider these examples of successful implementation: ride-sharing drivers prioritize interior deep cleaning to ensure customer satisfaction, luxury car services offer monthly interior detailing packages as a premium service, and fleet managers schedule regular deep cleans to maintain the appearance and hygiene of their vehicles. These examples highlight the importance of interior deep cleaning across various contexts, demonstrating its value for both personal and professional use.
Learn more about Interior Deep Cleaning
To ensure a successful and efficient interior deep cleaning as part of your car wash checklist, follow these tips:
- Remove everything: Start by removing all items, including floor mats, trash, and personal belongings, to ensure thorough cleaning access.
- Use appropriate cleaners: Different materials require specific cleaning products. Using the wrong cleaner can damage delicate surfaces.
- Systematic approach: Work systematically from top to bottom to prevent recontamination of already cleaned areas.
- Drying time: Allow adequate drying time before reassembling the interior to prevent mold and mildew growth.
This item deserves its place in the car wash checklist because it addresses a crucial aspect of vehicle maintenance often overlooked in a standard wash. It's an investment in your health, comfort, and the longevity of your vehicle's interior. Products from specialists like Lexol (renowned for leather care) and 303 Products are excellent choices for achieving professional results. Whether you're preparing for a long road trip, getting ready to sell your car, or simply want to enjoy a pristine driving environment, interior deep cleaning is a vital step. This makes it an ideal consideration for DIY enthusiasts, professional detailers, camping and RV travelers, homeowners, and even as a thoughtful gift for car lovers. Don't underestimate the impact a clean interior can have on your overall driving experience and the value of your vehicle. Remember, a thorough car wash checklist must include interior deep cleaning to truly achieve a comprehensive clean.
6. Drying and Water Spot Prevention
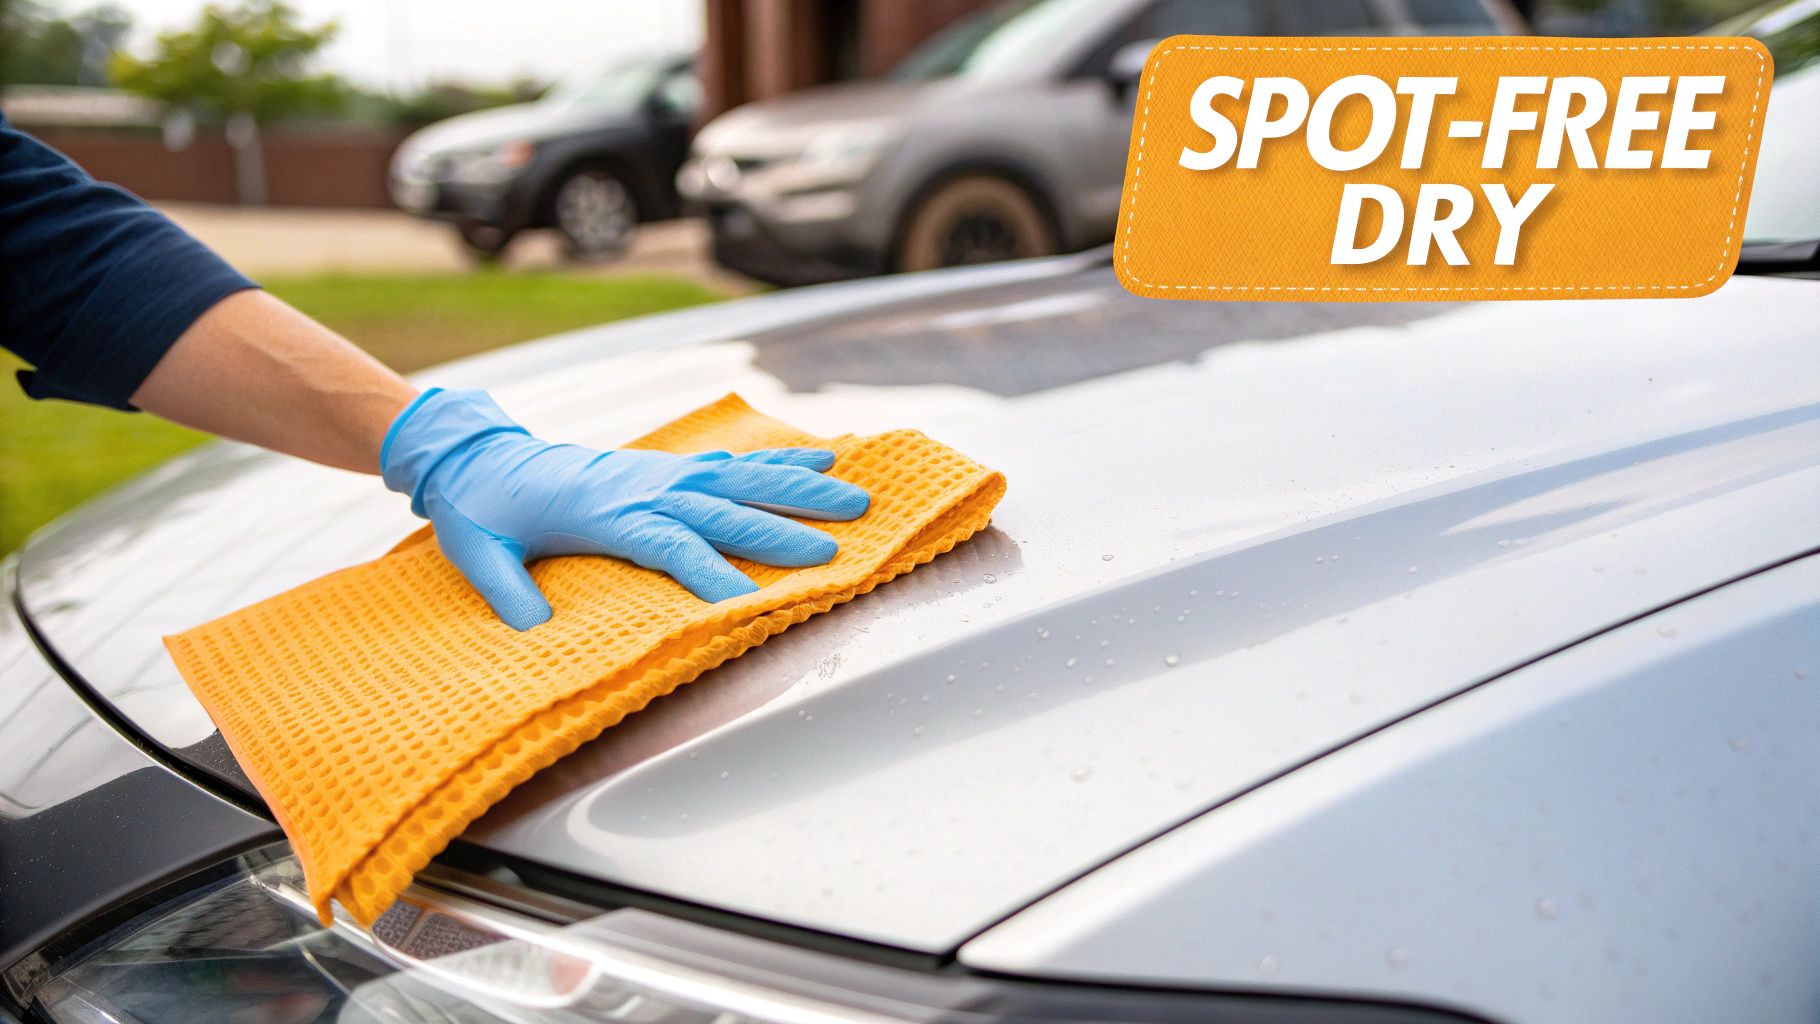
Drying your car isn't simply about getting it dry; it's a crucial step in the car wash checklist that directly impacts the long-term health and appearance of your vehicle's paint. Proper drying and water spot prevention is the process of meticulously removing all water from the vehicle's surfaces using the right techniques and tools. This prevents unsightly water spots, mineral deposits, and potential damage to the paint, preserving the pristine finish achieved during the wash. Skipping or rushing this step can negate all the hard work put into the previous stages of your car wash. This is why it deserves a prominent place in any comprehensive car wash checklist.
Water spots form when water evaporates, leaving behind the minerals it contained. These minerals etch into the paint, creating those stubborn, sometimes iridescent marks that can be difficult, if not impossible, to remove without polishing. This is particularly problematic in areas with hard water. Proper drying prevents this etching by removing the water before it has a chance to evaporate.
Features of Effective Drying and Spot Prevention:
The key to successful drying lies in utilizing high-quality materials and employing the right techniques. This includes:
- High-quality Drying Towels: Opt for plush, absorbent microfiber towels, particularly waffle weave or chamois-style cloths. These are designed to hold significant amounts of water and minimize friction against the paint, reducing the risk of scratching.
- Filtered Water Systems: If you live in an area with hard water, consider using a filtered water system for your final rinse. This minimizes the mineral content in the water clinging to your car, reducing the potential for spotting.
- Proper Drying Techniques: The blotting method is crucial. Instead of dragging the towel across the paint, gently blot the water, lifting the towel frequently to wring it out. This prevents the towel from becoming saturated and pushing dirt and minerals back onto the paint.
- Quick Detailer Sprays: These sprays act as a drying aid, lubricating the surface and helping to encapsulate any remaining water beads, allowing them to be wiped away effortlessly, leaving a streak-free, spot-free finish.
Pros of Diligent Drying:
- Prevents Water Spot Etching: This is the primary benefit and the reason why drying is so crucial. Preventing water spots saves you time and money in the long run, avoiding the need for costly paint correction.
- Maintains Paint Clarity and Shine: By preventing mineral deposits, you preserve the clarity and depth of your car's paint, keeping it looking its best.
- Reduces Need for Paint Correction: Proactive drying minimizes the need for polishing and compounding to remove water spots, preserving the integrity of your car's clear coat.
- Provides Immediate Visual Results: The instant gratification of a perfectly dried, spot-free car is undeniable, enhancing the overall satisfaction of a thorough car wash.
Cons to Consider:
- Requires Quality Drying Materials: Investing in high-quality drying towels is essential for effective drying and scratch prevention.
- Time-Sensitive Process: Drying needs to be done relatively quickly to prevent water from evaporating and leaving spots, especially in direct sunlight.
- Can Cause Scratching if Done Improperly: Using incorrect techniques or abrasive towels can introduce swirl marks and scratches into the paint.
- Challenging in Direct Sunlight or Windy Conditions: Direct sunlight accelerates water evaporation, while wind can blow debris onto the wet surface, making the drying process more difficult.
Examples of Successful Implementation:
- Professional Car Washes: Many professional car washes utilize forced-air drying systems to quickly and efficiently remove water from vehicles, minimizing the risk of spotting.
- Concours Car Preparation: In the world of concours car shows, achieving a perfectly spot-free finish is paramount, demonstrating the importance of meticulous drying techniques.
- Mobile Detailers: Professional mobile detailers often carry multiple drying towels to ensure they have clean, dry towels readily available for each section of the vehicle, maximizing efficiency and minimizing the risk of cross-contamination.
Tips for Optimal Drying:
- Work in the Shade and Keep Surface Cool: This slows down the evaporation process, giving you more time to dry thoroughly.
- Use a Blotting Motion Rather Than Dragging: This prevents the towel from dragging dirt and minerals across the paint.
- Start with Most Absorbent Towels First: Use your most absorbent towels on the largest panels, reserving less absorbent towels for smaller areas and details.
- Use Quick Detailer Spray as a Drying Aid: This helps to lubricate the surface and encapsulate remaining water beads for a streak-free finish.
Popularized by companies like The Rag Company, known for its premium microfiber towels, and Griot's Garage, which emphasizes professional drying technique education, the importance of proper drying has become increasingly recognized among car enthusiasts. Implementing these techniques into your car wash checklist will ensure a spot-free, gleaming finish every time.
7. Protective Product Application
A truly comprehensive car wash checklist doesn't end with a rinse and dry. The final, and arguably most crucial step, is the application of a protective product. This involves applying a coating – whether it's wax, sealant, or ceramic coating – to create a barrier between your car's paint and the harsh elements. This protective layer not only preserves the vibrancy and depth of your car's color but also shields it from UV rays, environmental contaminants, acid rain, bird droppings, and the general wear and tear of daily driving. Including protective product application in your car wash checklist elevates your routine from simple cleaning to proactive maintenance, contributing significantly to the long-term health and appearance of your vehicle.
Protective products work by creating a sacrificial layer atop the clear coat of your car's paint. This barrier takes the brunt of environmental assaults, preventing them from directly damaging the paint itself. Furthermore, many protective products impart hydrophobic (water-repelling) properties, making future washes easier as dirt and grime have a harder time adhering to the surface. This also minimizes water spotting, keeping your car looking cleaner for longer.
There are various levels of protection available, catering to different needs and budgets:
-
Wax: Often derived from natural carnauba wax, this option offers a warm, deep gloss and decent protection lasting several weeks. Popular with car enthusiasts for its ease of application and aesthetic appeal. Traditional manufacturers like Meguiar's and Mothers continue to refine and improve carnauba-based wax formulations.
-
Sealant: Synthetically engineered, sealants provide more durable protection than waxes, often lasting several months. They typically offer excellent hydrophobic properties and are a favorite among fleet operators and those seeking a longer-lasting solution. Brands like Collinite are known for their professional-grade sealant formulations.
-
Ceramic Coating: Representing the pinnacle of paint protection, ceramic coatings offer unparalleled durability, often lasting for years. They form a strong chemical bond with the paint, creating an extremely hard and resistant layer. The application process is more complex and often requires professional expertise, but the long-term benefits in terms of protection, gloss, and ease of maintenance are significant. Luxury dealerships often apply ceramic coatings to new vehicles, and brands like Gtechniq are leading innovators in this technology.
Pros of Protective Product Application:
- Long-term paint protection and preservation: Shields against UV damage, contaminants, and minor scratches.
- Enhanced gloss and depth of color: Enhances the visual appeal of your vehicle.
- Easier maintenance and cleaning: Hydrophobic properties repel water and dirt.
- Increased vehicle resale value: A well-maintained exterior adds value.
Cons of Protective Product Application:
- Requires proper surface preparation: The paint must be thoroughly cleaned and decontaminated for optimal adhesion.
- Application can be time-consuming: Especially for waxes and sealants, multiple coats may be required.
- Premium products can be expensive: Ceramic coatings, in particular, can be a significant investment.
- May require professional application: Ceramic coatings often require specialized equipment and expertise.
Tips for Successful Application:
- Ensure paint is completely clean: Wash, dry, and clay bar the surface to remove any contaminants.
- Work in the shade with optimal temperature conditions: Avoid direct sunlight and extreme temperatures.
- Apply thin, even coats for best results: Less is more. Multiple thin coats are better than one thick coat.
- Allow proper curing time between coats: Follow the manufacturer's instructions for optimal results.
Whether you're a DIY enthusiast meticulously detailing your weekend cruiser, a professional detailer seeking the ultimate protection for a client's vehicle, or simply a car owner wanting to keep their vehicle looking its best, protective product application is an essential step in any car wash checklist. From the classic appeal of carnauba wax to the cutting-edge technology of ceramic coatings, there's a protective product to suit every need and budget. By incorporating this crucial step into your routine, you're not just washing your car; you're investing in its long-term beauty and preservation.
8. Final Quality Control and Documentation
This crucial final step in any car wash checklist, whether you're a DIY enthusiast or a professional detailer, is Final Quality Control and Documentation. It’s the bridge between a good car wash and a truly exceptional one. This stage elevates the car wash from a simple cleaning process to a systematic approach that ensures consistent results, builds customer trust, and contributes to the long-term health and value of the vehicle. Think of it as the quality assurance process that guarantees a perfect finish every time. This section dives deep into the importance of this often-overlooked step in your car wash checklist, outlining its benefits, practical tips, and how it can transform your approach to car care.
Final Quality Control and Documentation involves a meticulous inspection of all cleaned areas, inside and out, after the main washing and detailing processes are complete. It's about identifying and rectifying any missed spots, imperfections, or inconsistencies before the car is considered finished. This stage also includes documenting the completed work, providing a valuable record of services performed. This documentation can include before/after photos, a detailed service record, and recommendations for future maintenance. It's a thorough assessment that ensures the car has been cleaned to the highest standard and provides a tangible record of the care taken.
How it Works:
The process begins with a systematic inspection, often guided by a checklist. This checklist ensures every area, from the wheels and tires to the interior upholstery and glass, is thoroughly examined under proper lighting. Any imperfections, such as lingering water spots, missed dirt patches, or streaks on the windows, are addressed with appropriate cleaning techniques and products. Once the car is deemed spotless, the documentation process begins. This involves taking detailed photographs from multiple angles, both inside and out, to record the condition of the car post-cleaning. A detailed service record is then created, outlining the services performed, products used, and any specific observations about the vehicle's condition. Finally, recommendations for future maintenance, such as paint protection or interior detailing, can be added to provide ongoing care guidance.
Examples of Successful Implementation:
Professional detailing shops excel at this stage, providing detailed service reports that showcase the extent of their work and build customer confidence. These reports often include high-quality before/after photos and a breakdown of the services performed, creating a valuable record for the customer. Similarly, insurance companies rely on detailed documentation, including photographs, for accurate claim processing. High-end car services also maintain meticulous digital service histories, allowing them to track the vehicle's condition and maintenance over time, adding value and demonstrating the quality of their care. These examples highlight the importance and practicality of Final Quality Control and Documentation in various automotive contexts.
Actionable Tips for Your Car Wash Checklist:
- Good Lighting is Key: Use bright, diffused lighting to reveal any imperfections or missed spots. Natural daylight is ideal, but a strong work light can also be effective.
- Multiple Angles Matter: Photograph the car from various angles, capturing both the overall appearance and specific details. This thorough documentation can be invaluable for future reference.
- Standardize Your Process: Create a standardized quality control checklist to ensure consistent inspections every time. This checklist should cover all areas of the car, both inside and out.
- Embrace Digital Records: Maintain digital records of your car wash sessions, including photos and service details. This allows for easy access to historical data and provides a comprehensive overview of your car care efforts.
When and Why to Use This Approach:
Final Quality Control and Documentation is essential for every car wash, regardless of the vehicle type or the cleaning method used. For DIY enthusiasts, it ensures a thorough cleaning and provides a personal record of their efforts. For professional detailers, it’s a critical component of delivering high-quality service and building customer trust. By incorporating this step into your car wash checklist, you ensure consistency, identify potential issues early on, and maintain a valuable record of your car’s care history. This meticulous approach not only results in a sparkling clean car but also contributes to its long-term value and appearance.
Pros and Cons:
- Pros: Ensures consistent service quality, provides valuable maintenance records, identifies recurring issues or needed repairs, builds customer confidence and trust.
- Cons: Adds time to service completion, requires attention to detail and documentation, may reveal additional work needed, can be overlooked when rushing.
In conclusion, Final Quality Control and Documentation is not just a final step; it’s the hallmark of a thorough and professional car wash. While it might add a few extra minutes to the process, the benefits far outweigh the costs, contributing to a consistently cleaner car, a valuable maintenance history, and increased peace of mind. This makes it a vital element of any comprehensive car wash checklist.
Car Wash Process Comparison
| Checklist Item | Implementation Complexity 🔄 | Resource Requirements ⚡ | Expected Outcomes 📊 | Ideal Use Cases 💡 | Key Advantages ⭐ |
|---|---|---|---|---|---|
| Pre-Rinse and Initial Inspection | Low to Moderate | Basic tools (pressure washer, water) | Removes loose dirt; identifies trouble spots | Initial wash step; quick contamination assessment | Prevents scratching; reduces wash time |
| Wheel and Tire Cleaning | Moderate to High | Specialized cleaners, brushes | Deep cleaning; prevents corrosion | Wheels and tires prone to grime; safety-critical | Extends lifespan; enhances appearance |
| Two-Bucket Wash Method | Moderate | Two buckets, grit guards, microfiber mitts | Minimizes paint scratches; cleaner wash water | Regular maintenance wash | Professional-grade paint protection |
| Paint Decontamination | High | Clay bars, iron removers, chemicals | Removes embedded contaminants; preps paint | Premium detailing; paint restoration | Restores smoothness; improves clarity |
| Interior Deep Cleaning | Moderate to High | Vacuum, specialized cleaners, steamers | Thorough interior hygiene and preservation | Cabin maintenance; resale value enhancement | Maintains materials; improves comfort |
| Drying and Water Spot Prevention | Moderate | Quality drying towels, quick detailers | Prevents water spots; maintains shine | Post-wash finishing; preventing mineral deposits | Protects paint; immediate visual quality |
| Protective Product Application | Moderate to High | Waxes, sealants, ceramic coatings | Long-term protection; enhanced gloss | Paint preservation; show car detailing | Durable protection; easier upkeep |
| Final Quality Control and Documentation | Low to Moderate | Inspection tools, camera, checklist | Ensures quality; documents service | Professional services; customer assurance | Builds trust; identifies issues early |
Your Car, a Sparkling Testament to Care
Mastering the perfect car wash isn't just about a clean car; it's about pride, preservation, and the satisfaction of a job well done. From the initial pre-rinse and inspection to the final protective product application and quality control check, every step in this car wash checklist contributes to a truly impressive result. Remember the key takeaways: the two-bucket method minimizes swirl marks, paint decontamination reveals the true depth of your car's color, and proper drying prevents water spots. Interior deep cleaning creates a comfortable and inviting space, while protective products shield your paint from the elements.
Maintaining organized records of your car washes is also crucial. This helps you track the effectiveness of your cleaning routine and identify any potential issues early on. Consider using digital tools to store photos and notes about each wash. A well-documented car wash history can even be helpful when selling your vehicle. To ensure efficiency in your record-keeping, make sure you're not duplicating efforts. Tools like this one can help streamline the process: duplicate medical scans.
By consistently following this car wash checklist, you're not just cleaning your car—you're investing in its long-term health and value. This dedication to care will be evident in the gleaming finish and pristine condition of your vehicle for years to come. Elevate your car washing game and experience the difference a comprehensive approach can make. Ready for effortless cleaning and a lasting shine? Explore the SwiftJet Car Wash Foam Gun–designed to perfectly complement your car wash checklist and deliver professional results at home. Visit SwiftJet today and discover how easy it can be to keep your car looking its absolute best.