
A good car wash soap with wax is like a shortcut to a brilliant shine. It rolls powerful cleaning agents and protective waxes into one easy step, lifting away dirt while leaving a glossy, water-beading layer behind. This saves a ton of time and elbow grease compared to the old-school, multi-step wash and wax routine.
So, What's the Big Deal with a Wash and Wax Soap?

Let’s face it, washing the car can feel like a serious chore. That's where a two-in-one soap really shines. Instead of just getting the grime off, these formulas lay down a slick, protective layer that you can see and feel immediately.
It’s not just about saving time. It's about getting a better, more durable finish every single time you suds up your vehicle.
A Deeper Gloss and Serious Water-Beading
The first thing you'll notice is the shine. The wax polymers in the soap subtly fill in the microscopic pits and valleys in your car's clear coat. This creates a much smoother surface that reflects light more evenly, giving your paint that deep, wet look right after you dry it.
But it’s not all about looks. These soaps are fantastic at repelling water. You'll see it the next time it rains—water will bead up and practically fly off the paint. This is more than just cool to watch; it means fewer annoying water spots and a much easier drying process after a wash.
My Take: I love using a car wash soap with wax as a "topper" for an existing sealant or ceramic coating. It’s the perfect way to refresh those hydrophobic properties and add a bit of extra gloss without compromising the tough protective layer underneath.
Carnauba vs. Synthetic Polymer Waxes: What's the Difference?
Not all wash and wax soaps are the same, and the type of wax in the bottle makes a huge difference in the final look and how long it lasts.
- Carnauba Wax: This is the old-school favorite for a reason. Carnauba, a natural wax, is famous for its deep, warm glow. It delivers that classic show-car shine but doesn't last as long as synthetics. It's perfect for enthusiasts who wash their car often and love that rich finish.
- Synthetic Polymers: These are the workhorses. Engineered for durability, synthetic waxes (often called sealants) create a stronger bond with your car’s paint. This means longer-lasting protection from UV rays and road grime, delivering a sharp, reflective shine that can hold up for weeks.
To make picking the right one a bit easier, here’s a quick rundown of how these two types of soap stack up.
Wash & Wax Soap vs Regular Car Soap at a Glance
| Feature | Car Wash Soap With Wax | Regular Car Soap |
|---|---|---|
| Primary Function | Cleans and adds a protective wax layer | Cleans dirt and grime only |
| Finish | Leaves a glossy, "just-waxed" look | Leaves a clean, neutral surface |
| Water Behavior | Creates strong water beading (hydrophobic) | Water may "sheet" or bead weakly |
| Protection | Provides a light, sacrificial layer of protection | Offers no protection after rinsing |
| Best For | Maintenance washes, boosting existing wax | Prepping for a full detail, or when you prefer a separate wax/sealant |
Ultimately, choosing a wash and wax soap is about efficiency and maintenance. For the average car owner looking to keep their ride looking great with minimal fuss, it's an absolute game-changer.
This demand for products that do more in less time is a huge driver in the industry. The global car wash detergent and soap market was valued at USD 2.97 billion in 2024 and is expected to hit USD 4.39 billion by 2035. It's all because people are more invested in vehicle maintenance and want premium products that clean and protect. You can dive deeper into these numbers with this detailed report on car wash products.
Building Your Home Car Wash Arsenal
Getting that professional-level shine at home isn't about buying the most expensive gear you can find. It’s about having the right gear. The tools you use are every bit as important as your car wash soap with wax. Let's go beyond a simple shopping list and actually build an arsenal that protects your car's paint.
The absolute cornerstone of a safe wash is the two-bucket method. This isn't just some old detailer's tale—it's the single best way to stop swirl marks from happening. You'll have one bucket for your suds and another with clean water just for rinsing your wash mitt.
The Essential Tools for a Swirl-Free Wash
The tools you pick can make or break your wash. A gritty sponge can instantly sabotage all your careful work, leaving you with new scratches to deal with.
- Grit Guards: These simple plastic discs sit at the bottom of your buckets. When you rinse your dirty mitt, the grit guard's design knocks the dirt loose and traps it at the bottom. This prevents you from picking that same grit back up and dragging it across your paint. It’s a cheap investment that pays off big time.
- Microfiber Wash Mitt: Please, throw away the old sponges. Sponges have flat surfaces that trap dirt and grind it right into your clear coat. A good microfiber wash mitt has a deep, plush pile that pulls those dirt particles away from the surface and deep into the fibers, making it a much, much safer choice.
A foam cannon or foam gun is a total game-changer. It blasts your car with a thick blanket of suds that starts loosening and lifting heavy dirt before you even lay a hand on the paint. This pre-soak makes the main wash so much safer and reduces the risk of scratching.
Drying Gear That Prevents Water Spots
How you dry the car is just as critical as how you wash it. Using old bath towels or a squeegee is a recipe for scratches, streaks, and those dreaded water spots.
A large, plush microfiber drying towel is your best friend here for soaking up water without harming the paint. For an even better, lint-free finish on delicate paint, I always recommend a waffle-weave microfiber towel. They have special pockets woven in that are designed to trap water like crazy.
Using the right drying tools ensures your car wash soap with wax can do its job properly, leaving behind nothing but that slick, glossy shine you're after.
Once you have the basics down, you might want to look into more specialized products. Things like ceramic car wash products can really boost the gloss and protection, especially if your car already has a ceramic coating.
The Prep Work That Makes or Breaks Your Finish
I can’t tell you how many times I see people jump straight to the foam cannon. It's a classic mistake, and honestly, it's the fastest way to create swirl marks. You're essentially grinding all that loose dirt and road grit right into your clear coat. This prep stage is what really separates a quick, amateur wash from a professional-level detail.
The whole point here is to get the heavy, abrasive stuff off the paint before your wash mitt makes contact. Taking a few minutes to do this lets your car wash soap with wax focus on what it does best: lifting the finer grime and leaving behind a slick, protective layer on a properly prepped surface.
The Right Way to Pre-Rinse
Your pressure washer is the perfect tool for this, but finesse is key. You're not trying to strip the paint off the car; you're just using the force of the water to gently knock loose the surface-level dirt.
Always work from the top down. Gravity is your friend here, so let it help you pull all that grime down and off the vehicle. Make sure you spray at a slight angle to the panels. Hitting it straight-on can just push grit deeper into the paint, whereas an angle helps lift it up and away.
My Two Cents: Never, ever wash your car in direct sun or if the paint is hot. The heat bakes the soap and water onto the surface before you can rinse it, leaving you with stubborn water spots and streaks that are a real pain to remove.
Hitting the Trouble Spots
After a general rinse, it’s time to focus on the areas that collect the most gunk. These are the spots where a quick once-over just won’t cut it.
Pay extra attention to these high-grime zones:
- Wheel Wells: They're a magnet for caked-on mud, brake dust, and road salt.
- Lower Rocker Panels: These panels get hammered with everything your tires kick up.
- Front Bumper and Grille: This is the bug graveyard, plain and simple.
Giving these spots a second, more focused blast with the pressure washer makes a huge difference. It ensures the thickest layers of grime are gone before you start the contact wash.
This kind of careful prep is becoming more common as people learn more about proper car care, and the market reflects it. The global car wash shampoo market was valued at around $3.8 billion in 2023 and is projected to hit $6.2 billion by 2032. You can discover more insights about these market trends here. Doing this prep work right means you're getting the absolute most shine and protection out of the products you're spending your money on.
Nailing the Foam and Hand Wash
Now that the prep work is out of the way, it's time for the main event. This is where your hard work pays off and your foam gun, two-bucket setup, and a quality car wash soap with wax all come together to give you that deep, swirl-free shine you're after.
Getting the Foam Just Right
First things first, we need to get that foam mixture dialed in. What you're looking for is a thick, rich foam that really clings to the paint, almost like shaving cream.
For most foam guns, a great starting point is about 2-3 ounces of soap for every 30 ounces of water in the canister. Mix it up and do a quick test spray. If the foam seems a little runny and slides right off, you'll want to add a bit more soap. On the other hand, if it's so thick that it's splattering instead of spraying evenly, just add a splash more water to thin it out.
The Art of Foam Application
Once you've got that perfect consistency, it's time to blanket the car. Start at the roof and work your way down, making sure you get a nice, thick coat over every surface. Now, let it sit. This is what we call dwell time, and it’s arguably the most important part of the pre-wash. Those suds are doing more than just looking cool; they're actively breaking down, lifting, and encapsulating all the leftover grime, which makes the upcoming hand wash much, much safer for your paint.
You’ll physically see the foam start to sag and pull dirt down the side of the car. That’s your sign that the soap is doing its job, handling the heavy lifting before your wash mitt even makes contact.
Pro Tip: The one thing you absolutely want to avoid is letting the foam dry on the car. If you're washing on a hot day or notice a panel starting to dry before you can get to it, don't panic. Just give it a quick rinse with the pressure washer and hit it with a fresh layer of foam.
The Two-Bucket Hand Wash: Your Paint's Best Friend
Alright, grab your two buckets. One should be filled with your soap solution, and the other with plain, clean water. And, of course, make sure you have a grit guard sitting at the bottom of each one. Honestly, this method is non-negotiable if you want to keep your paint free of scratches.
This infographic breaks down the process, showing how a proper pre-rinse sets you up for a safe and effective hand wash.
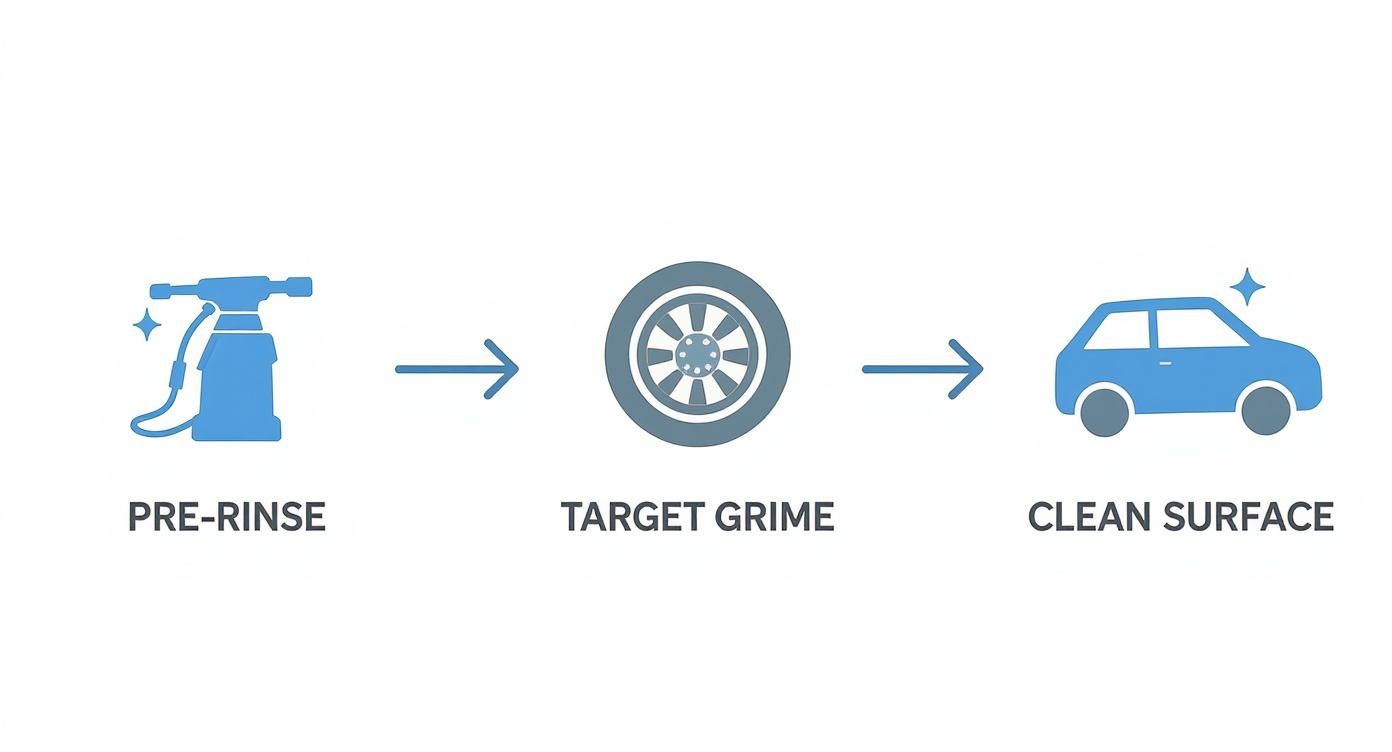
Following these steps ensures that the most harmful, gritty contaminants are long gone before you start washing by hand.
Start by dunking your clean microfiber wash mitt into the soapy water. Begin with one panel at a time—the roof is a good place to start—and wash in straight, overlapping lines. Never, ever use circular motions. That's how you get those dreaded swirl marks. Let the slick suds and the mitt do the work; you don't need to apply much pressure at all. There are tons of great foam car soap options that work perfectly with this method out there, so you can find one that fits your needs.
Here's the key: after you finish a single panel, immediately rinse your mitt in the bucket of plain water. Really scrub it against the grit guard at the bottom. You will be amazed at the amount of gunk you see collecting down there. Only once the mitt is completely clean should you dip it back into the soap bucket and move on to the next section of the car.
It’s no surprise that the car care world is booming. People value these techniques because they work. The global car wax market, which includes these kinds of advanced soaps, is projected to hit USD 1,484.85 million by 2035. This growth is all driven by people like us who want to take better care of our vehicles.
Rinsing and Drying Without Leaving Streaks
Here's where all your hard work pays off—or goes right down the drain. A sloppy rinse or a bad drying technique can leave you with a mess of streaks and water spots, undoing everything you just did.
I always tell people to think of rinsing as the final step of the wash itself, not the first step of drying. You need to be just as thorough. Start at the top and let gravity do the work, gently guiding the water and any leftover suds down and off the car. A gentle, free-flowing stream is your best friend here; blasting it with high pressure can cause the water to bead up and stick. You're aiming for a "sheeting" effect, where the water pulls itself off the panels in a large sheet.
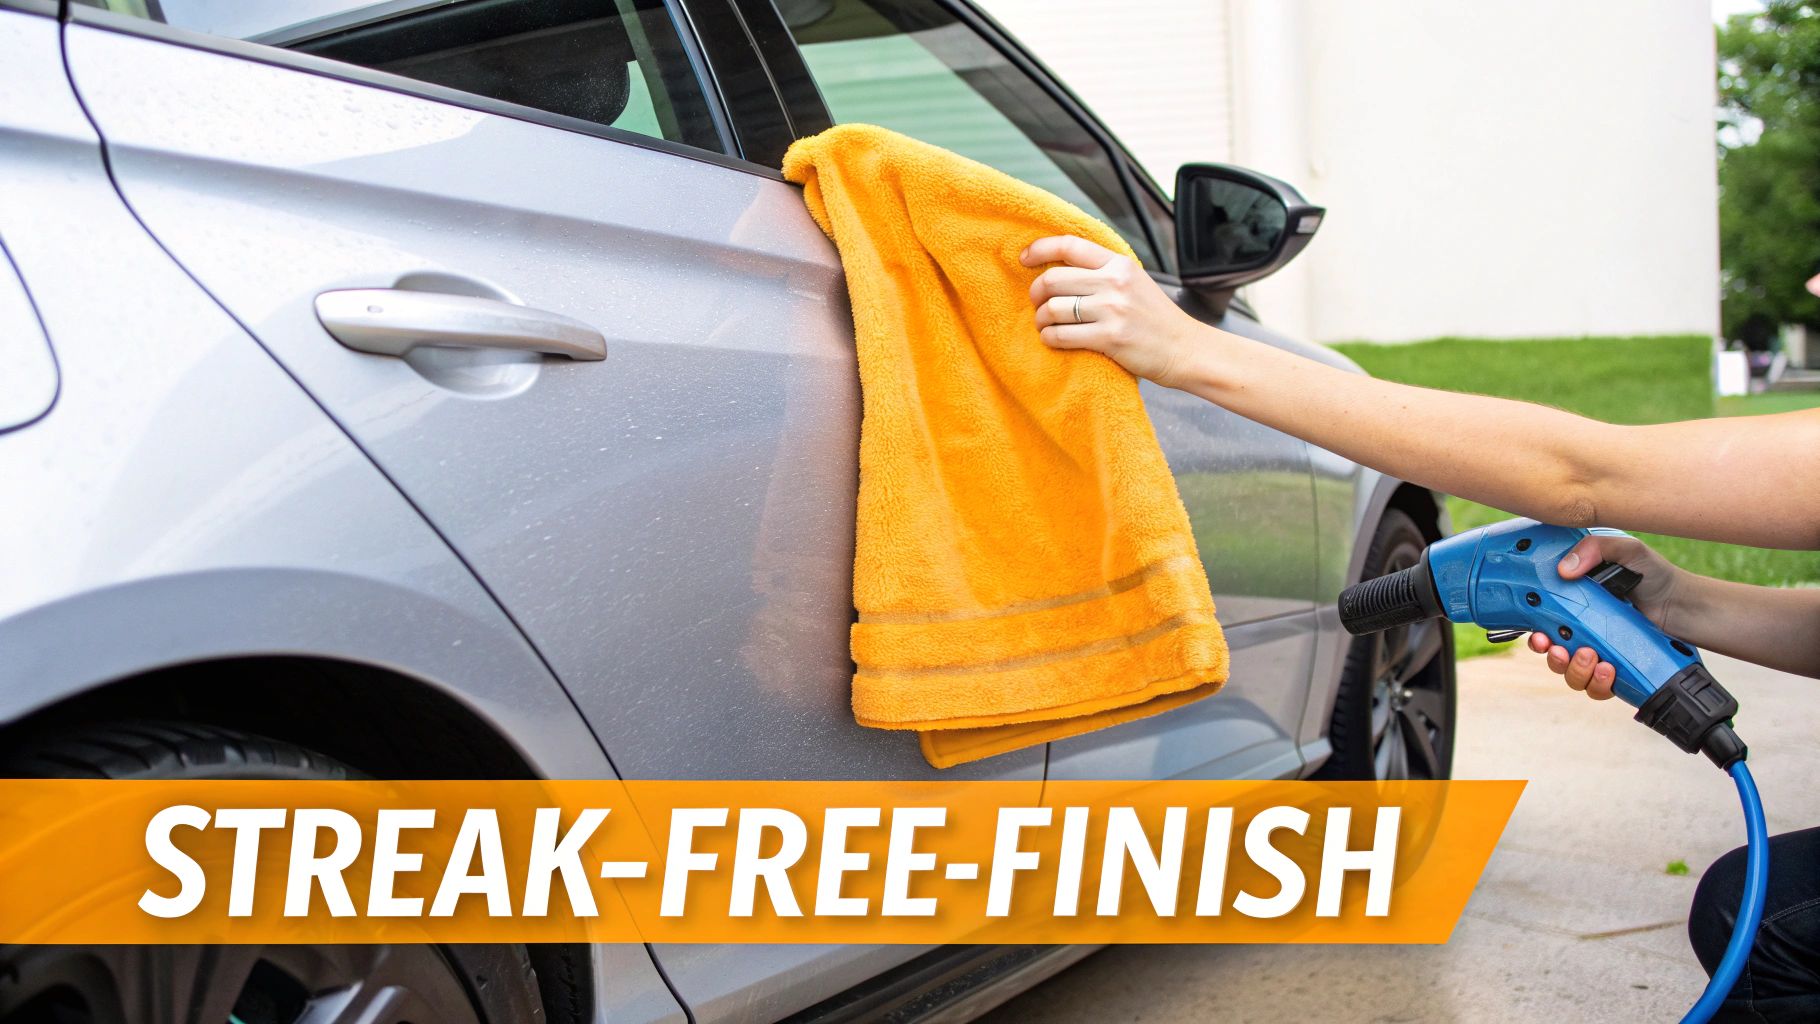
The Best Drying Techniques for a Spotless Finish
As soon as the rinsing is done, the clock is ticking. You want to get the car dry before the sun starts baking mineral deposits onto your paint. How you do this really comes down to the tools you have on hand.
My go-to method will always be a big, plush microfiber drying towel. The key is to avoid dragging it across the paint, which is a classic way to introduce tiny scratches. Instead, I use a much safer blotting technique.
- The Drape Method: I lay the towel out flat across a large panel, like the hood or roof.
- Pat, Don't Rub: Then, I just gently pat the towel, letting its absorbency do the work.
- Lift and Move: Carefully pick the towel straight up and move on to the next section.
This method minimizes contact and keeps that fresh layer from your car wash soap with wax perfectly intact.
My Experience: A leaf blower or a dedicated car dryer is an absolute game-changer for all the tricky spots. Think grilles, behind mirrors, around emblems, and in the wheel barrels. It blasts water out of those crevices where a towel just can't reach, which stops those annoying drips that always seem to appear ten minutes after you've finished.
Don't panic if you’re washing in less-than-ideal conditions and see a few water spots starting to form. A quick mist of detailer spray on a clean microfiber towel will usually take care of them before they get a chance to etch into the paint. Mastering this final stage is really what separates a "clean" car from a professionally detailed one. If you want to dive deeper, check out these top tips for achieving a spotless finish.
Insider Tips for a Show-Winning Shine
A good wash is the foundation, but getting that deep, dripping-wet shine that turns heads? That comes down to the little details. These are the pro-level tweaks I've picked up over the years that take your car's finish from just "clean" to truly spectacular.
If your vehicle already has a ceramic coating, using a car wash soap with wax is the perfect way to maintain it. It lays down a fresh, sacrificial layer of gloss and protection right on top of your coating. This quick-and-easy step revives that slick, water-beading magic and makes the underlying protection last even longer.
Smart Post-Wash Habits
So, how often should you be doing this? For a car you drive every day, I've found that washing every one to two weeks is the perfect rhythm. It keeps the grime from building up and constantly reinforces that protective wax layer, keeping your paint looking sharp.
Once the final rinse is done, don't just grab a towel and start drying. Here are a couple of post-wash habits that make all the difference:
- Bring in a Drying Aid: Grab a quality quick detailer and lightly mist each panel before you wipe it down. This simple trick adds lubrication, which is your best defense against inflicting tiny micro-scratches while drying. Plus, it leaves behind an incredible pop of gloss.
- Take Care of Your Towels: Seriously, don't just toss your microfiber towels in with your jeans and t-shirts. Regular laundry detergents and fabric softeners will clog the fibers, making them less absorbent and potentially harmful to your paint. Wash them separately with a dedicated microfiber detergent.
Taking care of your tools is just as important as the wash itself. A dirty or contaminated towel can drag grit right back across your perfectly clean paint, undoing all your hard work.
Even with the most careful technique, tiny imperfections can sometimes appear over time. Knowing how to remove swirl marks is a crucial skill for any enthusiast aiming for a flawless finish.
Of course, these tips are meant to supplement a proper, dedicated waxing routine, which provides that durable, long-term base layer of protection. For a complete walkthrough on that process, check out our guide on how to wax a car at home.
Common Questions About Wash and Wax Soaps
When it comes to using a car wash soap with wax, there are always a few questions that pop up. Let's clear the air on some of the most common ones I hear from fellow enthusiasts and detailers.
Can I Use This on My Ceramic Coated Car?
You bet. A good, pH-neutral wash and wax soap is actually one of the best things you can use to maintain a ceramic coating. It won't degrade your expensive coating at all.
Instead, it lays down a fresh, slick layer right on top. This little boost restores that amazing water-beading and adds a bit of gloss, acting as a sacrificial barrier that keeps your primary coating looking and performing its best. It's my go-to for a quick refresh between bigger details.
How Often Should I Be Using a Wash and Wax?
For a car you drive every day, washing it every one or two weeks with a wash and wax soap is the perfect rhythm. This keeps the grime from building up and maintains that protective wax layer without ever getting too thick.
Now, if you get hit with a week of non-stop rain or drive through a ton of road salt, you'll obviously want to wash it sooner. Just use your judgment.
Pro Tip: Think of this soap as a maintenance top-up, not a replacement for a full wax job. Your dedicated paste wax or sealant is the heavy-duty, months-long protection. The wash and wax soap is just what keeps that base layer looking and feeling fresh.
Does This Replace Traditional Waxing or Sealing?
Definitely not. This is probably the most important thing to get straight. The wax in these soaps is designed for a quick boost—it looks fantastic and gives you some protection that’ll last a week or two.
A proper paste wax or paint sealant is a different beast entirely. That's your durable, long-term foundation that you should be applying a couple of times a year. Using a wash and wax soap in between those major applications is the smartest way to keep your car looking sharp and well-protected year-round.
Ready to get that perfect, thick foam right from your garden hose? The SwiftJet Car Wash Foam Gun makes it happen, giving you a safer, faster, and more professional wash every single time. Discover the SwiftJet difference and get yours today!