Let's be honest, popping the hood to a grimy, grease-covered engine is just… uninspiring. But cleaning your engine bay is so much more than just a cosmetic touch-up. It’s one of the smartest, most proactive things you can do for your car. The process itself is straightforward: you’ll cover up the sensitive bits, hit it with a good degreaser, give it a gentle scrub and rinse, then dry everything off and add a protective finish.
Think of it as a crucial part of your vehicle's regular health check-up.
Why a Clean Engine Bay Is Your Best Kept Secret
A clean engine compartment is your first and best line of defense against surprise breakdowns and expensive repair bills. It's like giving your car’s heart a clean bill of health. When you wash away all that caked-on oil, dirt, and road grime, you get a clear, unobstructed view of what's really going on under the hood.
This isn’t just a nice idea—it’s a massive practical advantage that makes owning a car less of a guessing game. Routine checks become faster, more accurate, and far less of a chore.
Spot Problems Before They Start
Here’s a perfect real-world example. Imagine you’ve just spent an hour cleaning your engine. As you're stepping back to admire your handiwork, a little dark sheen on the valve cover gasket catches your eye. That tiny oil weep would have been completely invisible under a layer of dirt. Now you can get ahead of it with a simple gasket swap—an easy, inexpensive fix—before it turns into a major leak that could starve your engine of oil and cause catastrophic damage.
This kind of proactive maintenance applies to all sorts of things. A clean bay makes it incredibly easy to spot:
- Fluid Leaks: You can pinpoint the exact source of oil, coolant, or power steering fluid drips.
- Frayed Wires: Damaged wiring insulation stands out, helping you prevent electrical shorts.
- Cracked Hoses: Brittle vacuum lines and bulging coolant hoses are impossible to miss.
- Corrosion: You can catch and neutralize rust on battery terminals or other metal parts right away.
A clean engine isn't just for show cars. It’s a powerful diagnostic tool that turns you into a smarter, more proactive owner, saving you a ton of time, money, and headaches.
Let Your Engine Breathe (and Cool Down)
Another huge benefit is helping your engine manage heat properly. Thick, caked-on grease is basically an insulating blanket, trapping heat around the engine block and surrounding parts. Your engine is engineered to get rid of heat efficiently, and a layer of grime throws a wrench in that whole process.
While it might not cause your car to overheat on its own (if your cooling system is in good shape), that trapped heat absolutely accelerates the wear and tear on plastic and rubber components. Hoses get brittle faster, and plastic connectors crack long before they should, leading to frustrating vacuum leaks or other failures.
By keeping your engine clean, you’re helping it cool itself the way the engineers intended, which ultimately makes everything last longer. It’s no surprise that the professional engine cleaning market is projected to more than double to nearly USD 2.5 billion by 2033. More and more owners are realizing how important this is. You can find more details on this growing market trend online.
There are several compelling reasons to keep your engine bay looking its best. Here’s a quick breakdown of the most important advantages.
Key Benefits of a Clean Engine Bay
| Benefit | Why It's Important |
|---|---|
| Early Problem Detection | Spotting minor leaks, cracks, or frays before they become major, costly repairs. |
| Improved Heat Dissipation | Allows the engine to cool efficiently, extending the life of rubber and plastic parts. |
| Easier Maintenance | Working on a clean engine is faster, cleaner, and more pleasant. |
| Higher Resale Value | A clean engine bay signals to potential buyers that the car has been well-maintained. |
| Prevents Component Failure | Dirt and grease can degrade belts and electrical connections over time. |
Ultimately, taking the time to clean your engine bay is an investment in your vehicle's health and longevity. It's a simple task that pays big dividends down the road.
Getting Set Up for a Safe and Successful Clean

Proper prep is what separates a professional-looking engine detail from a costly, amateur mistake. I can't stress this enough. Think of it as your pre-flight checklist. Taking just 15-20 minutes to get your gear in order and protect your engine’s vulnerable parts is the real secret to a stress-free clean and fantastic results.
First things first: your engine must be completely cool to the touch. Seriously, don't even think about spraying a hot engine. Cleaning chemicals will flash-evaporate, leaving nasty stains you’ll have to clean all over again. Even worse, hitting hot metal with cold water can cause thermal shock, which can lead to cracked exhaust manifolds or other expensive headaches.
Gathering Your Essential Tools
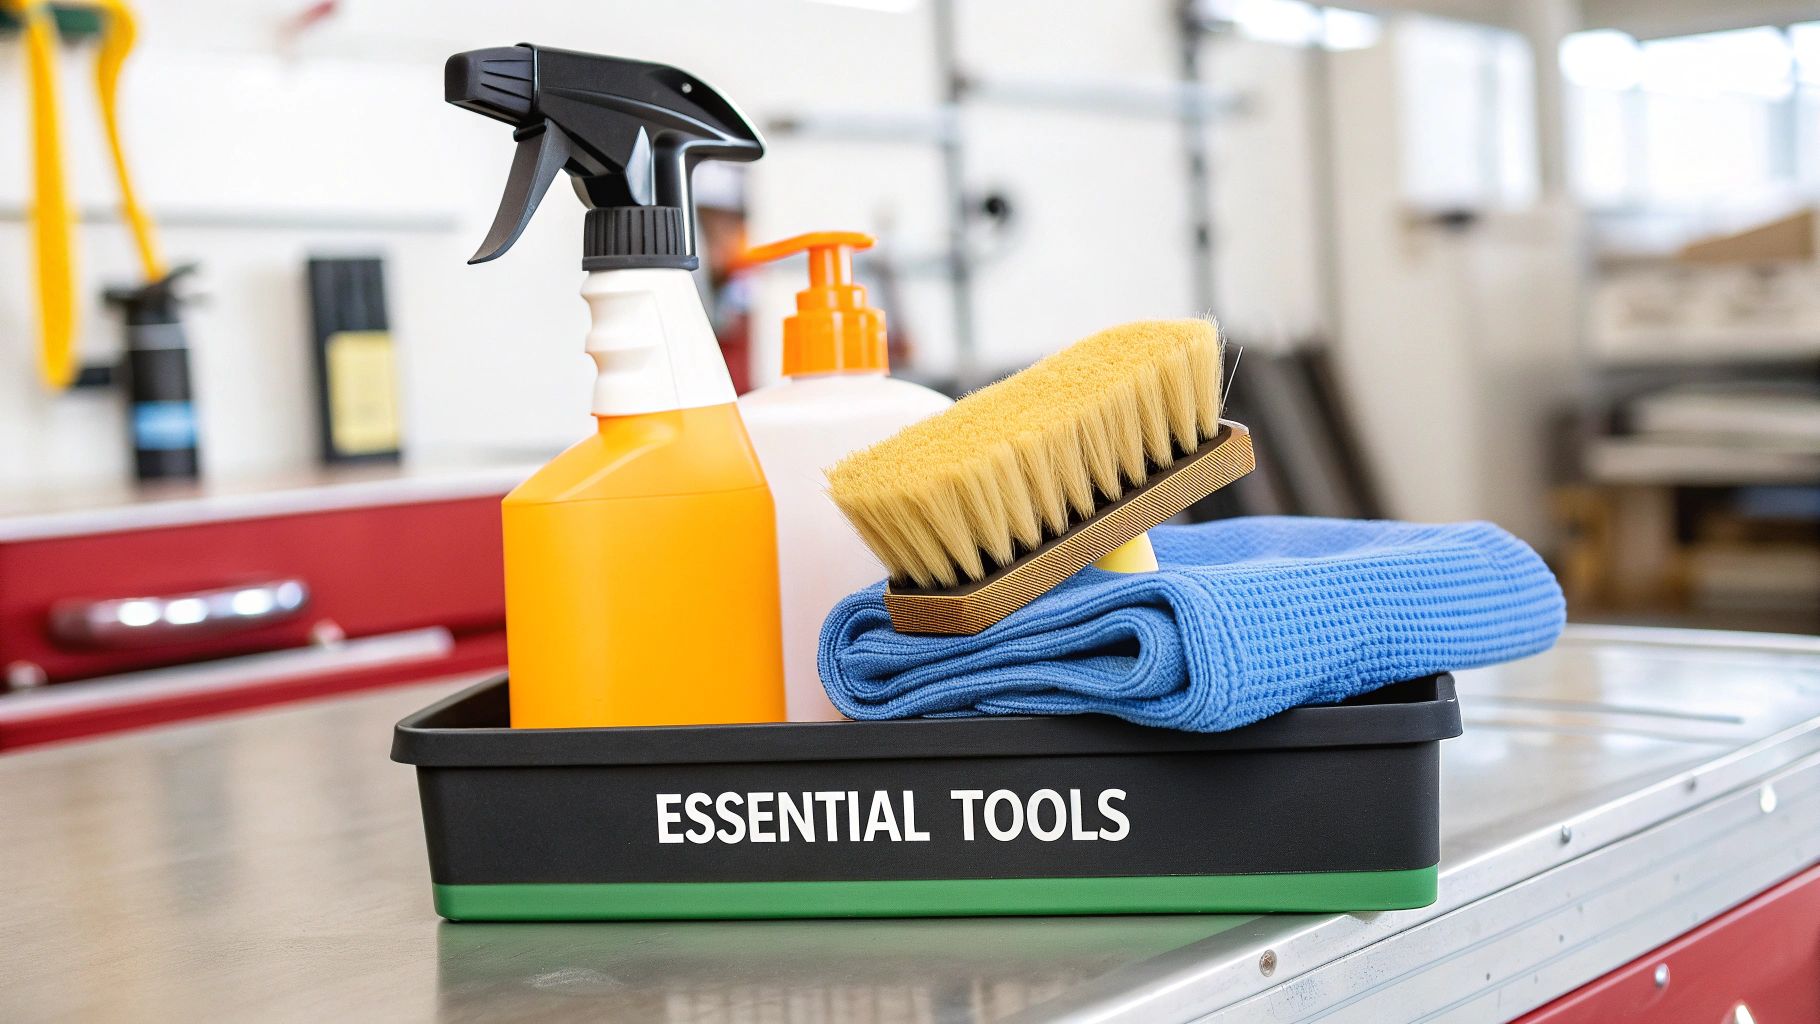
Having the right equipment on hand makes all the difference. You don't need a pro-level arsenal, just a few key items that will make the job much safer and more effective. A quick trip to the auto parts store or an online order will get you sorted.
Here’s what I always have ready:
- A Quality Degreaser: I usually start with a pH-neutral, citrus-based degreaser for general grime. If you're dealing with an engine that's caked in ancient, baked-on grease, you might need to step up to a more powerful solvent-based product.
- Assorted Brushes: A long-handled, soft-bristle brush is your workhorse for large, open areas. A collection of smaller detailing brushes—and yes, even old toothbrushes—are perfect for navigating all those tight nooks and crannies.
- Plastic Bags and Tape: Simple grocery bags and some painter's tape are your best friends for shielding electronics. Nothing fancy needed.
- Low-Pressure Water Source: A standard garden hose with an adjustable spray nozzle is all you need. Never use a high-pressure washer. The force is just too much for the delicate connections under the hood.
Before you get started, it's wise to think about runoff. You don’t want a greasy, chemical-laden puddle spreading across your driveway. Taking a look at a spill prevention plan template can give you some great ideas for containing the mess and keeping things clean and safe.
Protecting Sensitive Engine Components
This is, without a doubt, the most critical part of the entire prep stage. Modern engines are loaded with sensitive electronics that absolutely hate water. Your mission is to create a water-resistant shield around these key components before a single drop of water hits the engine bay.
The golden rule of engine cleaning is simple: An ounce of prevention is worth a thousand dollars in repairs. Covering these components isn't optional—it's cheap insurance against frying an expensive ECU or alternator.
I always start by disconnecting the negative battery terminal. It completely removes the risk of any electrical shorts. From there, grab your plastic bags and painter’s tape and get to work covering these vital areas:
- The Alternator: This is extremely vulnerable to water damage. Wrap it up nice and snug.
- Air Intake/Filter Box: Water sucked into the intake can cause hydrolock, which is catastrophic for your engine. Make sure this is sealed well.
- Fuse Box: Cover the lid tightly. You don't want any moisture seeping in and corroding your fuses and relays.
- Exposed Electrical Connectors: Take a moment to scan the engine bay for any large wiring harnesses or exposed plugs and give them a quick cover.
Here’s a little trick I’ve picked up over the years: I like to create small "dams" with balled-up painter's tape around the base of sensitive connectors. It helps divert water flow away from them and gives me extra peace of mind. For a more detailed breakdown, you can find more excellent tips in this guide on how to properly clean your car engine bay.
The Art of Degreasing and Rinsing
Alright, this is where the real transformation begins. With all your prep work done, it's time to let a quality degreaser work its magic and dissolve years of grime. The secret here is to work smarter, not harder. Let the chemicals do the heavy lifting for you.
Just a quick reminder: make sure you’re working on a cool or only slightly warm engine. Never, ever spray a cold degreaser onto a hot engine block.
Start by liberally spraying your degreaser across all the oily, dirty surfaces. A pro tip I learned years ago is to work from the bottom up. This simple trick prevents the cleaner from dripping down onto dry areas, which can cause streaks and uneven cleaning. Get generous with it, especially on those stubborn spots like the valve cover or around the power steering reservoir.
Let the degreaser dwell for about 3-5 minutes. This gives it enough time to penetrate and break down the grime's grip on the engine parts. But here’s the crucial part: never let the degreaser dry on the surface. If you see it starting to evaporate, just give it a light mist of water or a bit more product to keep it active.
Choosing Your Chemical Weapon Wisely
Not all engine gunk is the same, and neither are the cleaners made to fight it. Picking the right product is essential for getting great results without accidentally damaging plastics or rubber components. You wouldn't use a sledgehammer to hang a picture frame, right? Same principle applies here.
- Citrus-Based Degreasers: These are my personal favorite for most everyday jobs. They cut through light to moderate grime, road dust, and fresh oil spills with ease. Plus, they tend to be safer on sensitive materials and a little kinder to the environment.
- Solvent-Based Degreasers: For an engine bay that looks like it's been neglected for a decade—caked in thick, black, baked-on grease—you'll need to bring out the heavy artillery. Solvent-based cleaners offer serious cleaning power, but they demand more caution. Always test them on a hidden piece of plastic first to be safe.
The demand for effective, specialized cleaners reflects a bigger trend. The global engine cleaner market was valued at around USD 1.5 billion and is projected to hit nearly USD 2.3 billion by 2033. This growth shows just how many car enthusiasts and everyday owners are seeing the value in keeping this area of their car pristine. You can dive deeper into the engine cleaner market trends to see how the industry is advancing.
The Power of Agitation
After the degreaser has had a few minutes to soak in and do its thing, it's time to get a little hands-on. Agitation is what physically lifts the loosened dirt away from the surface. This is where that set of brushes you gathered comes into play.
Grab your long-handled, soft-bristle brush for the big, open areas like the engine cover or the inner fenders. Then, switch over to your smaller detailing brushes—even old toothbrushes work great—to tackle all the intricate spots. Get in and around hoses, between the intake runners, and deep into all those little nooks and crannies. You want to work the cleaner into a nice lather, focusing your effort on the filthiest parts.
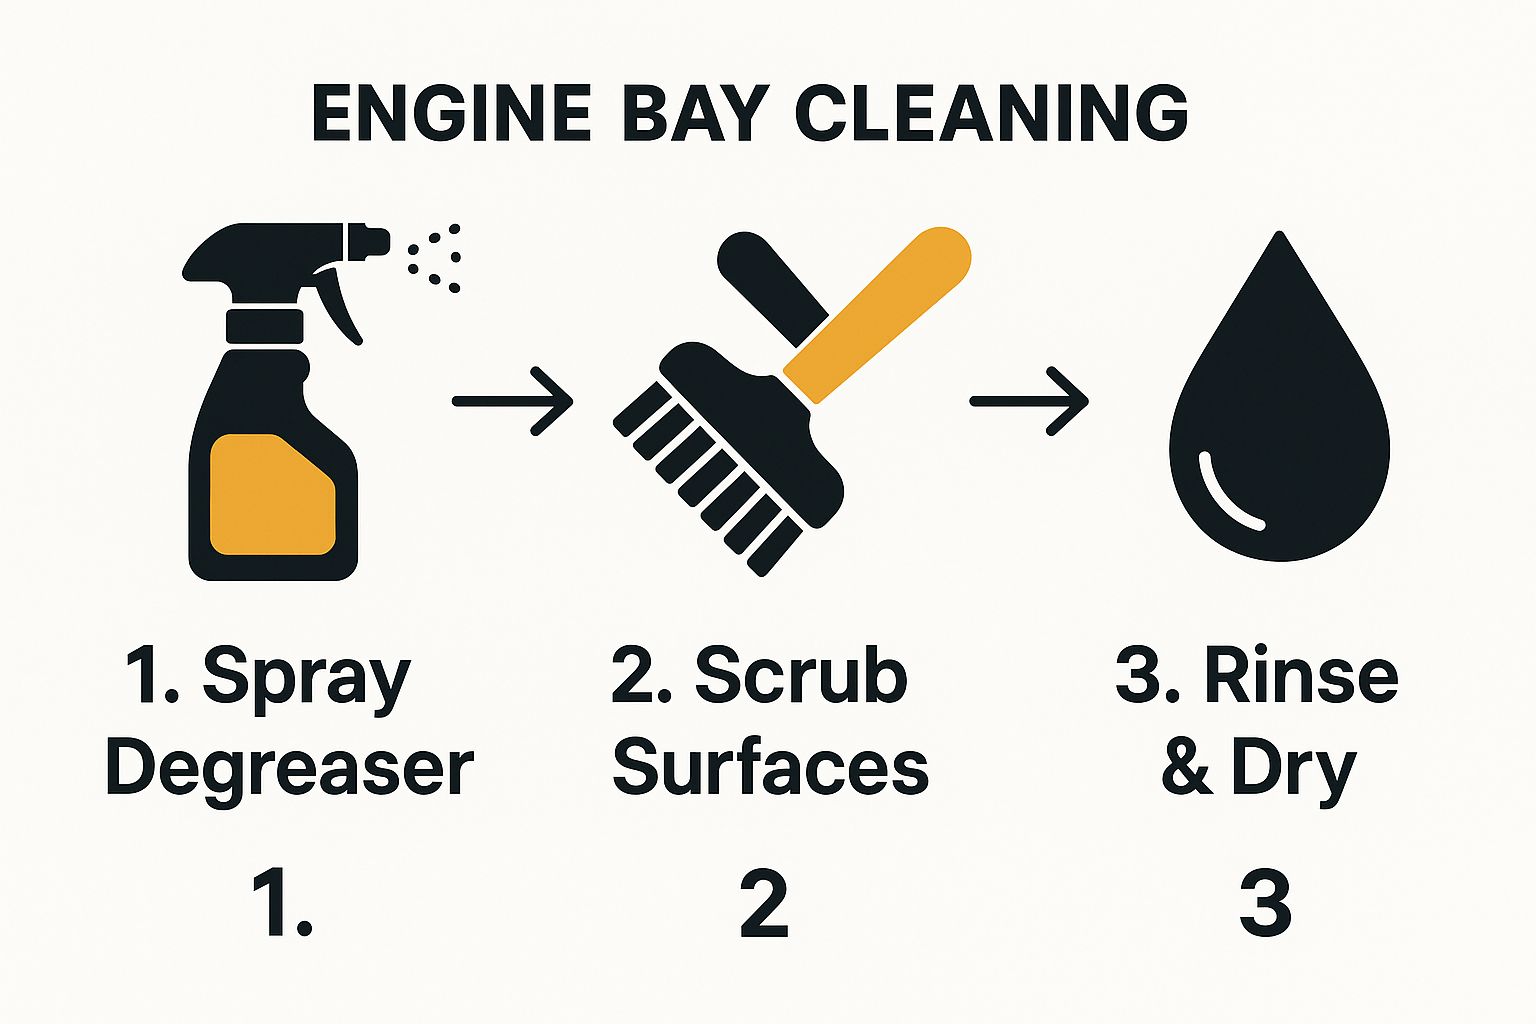
This image lays out the core process perfectly.

As you can see, degreasing, scrubbing, and rinsing are a connected flow. Each step builds on the last, and together they form the foundation of a properly cleaned engine bay.
Rinsing Without Regret
Now for the most satisfying step of all: washing away all that filth. Your rinsing technique is absolutely critical to avoid causing electrical headaches down the road. Put the pressure washer away for this job; a simple garden hose with a nozzle set to a "shower" or "mist" setting is all you need.
The secret to a safe rinse is using low pressure and high volume. You want to gently sheet water over the engine components, not blast them. This approach lets the water carry away the degreaser and dirt without forcing its way into sensitive electrical connectors.
Always rinse from the top down. Start at the back of the engine bay near the firewall and work your way forward and down. Gravity becomes your best friend here, ensuring that all the dirty water flows down and away from the areas you've just cleaned.
Be patient and thorough. You have to make sure you've rinsed out every last nook where the degreaser could be hiding. Any leftover residue will dry to a sticky film that actually attracts more dirt, completely undoing all your hard work. When the water running off the engine is perfectly clear, you know you’re done and ready for the final touches.
Drying and Protecting for a Lasting Finish

Getting your engine bay sparkling clean is a great feeling, but the job isn't over just yet. The final steps—drying and protecting—are what separate a good result from a professional one. This is your last line of defense against pesky water spots, corrosion, and potential electrical headaches.
Don't rush this part. It’s critical to get all the standing water out before you even consider starting the engine. Seriously, you can undo all your hard work if you skip this.
The Best Ways to Dry Your Engine Bay
Your main goal here is to chase water out of every nook and cranny. Pay special attention to electrical connectors and coil packs, as that's where moisture can cause real problems. The faster you can do this, the better.
My go-to tool for this is a simple electric leaf blower. It's fantastic. The sheer volume of air blasts water out of tight spaces without you ever having to touch anything.
Compressed air from an air compressor is another excellent option, giving you a bit more precision to target specific spots. Just watch the pressure; you don't need to go full blast and risk damaging something delicate.
No air tools? No problem. A good stack of clean, high-quality microfiber towels will work just fine. This method takes a bit more patience, but it’s just as effective. Remember to blot the water, don't just wipe it around. You'll probably use several towels as you meticulously dab everything dry. The core principles are the same whether you're drying paint or an engine, which you can read more about in our guide on the best way to dry a car after washing.
Applying a Protective Dressing
Once the bay is completely bone-dry, it’s time for the magic touch that makes everything look brand new. A quality engine dressing doesn't just restore that deep, rich black to plastics and rubber; it adds a vital layer of protection.
Here's a pro tip: A good protectant creates an anti-static barrier that actually repels dust and dirt. This keeps your engine bay cleaner for much longer and makes your next cleanup job way easier.
I always apply the dressing to a microfiber applicator pad first, never directly onto engine parts. This gives you total control, preventing overspray from getting on belts or metal surfaces where you don't want it. From there, just work the product into all the plastic covers, rubber hoses, and trim pieces.
Choosing Your Desired Finish
Engine dressings typically fall into two camps, and your choice really boils down to personal taste. Do you prefer a subtle, clean look or a high-impact shine?
| Dressing Type | Finish | Best For |
|---|---|---|
| Water-Based | Satin, matte, natural | Achieving a clean, OEM (original equipment manufacturer) look that isn't greasy or overly shiny. |
| Silicone-Based | High-gloss, wet look | Creating a deep, show-car shine that really makes plastics and rubber pop. |
Many professional detailers lean toward water-based dressings because they deliver that non-greasy, "like-new" finish. On the flip side, silicone-based products are perfect if you're after that super slick, wet-look shine that turns heads.
After you've applied the dressing, do one last quick pass with a clean microfiber towel. A light buff will even everything out and pick up any excess product. Now you can finally remove all the plastic bags and tape, reconnect the battery, and step back to admire an engine bay that looks as good as the rest of your car.
Common Mistakes That Can Wreck Your Engine
Knowing the right way to clean your engine is only half the battle. Knowing what not to do is what will save you from a world of expensive headaches. When I first learned how to clean my own engine bay, I realized that avoiding a few common but costly mistakes was just as important as the cleaning itself. These aren't just theories; they're based on years of seeing DIY jobs turn into repair shop nightmares.
The single biggest mistake I see people make is reaching for a pressure washer. It feels like the perfect tool for blasting away grime, but it's incredibly risky. That intense, focused stream of water can easily force its way past seals and into sensitive electrical connectors, frying critical components in a heartbeat.
I once watched a friend turn a simple Saturday cleaning project into a $1,500 repair bill. He thought a pressure washer would be quick and easy, but one accidental blast near the Engine Control Unit (ECU) was all it took. The car wouldn't start afterward. He'd fried the car's brain. A gentle garden hose is all you ever need.
Hot Engine Hazards and Chemical Reactions
Another major pitfall is trying to clean a hot engine. It’s tempting to get started right after a drive, but spraying cold water onto hot metal parts can cause thermal shock. This can lead to cracked plastic components or, in a worst-case scenario, even a warped exhaust manifold. It’s just not worth the risk.
On top of that, cleaning chemicals act completely differently on hot surfaces. A degreaser can flash-evaporate almost instantly, leaving behind a nasty chemical residue that's a real pain to remove and can permanently stain your engine components. Always, always work on an engine that is cool to the touch.
The goal is to clean your engine, not cook it. Patience is your best friend here. Letting the engine cool down completely is a non-negotiable step for a safe and effective clean.
Blunders That Lead to Bigger Problems
Beyond pressure washers and hot engines, a few other common errors can quickly derail your efforts. Just being aware of them will put you way ahead of the curve.
- Forgetting to Cover the Air Intake: This is a catastrophic mistake. If water gets sucked into your engine's intake, it can cause hydrolock. That’s a fancy term for when the pistons try to compress water instead of air, leading to bent rods and a completely destroyed engine. Always cover the intake securely.
- Using Aggressive Chemicals: Reaching for a bottle of tire shine to make your engine plastics look good might seem like a clever hack, but it's a terrible idea. Many tire dressings contain harsh petroleum distillates that can make plastics brittle and cause them to crack over time. Stick to dedicated, water-based protectants made for engine bays.
- Not Rinsing Thoroughly: Rushing the final rinse is an easy mistake to make when you're almost done. Any leftover degreaser will dry into a sticky, tacky film. Instead of a pristine engine, you'll end up with a dirt magnet that looks even worse than when you started.
Avoiding these simple mistakes is just as crucial as the cleaning process itself. For more holistic advice, you can check out our guide on the top car cleaning tips for a sparkling vehicle. By pairing good technique with an awareness of what to avoid, you’ll guarantee a successful and stress-free result every single time.
Your Engine Bay Cleaning Questions Answered

Even with a step-by-step guide, it's completely normal to have a few questions pop up, especially if this is your first time tackling the engine bay. I get it. Getting these last details ironed out is what builds the confidence to do the job right.
So, let's go over some of the most common questions I hear from fellow car enthusiasts.
How Often Should I Clean My Engine?
For a daily driver, a deep engine clean once a year is usually plenty. It’s enough to keep the grime from getting out of hand and gives you a chance to spot any potential issues.
That said, if you live in a particularly dusty area, enjoy hitting the trails, or just sorted out an oil or coolant leak, you’ll want to clean it more often. In those cases, a good cleaning every 3 to 6 months is a solid plan.
Is Using Water Actually Safe in There?
Yes, absolutely—as long as you’re smart about it. Your engine bay is built to handle water. It gets splashed every time you drive in the rain.
The secret is to use low-pressure water, like what you’d get from a standard garden hose with a spray nozzle. Never use a high-pressure washer. The real key to safety is taking the time to carefully cover sensitive electronics like the alternator, air intake, and fuse box before a single drop of water gets near them.
Degreaser vs. All-Purpose Cleaner: What's the Difference?
The main difference here is pure strength. Think of it this way:
- Engine Degreaser: This is the heavy-hitter. It’s a powerful, solvent-based cleaner formulated specifically to break down and dissolve stubborn, baked-on grease and oil.
- All-Purpose Cleaner (APC): This is your go-to for general maintenance. It’s much milder and works perfectly for clearing away light dust, dirt, and grime on plastic covers and hoses.
If you’re cleaning a neglected engine for the first time, start with a good degreaser. For your routine upkeep washes after that, an APC is all you'll need.
Here's a pro tip I swear by: use a leaf blower to dry the engine bay. It’s brilliant for pushing trapped water out of all the tight crevices and electrical connections. This dramatically speeds up drying time and helps prevent any chance of corrosion. Just remember to pull off any loose plastic bags you used for masking before you fire it up!
Ready to make every part of your car shine? The SwiftJet Car Wash Foam Gun turns any garden hose into a professional-grade foaming system, making car washing faster and more effective. Get yours today and experience a truly effortless clean!
