
So you've found a sticky, gooey drop of sap on your car. The key is to soften it up first. A little isopropyl alcohol or a good-quality sap remover will break it down, letting you gently wipe it away with a microfiber towel. The real secret? Act fast. Fresh sap is a minor cleanup job; hardened sap is a whole different beast.
Why You Need to Get Tree Sap Off Your Car—Immediately
That little drop of sap looks harmless enough, but don't be fooled. It’s a direct threat to your car’s paint job. Tree sap isn't just sticky; it's a mix of sugars and acidic compounds that immediately starts bonding with your car's clear coat.
Throw a little sun and heat into the mix, and things get worse, fast. The sap basically bakes onto the surface, hardening into a stubborn, amber-like resin. This isn't just a cosmetic issue. If you let it sit, the acid in the sap will start to etch into that protective clear coat, leaving a permanent dull spot in the paint.
The True Cost of Waiting
What starts as a simple cleaning job can quickly turn into an expensive visit to a detailer for paint correction. A fresh sap spot might take just a few minutes to dissolve and wipe away. But once it has hardened and etched the paint? You're looking at a job that requires polishing compounds and a lot of elbow grease to restore that smooth, glossy finish. Ignoring it is never the right move.
This is a huge issue for car owners everywhere. In fact, sap removal is a major driver in the global car care products market, which hit a value of about USD 11.52 billion in 2025 and is expected to climb to around USD 16.55 billion by 2034. Just like bird droppings or road tar, sap contains contaminants that will break down and permanently damage your car's finish if you don't deal with them quickly. You can dig deeper into these car care product market trends at Custom Market Insights.
Key Takeaway: The longer sap sits on your car, the more it bonds with the clear coat. Sunlight and heat act like an oven, speeding up the chemical reaction and seriously increasing the risk of permanent etching and discoloration.
From Sticky Spot to Permanent Blemish
Think of your car's clear coat as its skin. It's the first line of defense, shielding the color underneath from UV rays and small scratches. When sap hardens on it, it creates a concentrated stress point. Trying to just scrape it off without a solvent is a recipe for disaster—you'll almost certainly end up with deep scratches and swirl marks.
Ultimately, knowing how to remove sap isn't just about cleaning; it’s about preservation. By acting fast, you protect the integrity of your paint, keep your car looking great, and safeguard its resale value. Let's get into exactly how to tackle this common problem safely and effectively.
Choosing the Right Method for Sap Removal
Not all sap stains are created equal. The real secret to getting tree sap off your car without damaging the paint is picking the right tool for the job. And the most important factor? Time. How long has that sticky mess been sitting there, baking in the sun?
A fresh, gooey drip from this morning is a whole different beast than a hard, amber-like glob that’s been on your hood for a month. Fresh sap is still soft and hasn’t had a chance to truly bond with your car’s clear coat, making it pretty easy to dissolve. On the other hand, hardened sap has chemically fused with the paint's surface, so you’ll need something a bit stronger to break it down safely.
Fresh Sap vs. Hardened Sap
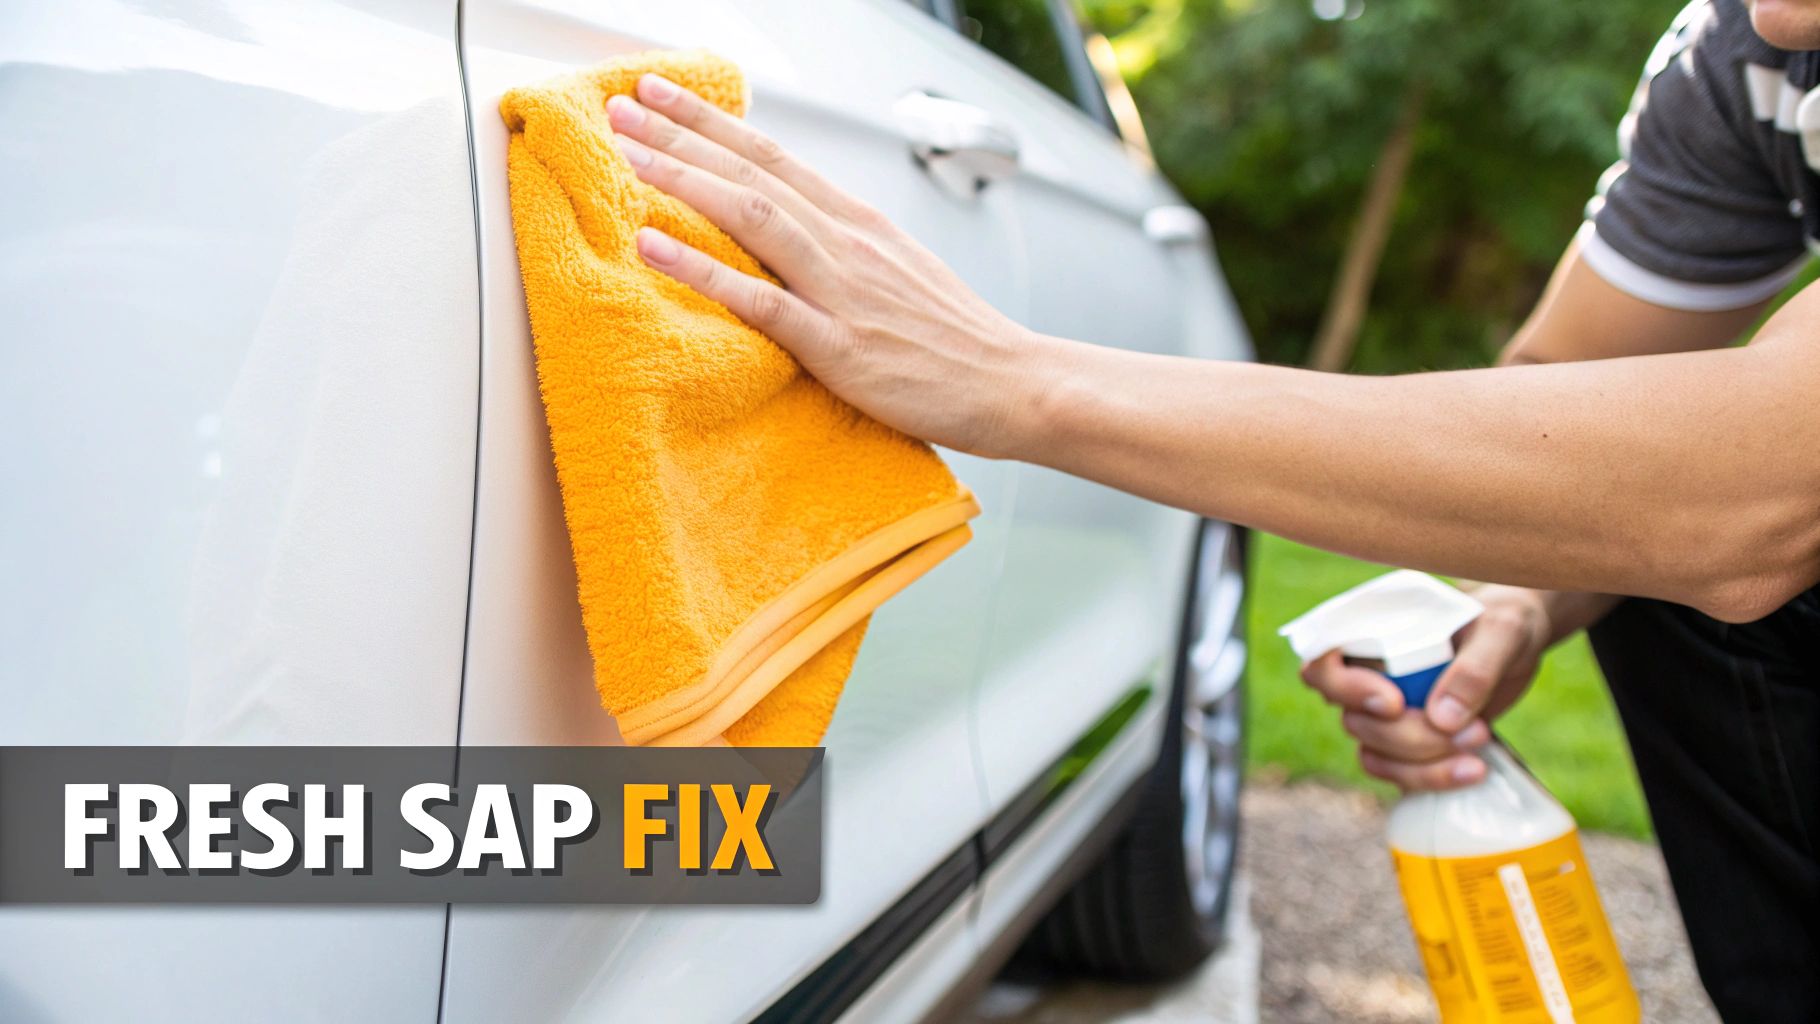
If you catch the sap while it’s still fresh and sticky, a gentle approach is usually all it takes. You might even have what you need sitting in your medicine cabinet. Isopropyl alcohol (rubbing alcohol) or even a little hand sanitizer on a soft microfiber cloth can dissolve the sugars in fresh sap surprisingly fast. The key is to let the solvent work its magic—gently dab and wipe, don't scrub like you're trying to remove a barnacle.
Once sap gets hit with UV rays and heat, it starts to crystallize and harden. It becomes much more stubborn and won't budge with mild cleaners. This is when you need to reach for a product specifically designed for the task. Trying to muscle it off with the wrong stuff will just lead to a lot of frustration and, even worse, a scratched-up finish.
This infographic lays out the game plan pretty clearly, showing why acting fast makes all the difference.
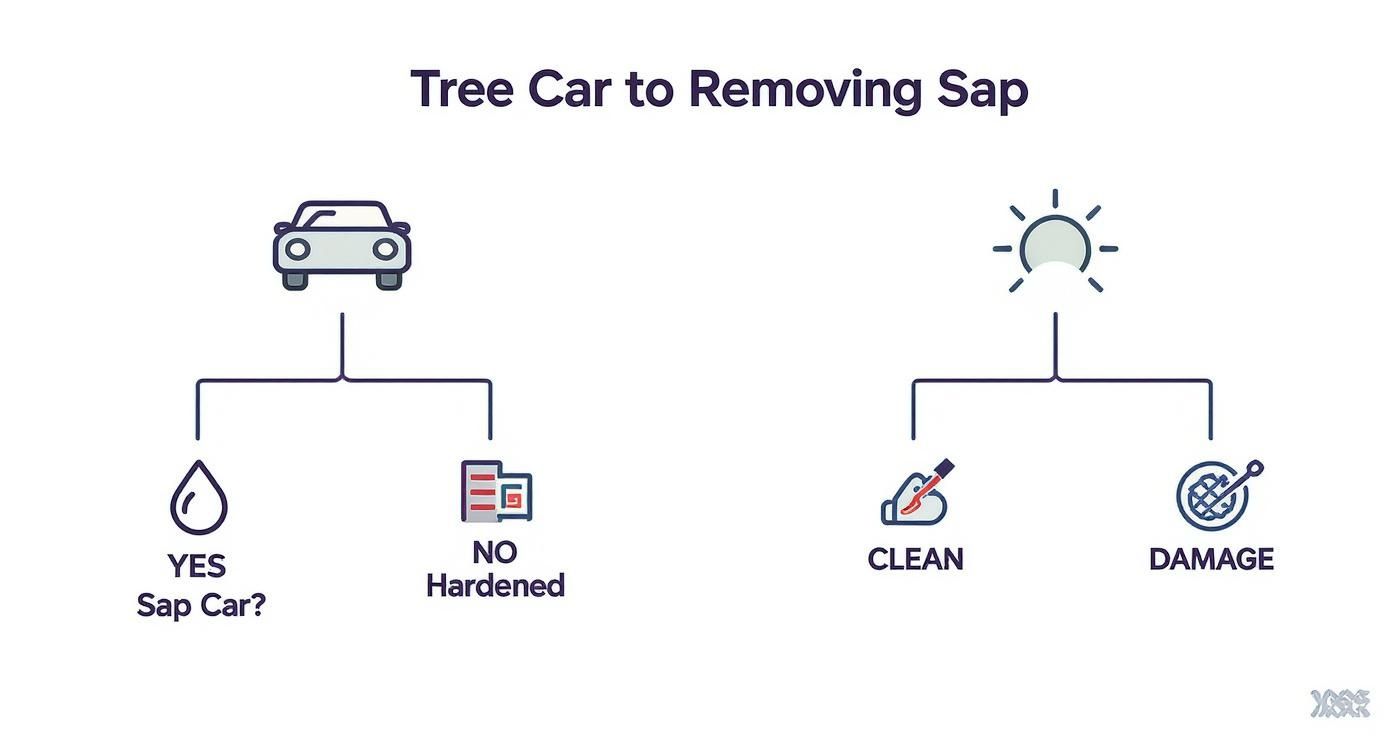
As you can see, dealing with sap while it's fresh gives you a clean, damage-free result. Waiting until it hardens dramatically increases the odds of it leaving a permanent mark on your paint.
Comparing Your Sap Removal Options
To help you decide, here’s a quick look at common sap removal solutions, what they're best for, and the potential risks involved.
| Method | Best For | Effectiveness | Risk to Paint |
|---|---|---|---|
| Isopropyl Alcohol | Fresh, sticky sap spots | High on fresh sap | Low |
| Commercial Sap Remover | Both fresh and hardened sap | Very High | Very Low |
| Detailing Clay Bar | Embedded, hardened sap residue | High | Low to Medium |
| WD-40 / Lubricants | Stubborn, resinous pine sap | Medium to High | Medium |
Among all the options, a lot of detailers swear by citrus-based cleaners. You can read more about the benefits of citrus-based cleaning to see why they work so well. Their natural solvents are tough on sticky resins but are formulated to be safe for automotive paint.
Pro Tip: Always start with the least aggressive method. Give isopropyl alcohol a shot on a small, inconspicuous area first. If that doesn't do the trick, then it’s time to move up to a dedicated commercial sap remover or a clay bar. This "start gentle" approach protects your paint by ensuring you only use as much power as you truly need.
Handling Fresh Sap with Household Solutions
Catching tree sap the moment it lands on your car is the best-case scenario. When it's still fresh and sticky, it hasn't had time to bake in the sun and stubbornly bond to your paint's clear coat. You can usually get it off with a few common items you already have, making for a quick and painless cleanup.
But before you touch that sap spot, stop. The most common mistake people make is trying to wipe it off a dirty car. Your car’s surface is covered in a fine layer of dust and grit, and rubbing that sap spot is like taking fine-grit sandpaper to your paint. You'll almost certainly leave behind a web of fine scratches and swirl marks.
First things first, you have to clean the area.
You don’t need to do a full-blown wash. Just grab a bucket of soapy water and a clean wash mitt, and gently clean the panel where the sap is. If you're looking for a great DIY option, check out our guide on whipping up a homemade car wash solution. Once the panel is clean and completely dry, you're ready to get that sap off for good.
The Gentle Solvent Technique
Your secret weapon for fresh sap is isopropyl alcohol—the regular rubbing alcohol you find at any pharmacy. I find that a 70% concentration or higher works best. In a pinch, alcohol-based hand sanitizer will also get the job done, since it's the same active ingredient doing the heavy lifting. The alcohol acts as a solvent, safely breaking down the sap's sticky sugars without damaging your paint.
Here's how I approach it for a perfect, scratch-free removal:
- Apply the Solvent: Never pour alcohol directly onto your paint. Instead, dampen a small section of a clean, plush microfiber towel.
- Let It Dwell: Take the damp part of the towel and simply lay it over the sap. Let it sit there for about 30-60 seconds. This is the most important part—you're giving the alcohol time to work its magic and dissolve the sap.
- Dab, Don't Rub: After a minute, lift the towel. The sap should be soft and almost gelatinous. Now, gently dab or blot at it. You'll see the sap start to lift right off the paint and transfer to the towel. If some remains, switch to a clean part of the towel, add more alcohol, and repeat the process. The trick is to let the chemical do the work, not aggressive rubbing.
Crucial Tip: Resist the urge to scrub or wipe in circles. That kind of pressure is what causes micro-scratches, or swirl marks. Once the alcohol has done its job, the sap will lift off with just a few gentle dabs.
Don't Forget the Final Step: Protection
Getting the sap off is only half the battle. Isopropyl alcohol is an amazing cleaner, but it’s so effective that it will also strip away any wax or sealant protecting your paint. That leaves the clear coat naked and exposed to the elements.
Once the sap is gone, wipe the area with a clean, dry microfiber towel to remove any alcohol residue. Then, you absolutely must re-protect the spot. A quick spritz of spray wax or a small application of paste wax is all it takes. This simple final step restores that crucial protective barrier, shielding your paint from UV rays and making it harder for dirt and sap to stick next time.
Tackling Tough, Baked-On Sap Stains
Sometimes, that sticky little sap spot gets missed. After a few days baking in the sun, it’s no longer just a nuisance—it has transformed into a hardened, amber-like resin that’s practically bonded to your car’s clear coat. At this point, simple household remedies won't make a dent. You need to bring out the big guns.
This is where specialized products like commercial sap removers and detailing clay bars come into play. They’re designed specifically to break down these stubborn stains without damaging your paint.
The right tools are incredibly effective. A good sap remover or a clay bar can get rid of hardened sap in just 10-15 minutes. More importantly, keeping your paint free of these contaminants pays off in the long run. Cars treated for issues like this regularly retain as much as 20-30% more of their paint gloss over a 3-year period. It's a common problem, too; professional detailers report that sap removal makes up 12-18% of their exterior work during peak seasons.
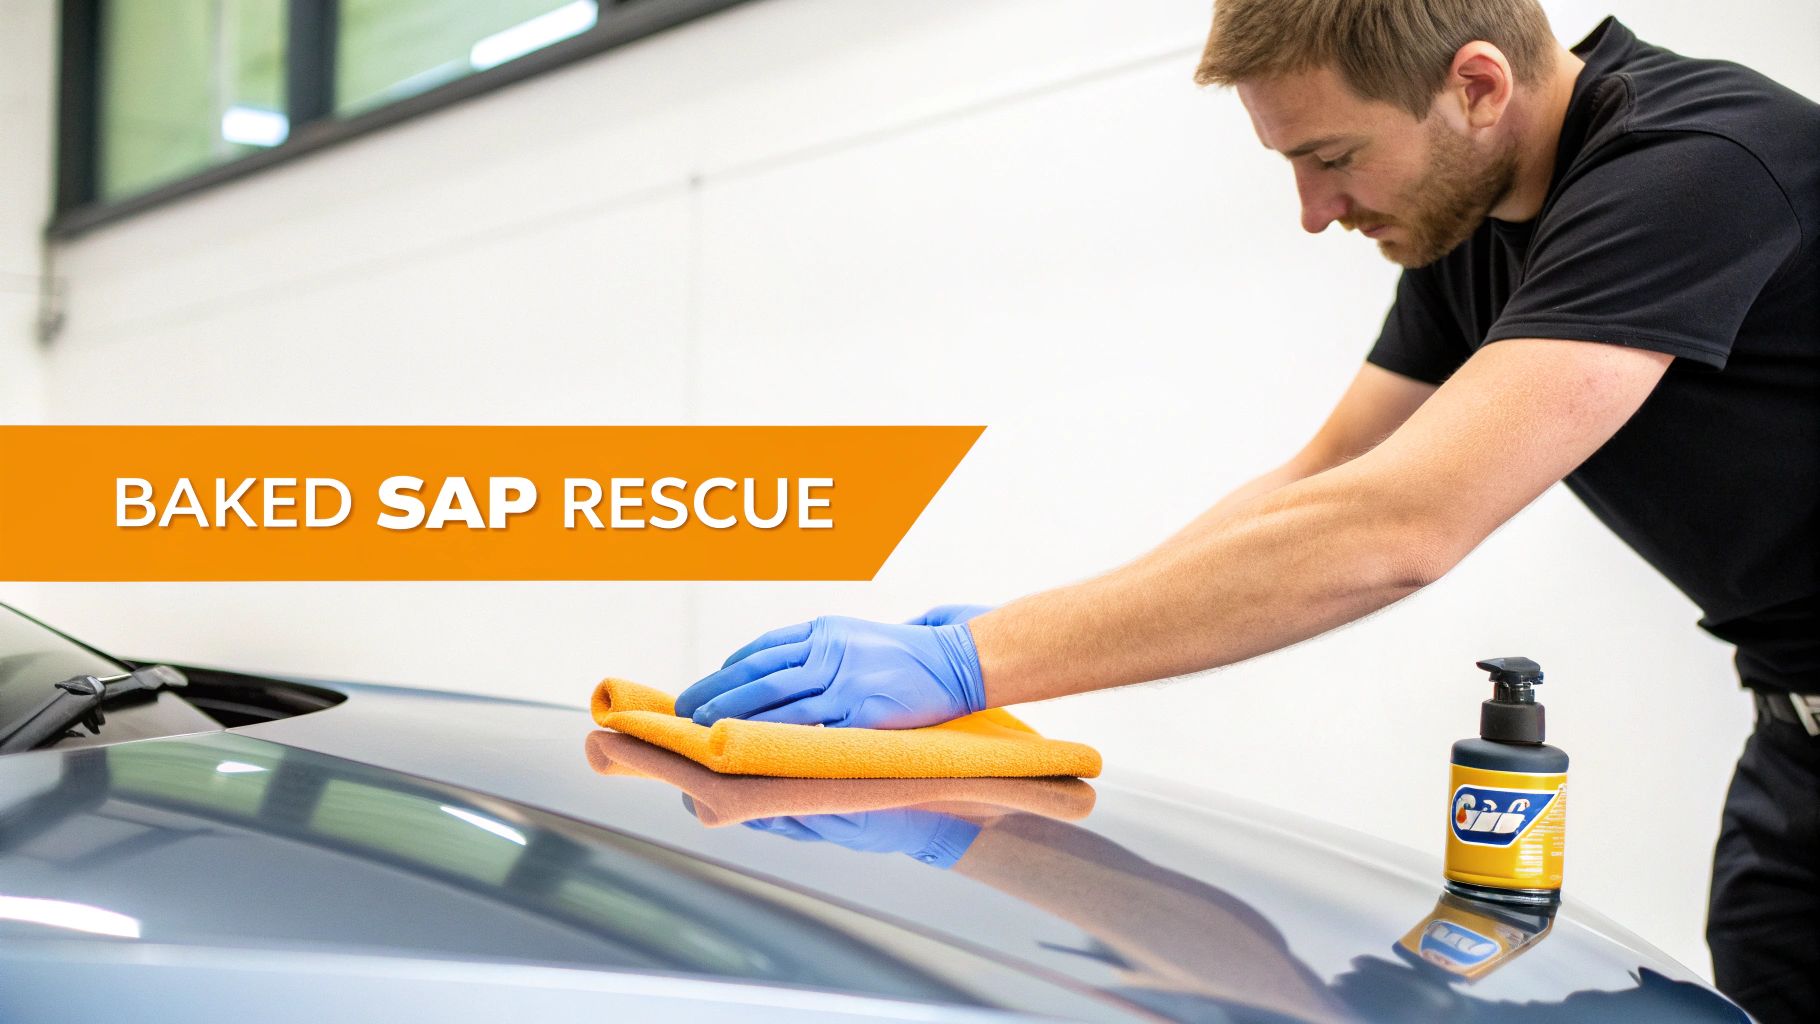
How to Use a Commercial Sap Remover Safely
Commercial sap removers are your first line of defense. These are powerful solvents specifically formulated to dissolve hardened resin without eating into your paint. But because they're strong, you have to use them correctly.
The single most important thing to do is a patch test. Before you go spraying it on the visible stain, find a hidden spot on your car—the inside of the fuel filler door or a lower door jamb are great options. Apply a small amount, wait a minute, and wipe it off. If there's no discoloration or damage, you're good to go.
Once you’ve done your test, apply the remover right onto the hardened sap. Let it sit and work its magic for the time recommended on the bottle, usually about 60-90 seconds. You’ll actually see the resin start to soften and break down. From there, just take a clean microfiber towel and gently wipe it all away.
Mastering the Detailing Clay Bar
What if the sap remover leaves a little something behind? Or maybe the spot just feels a bit rough to the touch? That’s the perfect time to grab a detailing clay bar. A clay bar is an engineered resin that works by physically pulling embedded gunk out from the pores of your paint, leaving the surface perfectly smooth.
The golden rule of claying is lubrication, lubrication, lubrication. Never try to use a clay bar on a dry surface; it will catch, drag, and leave fine scratches all over your paint. You have to use a dedicated clay lubricant or a quick detailer spray to create a slick surface for the bar to glide on.
Here’s how to get that glass-smooth finish:
- Prep the clay. Start by kneading a small piece of the clay bar until it's pliable, then flatten it into a small pancake, about the size of a silver dollar.
- Spray it down. Be generous with your lubricant. Spray the sap-affected area and the face of the clay bar itself. More is better here.
- Glide, don't press. Using very light pressure, just glide the clay back and forth over the lubricated spot. You’ll feel it grabbing the contaminants—it might even make a slight gritty sound at first. That's how you know it's working.
- Keep it clean. As the clay picks up the sap and other gunk, fold it over and knead it to expose a fresh, clean surface. This is key to avoiding scratching the paint with the debris you just picked up.
When you're finished, run your fingertips over the area. It should feel incredibly smooth. For a deeper dive into the technique, take a look at our easy step-by-step guide on how to clay bar a car.
Expert Insight: Using a clay bar is like a deep-cleanse for your paint. It pulls everything out, including any wax or sealant that was there before. Because of this, it's absolutely crucial to apply a fresh coat of wax or a paint sealant afterward. This final step protects the now-exposed clear coat from UV rays and future grime.
Preventing Future Tree Sap Problems
https://www.youtube.com/embed/J3gHoGl8q_s
After the hassle of getting a stubborn sap spot off your paint, you’re probably not eager to do it again. The best way to deal with tree sap is to stop it from becoming a problem in the first place. This really comes down to a two-pronged approach: where you park and how you protect your car's finish.
The most effective defense you have is a high-quality layer of protection on your paint. Think of wax, paint sealants, or ceramic coatings as a clear, sacrificial shield. This barrier sits on top of your car’s clear coat, so when sap inevitably drips down, it lands on the protective layer, not the paint itself. This makes removal a breeze—often, the sap will slide right off with just a gentle wash.
For a deeper dive into this, our guide on how to protect car paint for lasting brilliance has you covered.
It’s this focus on proactive protection that has fueled so much growth in the car detailing world. The industry was valued globally at around USD 39.89 billion in 2023 and is projected to climb to USD 55 billion by 2029. More and more car owners are catching on to the fact that an upfront investment in protection saves a lot of headaches from contaminants like tree sap down the road.
Smart Parking and Tree Awareness
Beyond coatings, a little bit of situational awareness can make a huge difference. Let's be honest, some trees are just messier than others, especially at certain times of the year.
- Know the Main Culprits: Pines, maples, birches, and oaks are notorious sap-drippers. If you can park somewhere else, do it.
- Watch Out for "Honeydew": That sticky stuff might not even be sap. It could be "honeydew," which is a sugary waste product from aphids feeding on leaves. It’s just as damaging and is incredibly common under linden and tulip trees.
- Check a Tree's Health: A sick or stressed tree can sometimes go into overdrive with sap production. Having a basic tree disease identification guide handy can help you spot problematic trees in your own yard that might need attention.
Expert Tip: A car cover seems like an obvious fix, but it can backfire. If either the cover or your car has even a thin layer of dust on it, dragging that cover on and off will grind that grit into your paint. The result is a fine web of micro-scratches that are a much bigger problem than a few spots of sap.
Of course, nothing beats a consistent wash schedule. Cleaning your car every week or two will wash away any fresh sap before it has a chance to bake in the sun and really bond to the surface. By combining smart parking with a solid layer of paint protection, you can turn a potential sap nightmare into a minor, easily managed task.
A Few More Questions About Car Sap Removal
Even with the best game plan, a few tricky questions always seem to pop up when you're dealing with stubborn tree sap. I've heard just about all of them over the years. Let's clear up some of the most common myths and "what if" scenarios so you can get the job done right.
Think of this as your quick-reference guide for those moments when you're standing in your driveway, staring at a sticky mess, and wondering what to do next.
Can I Just Grab WD-40 or Nail Polish Remover?
I get why this is tempting. You have them in the garage or under the sink, and they seem like strong solvents. But please, step away from the car with those. While WD-40 might soften sap a bit, it leaves a greasy, oily film that’s a nightmare to get off your paint. Even worse, it can stain your plastic and rubber trim.
Nail polish remover is a straight-up "no." If it has acetone in it—and most of them do—it's strong enough to dissolve your car's clear coat and paint right along with the sap. Don't risk a several-hundred-dollar paint repair to save a few bucks. Just stick with the safe stuff, like isopropyl alcohol or a dedicated automotive sap remover.
How Do I Know If the Sap Already Damaged My Paint?
This is a big one, especially if the sap has been baking in the sun for weeks. Once you've cleaned the sap off, wash and dry the area thoroughly. Then, take a close look at it in good light, viewing it from a few different angles.
Now, run your hand over the spot. Does it feel totally smooth? If it does, but you can still see a faint, dull outline of the sap blob, you're looking at etching. This is where the acids in the sap have ever-so-slightly eaten into the clear coat.
The good news is that minor etching can usually be buffed out with a good polishing compound and a little elbow grease. If the spot feels rough or pitted, however, the damage is deeper. That might require a professional paint correction to make it disappear completely.
Will a Normal Car Wash Take Care of Sap?
I wish it were that easy, but in almost every case, the answer is no. Your standard car wash soap is designed to tackle road grime and dirt, not the sticky, resinous compounds in tree sap. It just doesn't have the right chemistry to break it down, especially once the sap has hardened.
Trying to scrub it off during a wash is one of the fastest ways to scratch your paint. The only truly safe and effective way to remove sap is to dissolve it first with the right solvent, allowing it to be gently wiped away.
Is It Safe to Remove Sap from Windows?
Absolutely, and it's a whole lot easier than working on paint. Glass is way tougher and more chemically resistant than your car’s clear coat, so you have more options. You can use the same methods, like isopropyl alcohol or a dedicated remover, without any worry.
For that super-crusty, fossilized sap on your windshield, you can even bring out the big gun: a fresh razor blade. Just be sure to lubricate the glass first with some window cleaner, hold the blade at a very low, flat angle, and gently scrape the sap away. Never, under any circumstances, try this on your car's paint. You'll instantly create deep, painful scratches.
For a faster, safer, and more effective wash every time, trust SwiftJet. The SwiftJet Car Wash Foam Gun turns any garden hose into a professional-grade foamer, lifting dirt and grime away to prevent scratches and make jobs like sap removal even easier.