
When it comes to washing your car, the two bucket wash method is hands-down the most important change you can make to prevent swirl marks and fine scratches. This single technique is what separates a quick, potentially damaging wash from a professional-grade detail. It's all about keeping your clean, soapy water separate from the dirty rinse water.
The Secret to a Scratch-Free Shine
Have you ever washed your car, stepped back to admire your work in the sun, and been horrified to see a web of fine scratches all over the paint? Those dreaded swirl marks don't come from aggressive buffing; they usually come from a contaminated wash mitt.
Think about it. You wash a filthy lower panel of your car, and your mitt is now loaded with grit and road grime. If you're using just one bucket, you dunk that gritty mitt right back into your soapy water. Now, all that abrasive dirt is floating around in your "clean" solution. You've essentially turned your wash mitt into a piece of fine-grit sandpaper, ready to drag across the next panel. It’s a recipe for disaster.
Why This Method is the Gold Standard
The two bucket wash method is the simple, brilliant solution to this very common problem. It's a fundamental shift in your process that isolates the dirt and protects your car's delicate clear coat. The logic is simple but powerful:
- Wash Bucket: This one is filled with your car shampoo and water mix. Its only job is to load up your wash mitt with fresh, clean, and lubricating suds.
- Rinse Bucket: This bucket contains only plain water. You'll use it to rinse all the collected dirt and grime off your mitt before you even think about going back to the soap.
By creating this separation, you break the cycle of contamination. After cleaning a section of your car, you dunk the dirty mitt into the Rinse bucket first. The grit and grime release from the mitt and sink to the bottom. Then, with a now-clean mitt, you dip into your Wash bucket for a fresh load of suds.
This simple process ensures you're only ever touching your car's paint with the cleanest possible mitt. It's the cornerstone of safe washing and what gives professional detailers that flawless, swirl-free finish.
Still not convinced? Let's break down the core differences. While using one bucket seems faster, the extra minute it takes to set up a second one pays huge dividends in protecting your paint's finish and value.
One Bucket vs. Two Bucket Method At a Glance
| Aspect | Single Bucket Method | Two Bucket Wash Method |
|---|---|---|
| Water Contamination | High. Dirt from the car goes directly back into the soap solution. | Low. Dirt is isolated in a separate rinse bucket. |
| Risk of Scratches | Very High. Abrasive particles are reapplied to the paint. | Very Low. Wash mitt is rinsed clean before reloading with soap. |
| Paint Finish | Prone to swirl marks and micro-scratches over time. | Maintains a clearer, deeper, and more reflective finish. |
| Required Gear | 1 bucket, 1 wash mitt. | 2 buckets, 1-2 wash mitts (ideally with Grit Guards). |
| Best For | Not recommended for any car you care about. | Anyone wanting to preserve their car's paint and value. |
As you can see, the two-bucket system is a clear winner for anyone serious about car care. It’s a small investment in time and equipment that protects the much larger investment you have in your vehicle.
Beyond Just Buckets
While mastering the two-bucket method is a huge leap forward, it’s just one piece of the puzzle. Understanding the full scope of general car cleaning practices—from pre-washing to drying—will elevate your results even further. This isn't some secret technique reserved for detailing fanatics; it’s a practical, essential practice for any car owner who wants to keep their vehicle looking its best for years.
Building Your Professional Wash Kit
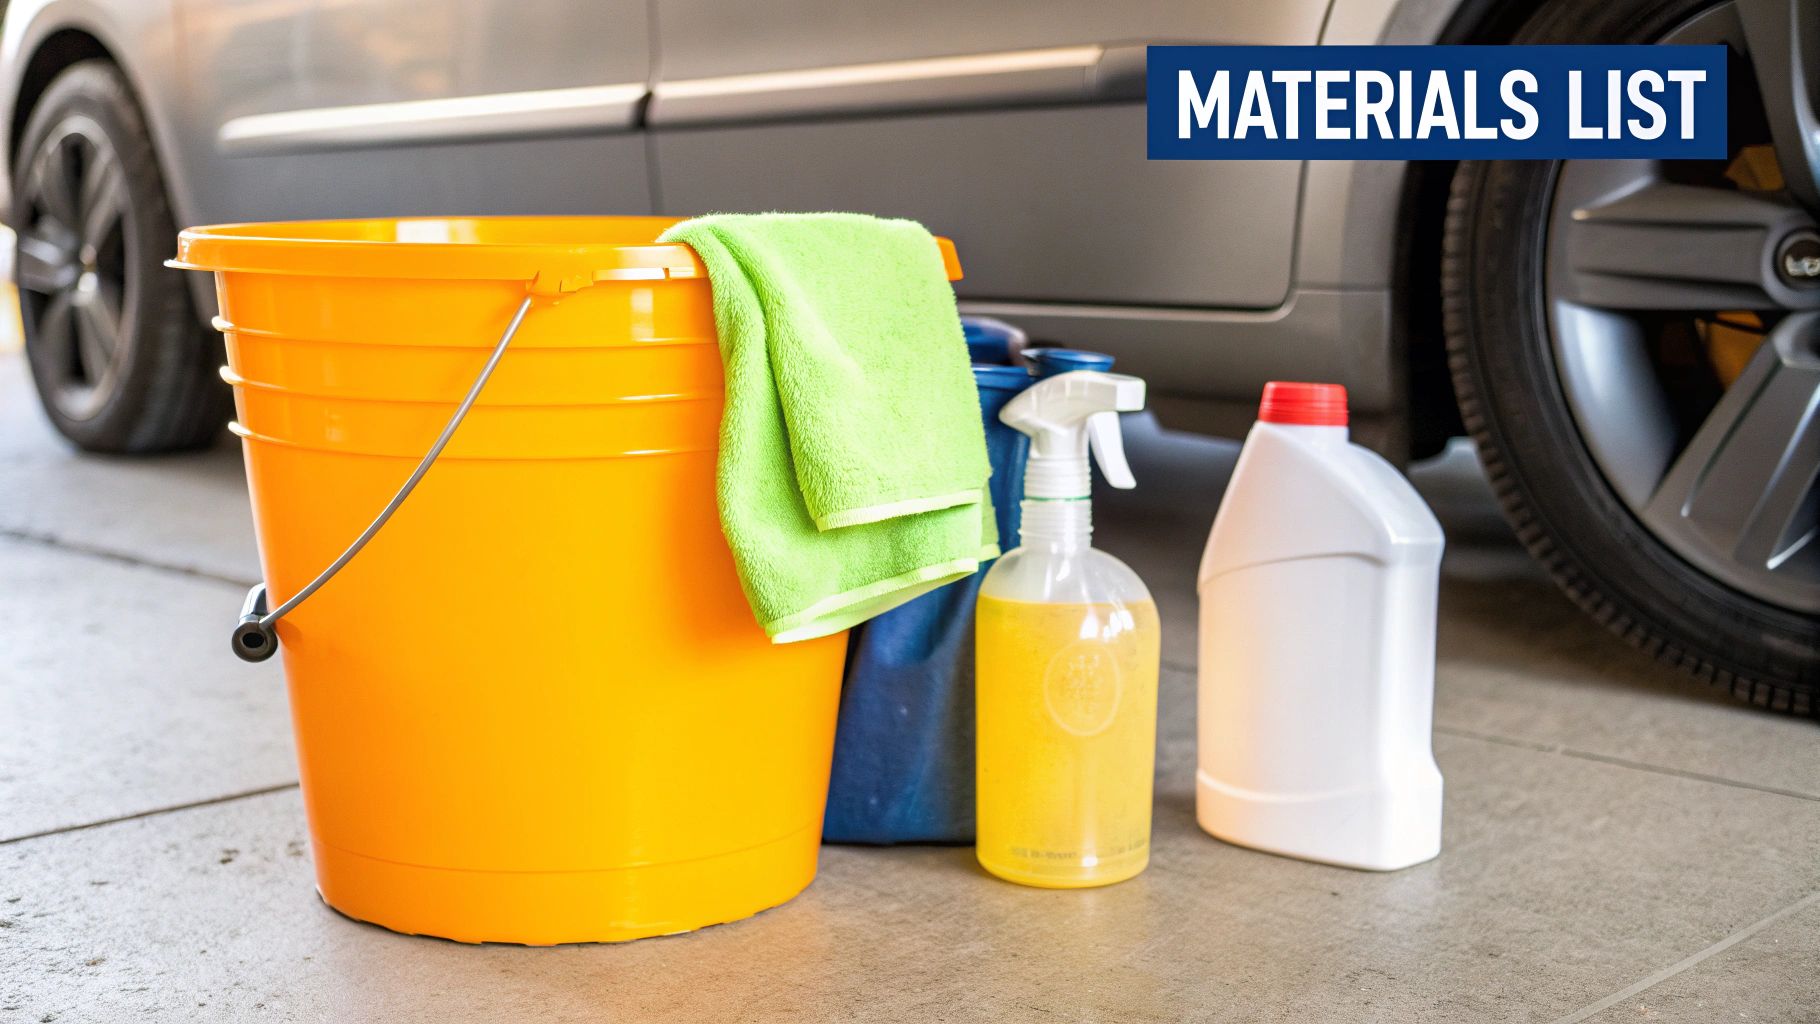
Before you even think about turning on the hose, let’s talk gear. Getting a professional, scratch-free finish has less to do with elbow grease and more to do with having the right tools for the job. This isn't about tracking down the most expensive products on the shelf; it's about understanding why each piece of equipment is critical for protecting your car's paint.
The core of this whole system, naturally, is the buckets. You absolutely need two. I’ve seen people try to get by with one, and it just doesn't work. Go for big 5-gallon buckets. The extra volume isn’t just for show—it gives dirt more room to disperse, which seriously cuts down on the risk of you picking it back up and dragging it across your paint.
The Non-Negotiable Safety Net
Now, here’s the part people often skip: inside each of those buckets, you need a Grit Guard. This is non-negotiable. These simple plastic grates sit at the bottom and act like a washboard for your mitt.
Every time you bring your dirty mitt back for a dunk in the rinse bucket, you scrub it against the guard's surface. This knocks all the nasty grit and dirt particles loose, and they sink safely to the bottom, trapped underneath the guard's fins. It's a simple, brilliant design that keeps you from ever reintroducing that abrasive junk to your paint. Frankly, without Grit Guards, you’re just making dirt soup, and the whole two bucket wash method falls apart.
Think of a Grit Guard as an insurance policy for your paint. It’s a small investment that provides a massive return by actively trapping the very particles responsible for creating swirl marks.
Your Wash and Drying Arsenal
Okay, let's talk about the one tool that will touch every inch of your car's paint. This is a big one. Please, throw out your old sponges. They are swirl-mark machines.
What you need is a true detailing wash mitt and the right soap to go with it.
- Plush Microfiber Wash Mitt: A sponge has a flat surface that traps grit right against the paint as you wipe. A plush mitt, on the other hand, has a deep, shaggy pile. Its long fibers are designed to pull dirt away from the paint and deep into the mitt itself, holding it securely until you rinse it out on your Grit Guard. The SwiftJet foam gun kit actually includes one, which is a great place to start.
- pH-Neutral Car Shampoo: Never, ever reach for dish soap. I can't stress this enough. Dish soap is designed to obliterate grease and oils, which means it will strip off any wax or sealant you have, leaving your paint totally exposed. A dedicated, pH-neutral car shampoo is your best friend. It provides slick lubrication that helps your mitt glide safely over the surface while still breaking down grime.
- High-Quality Drying Towel: You're almost there. The final rinse is done, and now you have to dry the car without undoing all your hard work. This is the final frontier for scratches. Ditch the old bath towels and squeegees. A large, ultra-plush microfiber drying towel (look for "waffle weave" or "twisted loop" styles) is what the pros use. They can soak up an incredible amount of water in a single pass, leaving a perfect, streak-free finish without scratching your clear coat.
When you carefully choose each component of your kit, you're not just buying supplies—you're building a system. Every tool, from the buckets to the towels, has a specific job in protecting your vehicle. That thoughtful approach is what separates a basic wash from a professional detail.
Getting Down to Business: The Perfect Two-Bucket Wash
You've got your gear ready to go. Now, let’s get our hands dirty (or rather, keep the car clean). This is where we move from just washing your car to actually detailing it. The two-bucket method isn't complicated, but doing it right is what separates a quick rinse from a finish that truly protects your paint.
Getting the setup dialed in is half the work, and honestly, it’s the most important part.
The Setup: Two Buckets, One Goal
First things first, grab your two 5-gallon buckets. If you have them, make sure the Grit Guards are sitting snugly at the bottom. I personally use different colored buckets—one for "Wash" and one for "Rinse"—to avoid any brain-fade moments. If your buckets are the same color, no sweat. A quick label with a permanent marker does the trick.
Start with the "Rinse" bucket. Fill it about three-quarters of the way with plain, clean water. This bucket’s only job is to be a cleaning station for your wash mitt. Simple.
Next, move to your "Wash" bucket. Here's a little pro tip: add the recommended amount of your pH-neutral car shampoo before you add the water. Then, hit it with a strong jet from the hose. This method whips up a mountain of thick, rich suds without you having to stir it like a mad scientist. You're aiming for a solution that’s not just soapy, but incredibly slick. That lubrication is what lets your mitt glide over the paint instead of dragging grit across it.
Here’s a great visual that breaks down the whole concept.
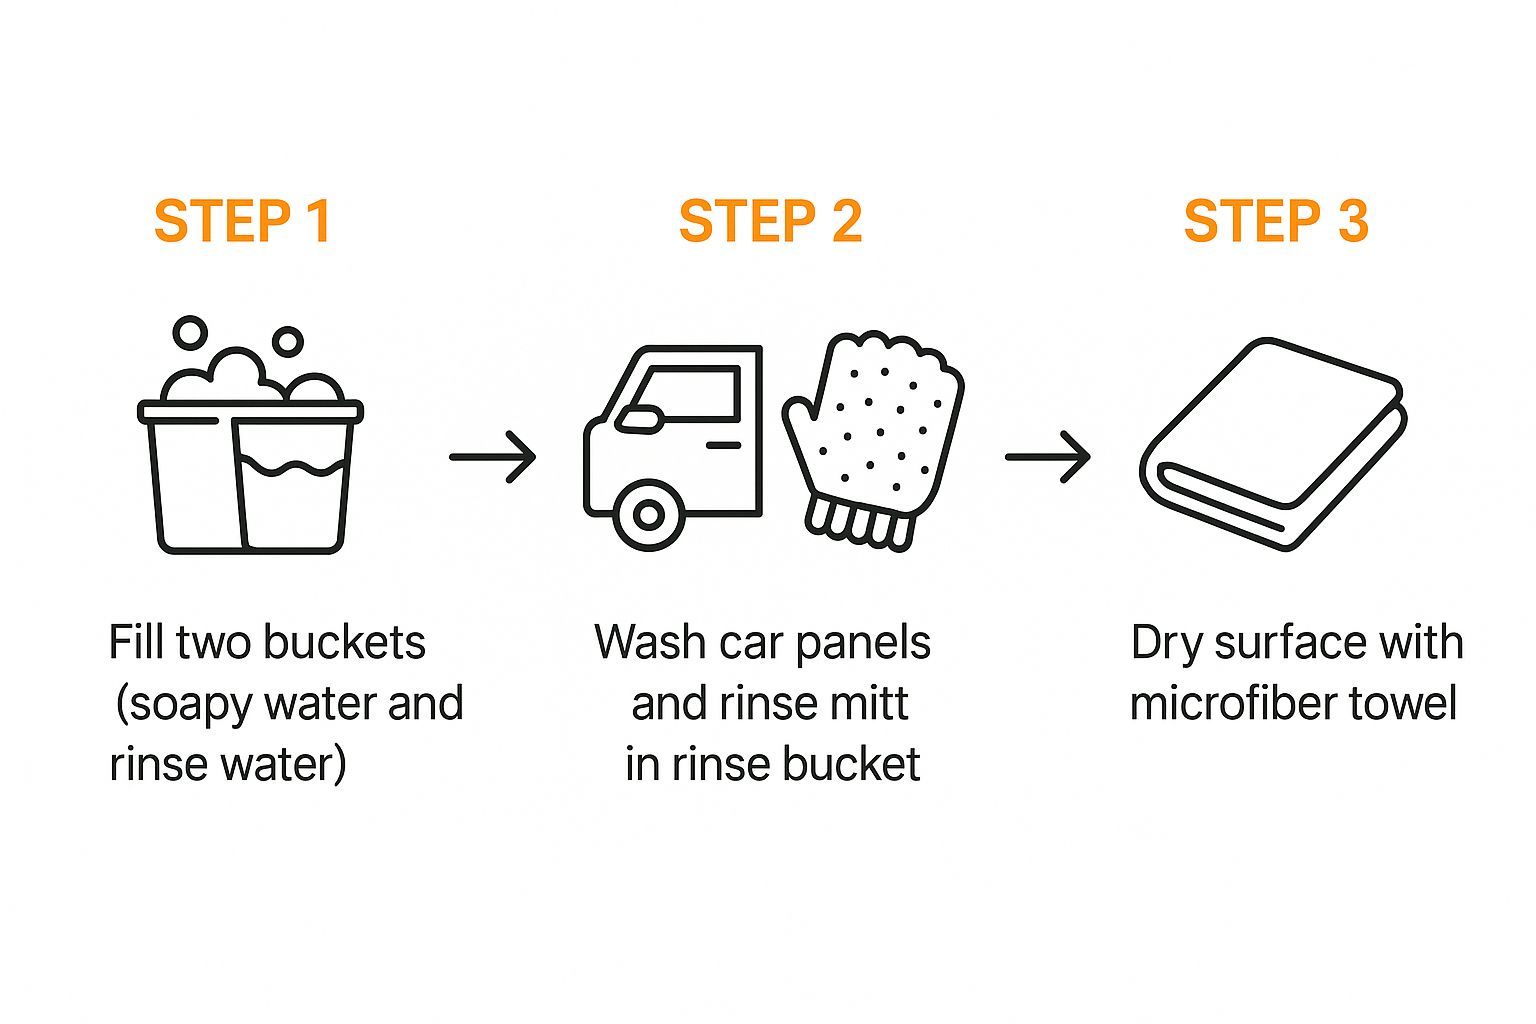
As you can see, it's all about trapping that dirt in the rinse bucket. This one simple idea is what prevents those frustrating scratches and swirls.
The Wash: Top to Bottom, Straight Lines Only
Before a single sudsy mitt touches the paint, give the entire vehicle a solid pre-rinse with your hose. The goal here is to knock off all the loose dirt, dust, and grime. This means your wash mitt has much less work to do, dramatically lowering the risk of scratching. Don't skip this step!
Now for the main event. It’s a simple rhythm: Wash, Rinse, Repeat.
- Dunk your clean microfiber mitt into the Wash bucket and get it fully loaded with soapy water.
- Start at the top of the vehicle. The roof is always my first stop since it's usually the cleanest part. Working top-to-bottom is just common sense—it keeps dirt from the lower panels from running down onto areas you’ve just cleaned.
- Focus on one panel at a time. Think half the roof, or a single door.
Here’s where technique really counts. Fight the urge to scrub in circles like they do in the movies. That’s how you get swirl marks. Instead, use gentle, straight, overlapping lines. This gives you full coverage without creating those spider-web-like scratches in the clear coat. Let the suds and the plush mitt do the work for you; there's no need to apply a ton of pressure.
After washing just one small section, it’s time to clean your mitt. This is the magic of the two-bucket method. Instead of diving back into the suds, you go directly to the Rinse bucket.
Plunge the dirty mitt in and give it a good scrub against the Grit Guard. You will literally see the dirt and grit fall out of the mitt and get trapped at the bottom of the bucket. It's surprisingly satisfying. Wring out the excess water, and now you can go back to the Wash bucket for a fresh load of suds.
The Final Rinse and Dry
Once you’ve made your way around the entire car, saving the dirtiest parts like the lower rocker panels for last, it's time for the final rinse. But don't just blast it with a high-pressure nozzle.
Take the nozzle off your garden hose and let a gentle, open stream of water flow over the car from top to bottom. This is a technique called "sheeting," and it causes the water to run off in sheets instead of forming thousands of tiny beads. It pulls most of the water right off the surface, which makes drying infinitely easier and safer.
Less water on the car means less wiping with your drying towel, and that means fewer chances to accidentally put a streak or fine scratch back into your perfectly clean paint.
Want to dive even deeper? For more pro-level tips and a detailed breakdown, check out our definitive guide to the 2 bucket car wash.
Advanced Techniques for a Showroom Finish
So, you’ve mastered the basic two bucket wash method. That alone puts you way ahead of the game and is a huge win for protecting your car's paint. But if you're ready to chase that truly flawless, head-turning shine, it’s time to level up. A few pro-level strategies can make all the difference, turning a good wash into a great one.
The single biggest upgrade you can make to your routine is adding a pre-wash stage with snow foam. It looks cool, but this isn't just for show—it's a critical safety step. When you use a foam gun like the SwiftJet to blanket your car in thick suds, you’re letting chemistry do the heavy lifting. The foam dwells on the surface, breaking down and encapsulating the worst of the grit and grime before your wash mitt ever touches the paint. This dramatically reduces how much abrasive dirt you have to physically scrub off later.
Isolate the Dirtiest Jobs
Let's be honest, some parts of your car are just filthier than others. Your wheels and tires are ground zero for brake dust, road tar, and all sorts of nasty contaminants. You wouldn’t use your dish sponge to clean the toilet, right? The same logic applies here.
This is why serious detailers almost always add a third bucket just for the wheels and tires. This bucket gets its own set of tough brushes and a dedicated wash mitt. By keeping your wheel tools completely separate from your paint-washing tools, you completely eliminate the risk of dragging highly abrasive brake dust all over your car's delicate clear coat.
This simple step is a game-changer for preventing scratches. Brake dust is full of tiny, sharp metal particles. If even a few of those get into your main wash mitt, you’re essentially wet-sanding your paint. A dedicated wheel bucket prevents that from ever happening.
The Final Touch for a Perfect Dry
You’ve done everything right so far—the foam pre-wash, the careful two-bucket contact wash, and a thorough rinse. Don't fall at the final hurdle. How you dry your car is just as important as how you wash it, and it's the key to avoiding frustrating streaks and fine scratches.
The secret isn’t just one towel, but two. The "two-towel" method is incredibly simple and effective:
- The First Pass Towel: Start with a large, ultra-absorbent microfiber drying towel. Your goal on this first pass is to get about 80% of the water off the car. Don't scrub. Just lay the towel flat on a panel, like the hood or roof, and gently drag it toward you. This towel will get damp, but it safely soaks up the bulk of the water.
- The Final Buff Towel: Now, grab a second, completely dry, plush microfiber towel. This is your finishing towel. Go back over the car and lightly buff away any remaining water spots or light streaks. This final, dry pass is what delivers that perfectly clear, streak-free finish you see in showrooms.
This two-stage approach prevents you from trying to dry the car with an already-wet towel—a classic recipe for streaks. It's the small, professional touch that truly makes your hard work shine.
Common Pitfalls and How to Avoid Them
You can have the best gear in the world, but a few simple mistakes can completely undermine all your hard work. When it comes to the two bucket wash method, knowing what not to do is just as crucial as knowing the right steps. Let's walk through some common traps that are surprisingly easy to fall into but just as easy to avoid.
One of the biggest culprits I see is washing a car in direct sunlight, especially when the paint is hot to the touch. That heat causes water and soap to evaporate almost instantly. What's left behind? Ugly water spots and soap scum that are a real pain to get off, often requiring more rubbing that risks scratching the paint. The simple fix is to always wash in the shade or wait for a cooler time of day, like early morning or later in the evening.
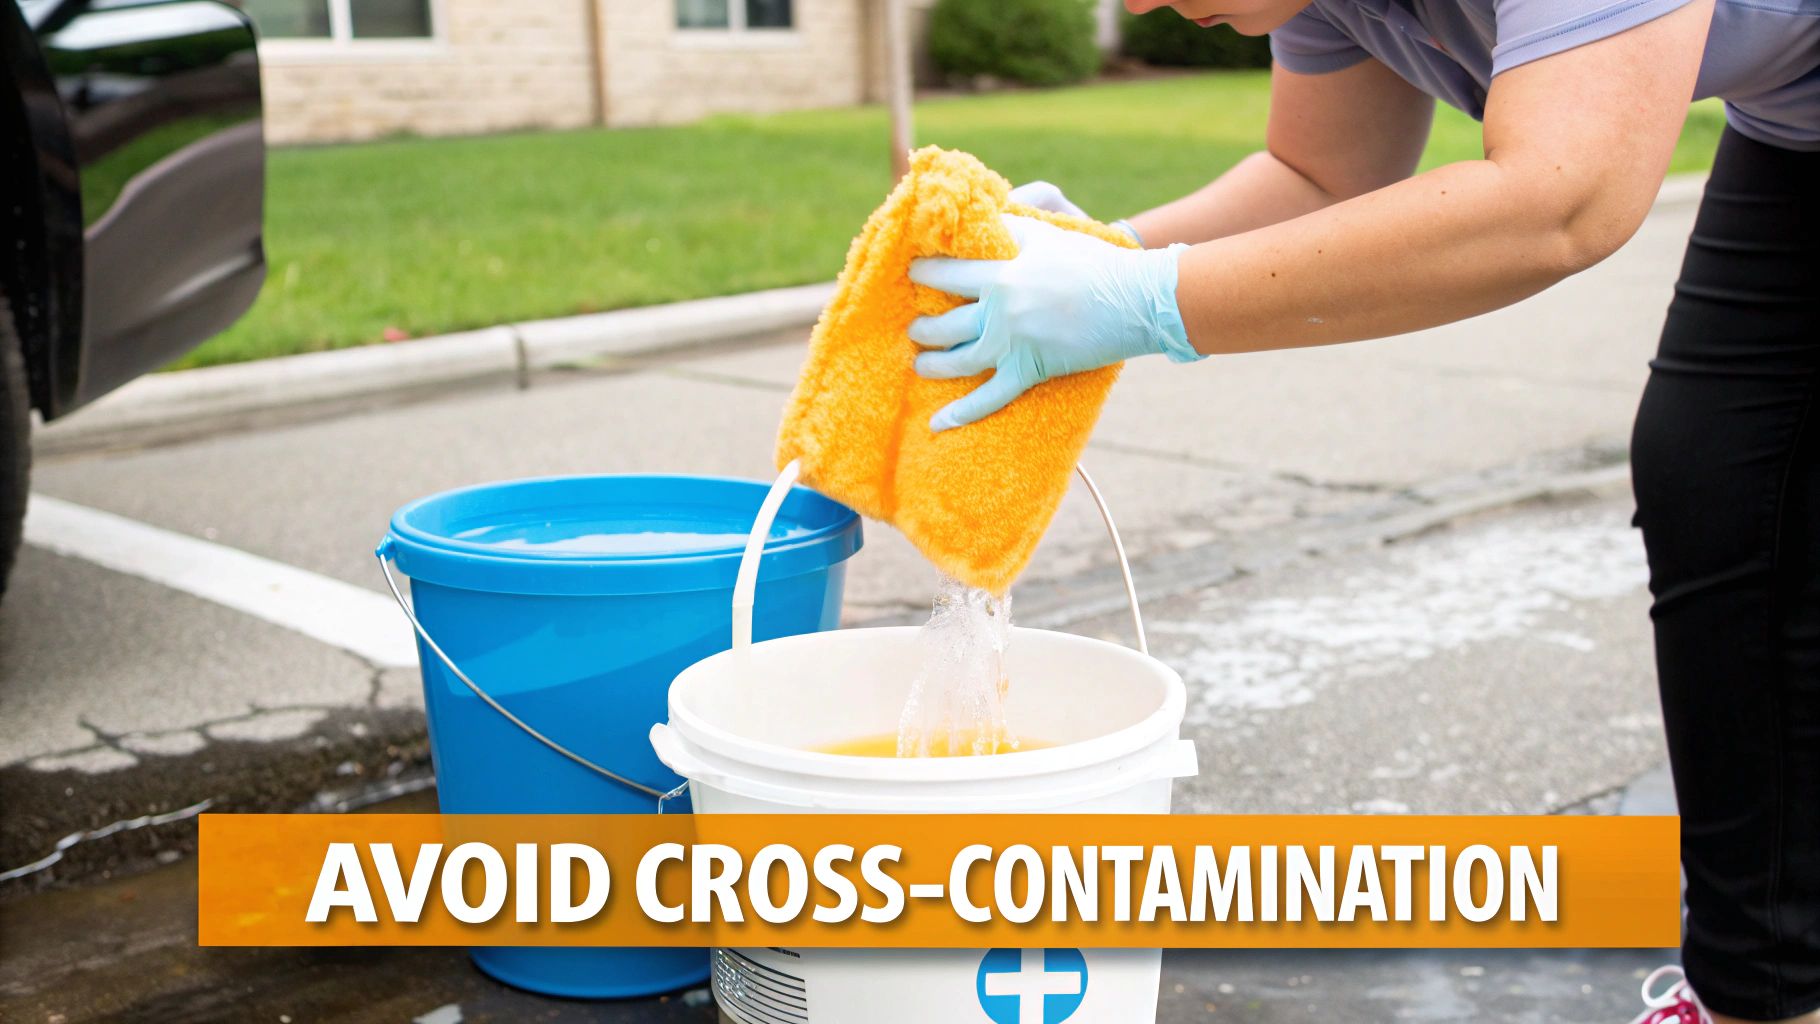
Don't Let Contamination Ruin Your Finish
Using the wrong soap is another critical mistake. It's tempting to grab the dish soap from the kitchen, but don't do it. Those detergents are formulated to strip grease and oil, which is exactly what your car's protective wax or sealant is made of. Stick with a quality, pH-neutral car shampoo specifically designed for automotive finishes.
Here’s a hard and fast rule: the "five-second rule" does not apply to your wash mitt. If you drop it on the ground, it is officially contaminated. It’s now loaded with tiny, sharp particles of grit and sand. Stop what you’re doing and either grab a clean, spare mitt or thoroughly rinse the dropped one until there’s no chance of debris left.
Think of a dropped mitt as a piece of fine-grit sandpaper. Continuing to use it will etch a web of swirl marks and fine scratches into your clear coat, undoing all the good you’ve done.
Using the Right Tools for the Right Part of the Job
Cross-contamination is a detail that separates the amateurs from the pros. Never use the same wash mitt on the entire car. Your vehicle's lower sections—the bumpers, rocker panels, and the areas behind the wheels—collect the heaviest, grittiest road grime.
To prevent dragging that nasty stuff all over your paint, adopt this simple practice:
- Mitt #1: Reserve this for the upper two-thirds of your car (the roof, hood, trunk, and upper door panels).
- Mitt #2: Use this one only for the filthy lower third and wheel wells.
This one small adjustment dramatically reduces the amount of dirt that ends up in your wash bucket and, more importantly, keeps it off your paint. It’s an easy way to level up your two bucket game. For a deeper dive into paint care, our guide on the best way to protect car paint has even more valuable strategies.
Believe it or not, this method is also quite water-conscious. A traditional hose-and-bucket wash at home can easily use over 100 gallons of water. The two-bucket method is far more controlled and uses significantly less. It's a more thoughtful approach, especially when you consider that even modern professional car washes still use around 30 to 40 gallons per vehicle, despite their recycling efforts.
Have Questions? We Have Answers.
Even with the best guide, a few questions always pop up. It's totally normal. Let's tackle some of the most common ones we hear about the two-bucket wash method so you can get started with total confidence.
Are Grit Guards Really Necessary?
Yes, a thousand times yes. Don't think of them as an optional add-on; they are fundamental to the whole process. A Grit Guard acts like a filter, creating a protective barrier at the bottom of your buckets.
Every time you dunk your wash mitt into the rinse water, the grate scrapes off the dirt and grime. That debris then settles harmlessly underneath the guard, preventing you from ever picking it back up. This single, simple step is your best defense against creating those frustrating swirl marks in your paint.
Can I Use This Method on My Ceramic Coated Car?
Absolutely. In fact, the two-bucket method isn't just safe for ceramic coatings—it's what most professional detailers recommend to maintain them. Coatings are tough, but they aren't bulletproof.
Using this gentle wash technique, especially with a quality pH-neutral car shampoo, is the key to avoiding micro-scratches that can dull your coating's shine and weaken its water-beading magic. It's all about preserving the gloss and protection you invested in.
A proper wash routine is the best insurance for your ceramic coating investment. The two-bucket method cleans the surface effectively without ever harming the protective layer underneath.
If you're looking for more ways to keep your ride looking its best, check out our other car cleaning tips for some pro-level advice.
How Often Should I Dump and Refill the Water?
For an average-sized car with typical road grime, one set of buckets should get you through the entire wash without any issues. The real key is to keep an eye on your rinse bucket.
Here’s a good rule of thumb: if the water gets so cloudy that you can't see the Grit Guard at the bottom anymore, it's time for a refresh. Dump it out and refill it with clean water. This ensures you're always working with the cleanest possible water and keeping your paint safe.
Ready to make your wash routine safer and more effective? The SwiftJet Foam Gun is the perfect companion to your two-bucket setup, providing a thick pre-wash foam that lifts dirt before you even touch the paint.